Call Us Toll Free - US & Canada : +1-(888) 602-0119

How to Setup PayPal Powered by Braintree in WooCommerce?

PayPal powered by Braintree is an easier option for accepting payments. This payment gateway plugin is no different to credit card terminals where the customers are required to swipe their card to pay for their in-store shopping. It ensures that the payment info of the customer is safely and securely stored.

Integrating your website with a merchant account on PayPal powered by Braintree offers a number of benefits. The shopping cart and e-commerce partners allow users to create a provisional or trial account even with less information. After creating a merchant account users can access the payment gateway through the Control Panel of PayPal powered by Braintree. Once your application process is completed you may start receiving all the payments to the registered bank account.

It is easy to accept PayPal and credit cards alongside each other. When submitting your account application it is recommended to link your account with your current PayPal account. Alternatively, you may build a new account. In either of the ways users can easily manage their PayPal account settings/disputes.

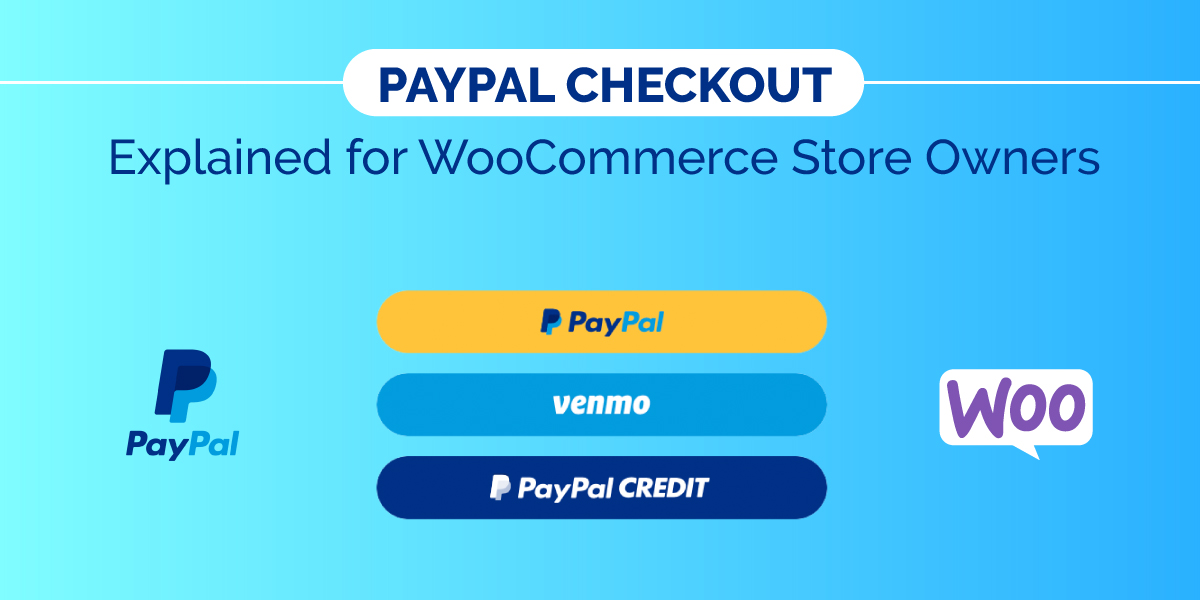
WooCommerce PayPal Checkout Payment Gateway plugin is used for the purpose. It can be downloaded using this link.

A) Installing PayPal Checkout Plugin

  • Sign in to your WordPress account
  • Find ‘Plugin’ and then click on ‘Add new’

B) Setting Up And Configuring

  • Go to Woo Commerce > Settings > Payments > PayPal Checkout
  1. Now, enable Braintree(PayPal) plugin
  2. Click ‘Manage’
Enable Braintree PayPal

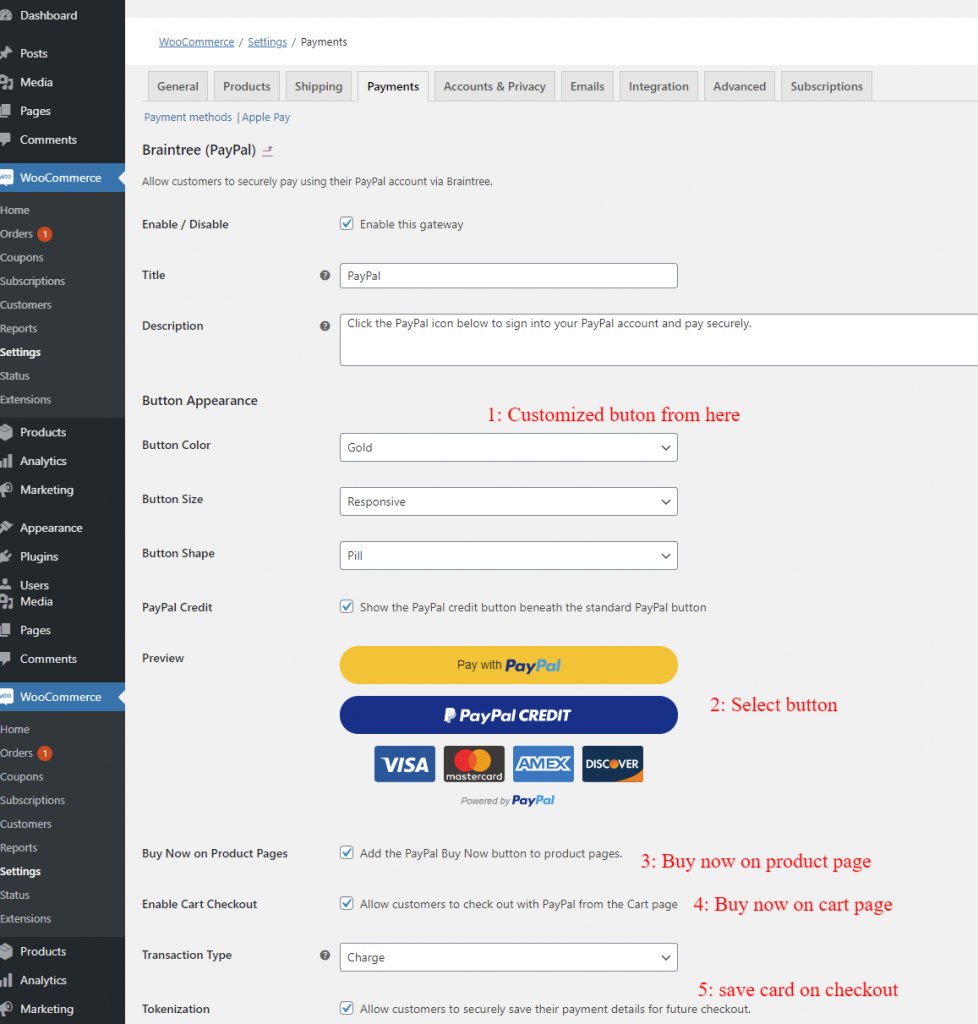
Setting of Gateway Configuration

To set Gateway Configuration check the steps listed below –

  1. Check Braintree (PayPal) Gateway by ticking on ‘Enable this Gateway’ box
  2. From Environment’s sandbox choose ‘Production’ from the dropdown menu
  3. Fill Merchant ID, Public Key, and Private Key.
  4. Select ‘Save Change’
Braintree PayPal Gateway
  1. Customize Button Shape, Button Shape, and Button Size
  2. Choose Pay with PayPal or PayPal CREDIT button
  3. Tick on Buy Now On Product Pages
  4. Check Enable Cart Checkout box
  5. Check Tokenization to enable save card on checkout option
  6. Select ‘Save Changes’
Customizing Payment Button

Check the Final Braintree PayPal Pages

Product Page of Your Website

Final Braintree PayPal Pages

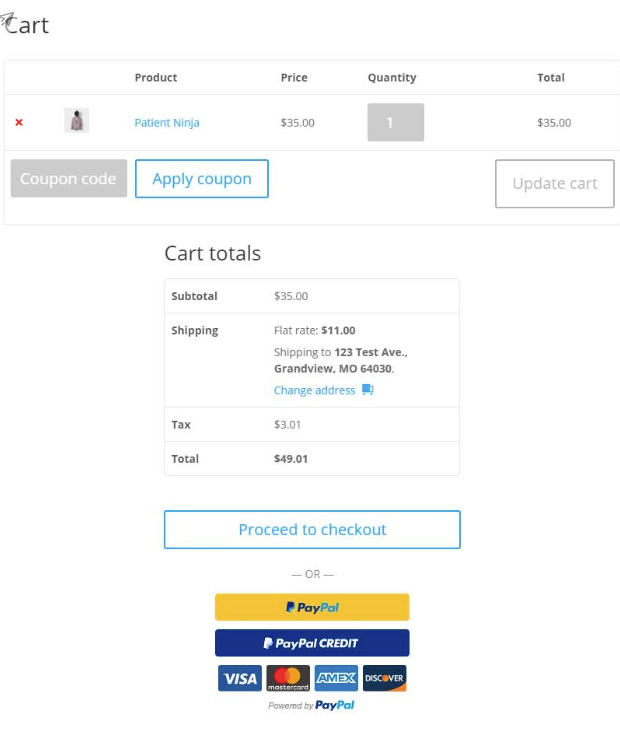
Checkout Page and Cart Page of Your Website

Cart Page of Your Website

h2 class=”elementor-heading-title elementor-size-default”>How to Find API and Merchant ID on PayPal Powered by Braintree?

Follow the steps to connect the plugin to your Braintree account –

  • Sign in to your account
  • Find the profile icon (towards the upper right corner)
  • Select ‘My User’
My User
  • Click on ‘View Authorizations’
View Authorizations
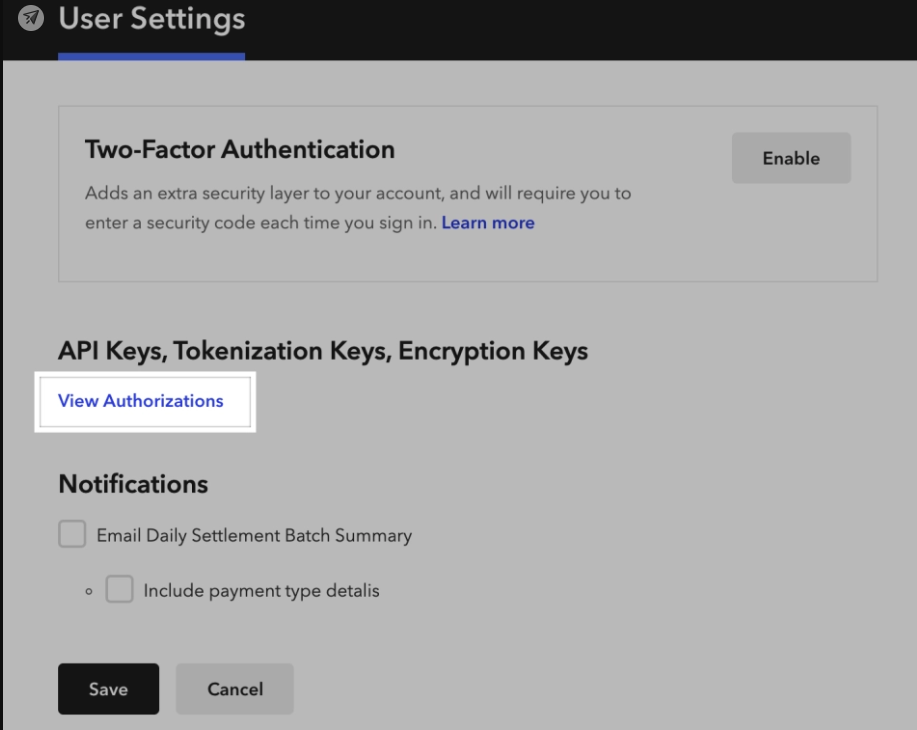
  • Select ‘View’ for viewing the API keys. Alternatively, you have the option of generating a new set of API Keys.
viewing the API keys
  • If you click on ‘View’ you’ll get access to Public Key, Private Key, and Merchant ID.
Public Key

Braintree PayPal Gateway Settings

Enable PayPal in your account to access Braintree PayPal gateway. Go to Settings > Processing to enable customers to pay with PayPal option.

Braintree PayPal Gateway Settings

How to use a Control Panel for voiding a payment on PayPal powered by a Braintree account?

Follow the steps listed below voiding a payment –

  • Sign in to your Braintree account and go to Control Panel
  • Select ‘Transactions’ ( towards the upper left corner)
  • Check or uncheck the options to customize date range, amount, etc.
  • Next, select ‘Search’
  • Look for the latest transactions
  • Select payment Transaction ID ( that you want to void)
  • Click Select ‘Void’ ( located towards the upper left corner of the screen)

How to activate fraud filters on your Braintree account Control Panel?

The steps listed below will help you in enabling fraud filters –

  • Sign in to your PayPal powered by Braintree account
  • Select the gear icon (upper right corner).
  • Click on ‘Processing’
  • Select the Options located next to CVV and AVS for customizing credit card fraud filters.

Conclusion

PayPal powered by a Braintree account not only makes it easier for merchants to accept payments but also offers multiple other benefits such as voiding payment.

With its use merchants have the ability of voiding a debit or credit card payments while the settlement is in pending. Moreover, when a user receives full approval for their Braintree account they can access fraud filters designed for combating fraudulent activities and ensuring fraud management. The filters allow users to take complete control of their online business and meet customer demands efficiently.

If you want professional assistance in PayPal powered by Braintree configuration for WooCommerce or need WooCommerce support services, contact WPCustomify.

PayPal Checkout Explained for WooCommerce Store Owners

PayPal Checkout for WooCommerce allows online store owners to accept instant online payments through PayPal. The checkout is featured with personalized advanced Payment Buttons. This latest and PayPal extension is indeed one of its best payment methods.

When you use PayPal checkout for your store, the feel and look of the checkout page can be customized according to your unique requirements. Plus, you’ll get the complete protection from fraud and theft. The WooCommerce extension also benefits the users with real-time updates automatically. So, it is always a better idea to adopt it. Most of your customers must have PayPal too, right?

In this article, we will introduce you to PayPal properly and tell you how to enable PayPal checkout for your store. Meanwhile, you can also take expert advice and services from WPCustomify regarding this integration and other WooCommerce issues/tasks.

Features of PayPal

Advanced servers for high-end security

PayPal uses secure servers for processing the payments. It means you need not to be concerned about safety and security of sensitive info of your customers shared on checkout. PayPal Checkout allows individuals to  focus more on making their business successful.

Easy to set-up

PayPal onboarding offers the added advantage of free extension facilitating the users with easy ways of setting up and using the PayPal account for the business. Just select “Setup your PayPal account” and you will not have to deal with the hassle of copy/pasting the PayPal credentials.

Seamless and Secure Checkout

PayPal comes with In-Context Express Checkout  feature benefitting the buyers with speedy, seamless, and secure checkout while staying on the website. The business website provides streamline experience to the customers.

WooCommerce One Touch check out

WooCommerce PayPal Checkout comes with One Touch feature designed for seamless experience of the customers. They need not to enter card details or password for at least six months. It enhances their overall checkout experience on the site.

Direct capturing of charges in WooCommerce

The extension facilities users to maintain record of the previous transactions from the website’s Edit Order page. You’ll be saved from the extra efforts that otherwise go singing in to the PayPal account.

Personalized checkout page

With this extension in use you may ensure that the payment experience matches your brand’s unique style. The extension offers the flexibility of changing the size, layout, and color for a customized experience during the checkout process.

How to set up a PayPal checkout?

Requirements

  1. A PayPal account (in the name of your business). If you don’t have an account you may register one at PayPal.com.
  2. PayPal Reference Transactions for Subscriptions. You may opt for Reference Transactions for using/selling Subscriptions at WooCommerce.

Which Plugin used for setting up PayPal Checkout?

First of all you need to download PayPal Checkout Payment Gateway for WooCommerce using this link.

Setting up and configuring WooCommerce PayPal Checkout

Here are the steps –

PayPal Checkout Plugin Installation

    • Sign in to WooCommerce account
      • Find ‘Plugin’ and then click on ‘Add new’
        1. Activate the plugin once it’s installed in your system.
        2. Now you need to Setup and configure
        3. Find WooCommerce, then click on Settings, then Payments and then on PayPal Checkout
        4. After Enabling the plugin and select ‘Manage’

PayPal Checkout Integration with WooCommerce

      1. Tick the ‘Enable PayPal Checkout’ box
      2. Select ‘Live’ from Environment sandbox’s dropdown menu
      3. Enter Live API Username, Live API Password, and Live API Signature
        • Select ‘Save Changes’


      • PayPal Checkout is successfully integrated with WooCommerce
      • Check your final Checkout page once a product is added to the cart.

How to find the API of PayPal?

        • Sign in to your PayPal account using this link.
        • Click on Setting > Account access > API Access (select Update)

        • Select ‘Mange API credential’

      • Select show Signature, API Username, and API Password to access the API keys.

How to Customize Button on Checkout, Cart or Product Page?

Customization of Checkout Button

        • Click WooCommerce > Settings > Payments > PayPal Checkout
        • Select the ‘Button Settings’ to personalize Button Color, Button Shape, Button Label, Button Layout, and Button Size.

      • Click ‘Save Changes’

Customizing Direct Checkout

        • Tick ‘Enable Paypal Checkout On The Cart Page’ box
        • Tick ‘ Configure Settings Specific to Mini-Cart’ box
        • Customize the Button label, size, and layout

      • Select ‘Save Changes’

Check Cart Page of your site

Personalization of Direct Checkout Page

        • Tick on the ‘Checkout On Single Product’
        • Select ‘Configure Settings Specific To Single Product View’
        • Customize Button Label, Button Layout, and Button Size

      • Select ‘Save Change’
      • Check the single product page look of your website

How to Use Direct Checkout?

Direct Checkout on the Site’s Cart Page

Direct Checkout on the Site’s Single Product Page

How to set up a PayPal reference transaction for recurring payment?

Users are required to email their queries to PayPal support for enabling reference transaction

For sending Email Application

      • Sign in to PayPal account
      • Find Email Contact Form
      • Select Business solutions as your topic
      • Select PayPal payment solutions as your sub-topic
      • Select PayPal Express
      • Checkout as your sub-topic

Write your message in the given space. Don’t forget to add your PayPal account name and email address. Send the message.

Wait for the response.

Customize reference transaction setting

        • Select WooCommerce > Settings > Payments > PayPal
        • Customize the credentials
        • Click on the ‘Enable PayPal Reference Transaction’ link as in the image below.

      • Enable Reference transaction

Once you are done with all the above-listed steps recurring payment will be enabled for your PayPal account.

PayPal Checkout Support Subscription

Recurring payments are supported when WooCommerce Subscriptions are integrated with PayPal Checkout supports. Users can use Express Checkout when applying for Reference Transactions to enable this PayPal plugin with Checkout Subscription support.

PayPal Credit Checkout

This option is available primarily for U.S. users. It is one of the Checkout stack parts of PayPal. It allows the users to offer payment flexibility to their customers when shopping on the site. Merchants get full payment of the merchandise instantly but customers are allowed to pay for it over time.

Troubleshooting

Go to Advanced plugin settings to ‘Enable logging’ for Debug Log

You can find Logs by clicking on WooCommerce and then on System Status and lastly on Logs.

Conclusion

Paypal Checkout extension allows merchants to accept Credit Card, Debit Card, and PayPal. Plus, it supports payment subscription as well. The best part is that it can be set up without any hassle. Customers are benefited with Checkout directly from cart page and product page without getting redirected to third party website.