Call Us Toll Free - US & Canada : +1-(888) 602-0119

What is Pin Payments Gateway & How to set up in WooCommerce?

The Pin Payments Gateway plugin allows the users to reap the benefit of credit card processors through Pin Payments even if they don’t have a bank account (registered in the name of their business).

Using this safe and protected payment gateway form empowers the merchants to process the amount in multiple currencies (Pin.js supported). Plus, card re-use and subscriptions will be also supported by this extension. Once the customer pays for the online purchase, Pin Payments records the details for future use. Pin Payment Gateway can be purchased using this link.

Also, you can take WooCommerce Payment Gateway integration services from WPCustomify regarding Pin or other similar gateway.

WooCommerce Pin Payments offers the following benefits –

  • With Pin Payments merchants can enable reuse of card features. This means if customers pay the amount online their card details are recorded in Pin Payments (as Customer Token) for future transactions.
  • If the customer returns to your website and makes a purchase then they can use Customer Token at Checkout. This means they aren’t required to fill in all the details again.
  • Pin Payments offers the added advantage of Multi-Currency.
  • Merchants need to have a business account necessarily for receiving their sale proceeds as the extension works according to the bank account of the users.
  • Your customers need not leave the site for when paying with the cards.
  • Sale proceeds are credited to the merchant’s bank account automatically.
  • Pin Payment Gateway works with Xero.

Difference between Payment Gateways and Pin Payments Gateway

Online payment gateway is a technology that allows consumers to make their payments online using any payment card. It is easier for both customers and small businesses to make and receive the amount. However, in case of payment gateway businesses need to manage multiple accounts with different service providers.

On the other hand, Pin Payments Gateway serves as a single account combining both online business owner’s account and payment gateway. It can be easily set up and maintained as it’s an ideal solution for accepting customer’s payment online.

What are the Requirements for Pin Payment Gateway Enabling for WooCommerce?

  • Pin Payments account
  • Pin Payments supported online store
  • A valid SSL certificate

Steps to Pin Payments Gateway Installation

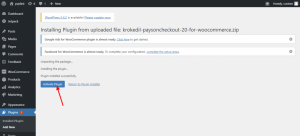
  1. Get started with downloading the WooCommerce account’s .zip file.
  2. Now go to WordPress Dashboard > Plugins > Add New > Choose File. You can now Upload Plugin using the downloaded file.
  3. Next, proceed to extension installation and activation.
  4. Update settings in Pin Payment Gateway for WooCommerce.

Setting up and Configuring Pin Payments Gateway

  • Sign in to Pin Payments admin board and select ‘Account’.
  • Find the API Keys of your account (both Secret and Publishable). These keys will be used for calls (server based) and Pin.js.

Note – After completing the process of account activation users get live and test API keys. In case you don’t have the necessary details repeat the process using activated API keys.

  • Now sign in to your WordPress account.
    Select WooCommerce > Settings (located towards the left side of the page) > Payment Gateways.
  • Select “Pin Payments” from the option list.
  • Account holders may find “Pin Payments” link towards the page’s top corner. Select the link for plugin configuration. Plus, you’ll find the following option list which can be customized according to your requirements –
    1. Select “Enable this payment method” for activating this feature on your WooCommerce.
    2. “Title” sandbox – where you can fill in the payment option title that you want to be seen by your website users on the checkout page. Merchants may choose “Credit card”, “Pin Payments” or anything similar.
    3. “Enable Test mode” checkbox – On activating this feature you may test multiple transactions through the pin payment gateway.
    4. Sandbox for entering “Secret API Key” and “Publishable API Key”.
  • Select “Save changes” to complete the process.

Conclusion

WordPress account features two different keys – “Secret API Key” and “Publishable API Key”. The former is used for API settings. It is important to keep Secret API key details confidential as it allows users to set refunds and charges. On the other hand, a publishable key is used for creating cards. This key is used for creating payment forms.

Pin Payment Gateway is indeed one of the best options receiving payments. Advanced features like seamless integration, fast reconciliation, detailed reporting, etc. makes it one of a kind option for processing the payments.

How to set up a Payson Payment Gateway in WooCommerce?

Payson is a popular plugin that enhances the features of a merchant’s WooCommerce site, allowing them to make payments using this payment gateway. The platform not only integrates with MasterCard and Visa, but also with Swedish banks including Handelsbanken, Swedbank, Nordea and SEB.

Read this article ahead in case you want to set up this gateway for your online store. If you want to get support services for Payson configuration in your WooCommerce shop, take our services.

Which plugin is used for Payson Payment Gateway?

You may download the plugin using this link.

Steps to Payson Gateway Plug-In Installation

Step 1 – Sign in to your WooCommerce Payson account. Select Plug-in > Add New

Step 2 – Select “Upload Plugin” button.

Step 3 – Click on “Choose File” and then on “Browse” to upload the file.

Step 4 – After selecting the file, click on “OK” > “Install Now”.

Step 5 – Click on “Activate plug-in”.

Steps to Payson Gateway Plug-In Configuration

Step 1 – Select WooCommerce > Settings

Step 2 – Click on the “Payments” button and then enable “Payson” from the given list. Next, select “Manage” for plug-in configuration.

Step 3 – Configure the different options listed on the page including “Title”, “Description” “Payson email address”, “Agent ID”, “API Key”, Order Management, “Debug Log” among others.

Step 4 – Click on “Save Changes”

How to Take Payments in Payson?

The plug-in features two payment options –

Payson Direct

Payson Direct Payments allows merchants to take payments through direct transfer online (via an associated bank) and credit card. It also integrates with Payson Guarantee. Purchasers have the option of inspecting/approving/denying the product before making the final payment.

Payson Invoice

In this method the buyers receive the item and then give the payment through invoice.

Installation Process

  • Purchase the plug- in from WooCommerce.com and then download the zip file.
  • Sign in to the WordPress dashboard.
  • Select Plug-ins > Add New > Upload > Browse for selecting the downloaded zip file.
  • Click on OK > Install Now > Activate plug-in

Payson Direct Configuration

  • For Payson Direct plug-in configuration select WooCommerce > Settings > Payment Gateways. Select “Payson Direct” option from the given list.
  • Alternatively, you’ll find the “Payson Direct” link on top of the Settings page. Select this link for configuring Payson Direct plug-in.
  • Configure the options according to your needs –
  1. Select “Enable this payment method” for activating this Payson Direct feature on your WooCommerce.
  2. “Title” option – where you can fill title in the payment option which you want to be seen by your website users on the checkout page.
  3. “Description” option – controls the message that appears under the payment fields on the checkout page.
  4. “Payson email address” – Add the email ID used for Payson account registration.
  5. “Agent ID”– Sourced from your account. For this you need to sign in to your Payson account and then select My account > Integration (for retrieving the info).
  6. “MD5” – Sourced from your account. For this you need to sign in to your Payson account and then select My account > Integration (for retrieving the info).
  7. “Payson Guarantee”
  8. “Language” – Select the language for your Payson Direct account page. The page will be displayed before the customers in the same language.
  9. “Debug” – Check or uncheck this option. Selecting this option means the customer info and card details will be stored in a Payson account.
  10. Finally, click on “Save changes”.

Payson Invoice Configuration – How does Payson Invoice works?

    • Go to Woo Commerce > Settings > Payment Gateways option.
    • Find the “Payson Invoice” option – it is on the top corner of the settings page. It would be in the form of a link as well. Select this option for plug-in configuration.
    • Customize the options featured on the page including the ones listed below –
        1. Tick the checkbox to enable Payson Invoice option on your WooCommerce.
        2. “Title” option – where you can fill in the payment option title that you want to be seen by your website users on the checkout page.
        3. “Description” option – controls the message that appears under the payment fields on the checkout page.
        4. “Payson email address” – Add the email ID used for Payson account registration.
        5. “Agent ID”– As retrieved from your account. For this you need to sign in to your Payson account and then select My account > Integration (for retrieving the info).
        6. “MD5” – As retrieved from your account. For this you need to sign in to your Payson account and then select My account > Integration (for retrieving the info).
        7. “Language” – Select the language for your Payson Direct account page. The page will be displayed before the customers in the same language.
        8. “Invoice fee” – Add Invoice fee for the product in the given sandbox.
        9. “Debug” – Check or uncheck this option. Selecting this option means the customer info and card details will be stored in your account.
        10. Select “Save changes”.

      Conclusion

      Payson Payment Gateway is one of the best options for receiving the payments given by the buyers for their purchases on the site. It comes with high-end features such as receiving payment via cards, invoice, and online transfer.

How to Set Up PayFast Payment Gateway in WooCommerce?

Pay Fast Payment Gateway is designed specifically for South African online sellers including charities, individuals, and businesses (both small and big market players) to receive the payments through secure sources. It comes with multiple payment options such as debit card, mobicred, credit card, MasterPass, Instant EFT, and SCode. With this, merchants don’t need any bank account, but a PayFast account to process the payment.

The extension benefits both online customers and merchants. Plus, it comes with matchless security features eliminating the possibilities of fraud. Pay Fast can be integrated with more than 70 platforms. PayFast accepts payments from all verified cards such as MasterCard or Visa card. Plus, buyers can also use Maestro and Visa Electron debit cards to make the payment on the platform.

PayFast Payment Gateway Features

  • It allows the users to schedule time and date of product availability.
  • With this extension orders can be charged automatically when it’s available
  • It offers the flexibility of changing product release date
  • Automates the email process (for pre-ordered items)
  • Pre-order cancellation when the item isn’t available

Which plugin is used for the PayFast Payment Gateway?

You may download the plugin using this link. With Pay Fast the customers get the flexibility of scheduling their payments – weekly, annually, or monthly as per their convenience. You can hire WPCustomify experts to configure this gateway in a matter of minutes or read ahead to do it on your own.

Steps to Registering a Payfast account

Step 1 – Sign up on Pay Fast
Step 2 – Register for a PayFast account

Step 3 – Next, proceed with account verification
Step 4 – Click on Pay Fast > Settings > Integration
Step 5 – You’ll get access to Merchant Key and Merchant ID (keep a copy of it as it will be used when setting up your site.

How to Find Merchant ID and Merchant Key?

Merchant Key and Merchant ID are needed to link Pay Fast and online shopping sites during the integration process. To find the Merchant Key and ID go to the PayFast dashboard. You’ll find the details towards the top-left corner of the page.


Alternatively, you can go to Settings > Integration to get a copy of your Merchant Key and ID.


Merchant ID & Merchant Key:-

It is important to configure Merchant ID and Key before using the payment gateway with your online store.

You can find the details with the process mentioned above. After filling in the details select “Activate” button.

How to Setup and configure PayFast?

Follow the steps listed below for PayFast setup

  • Sign in to your PayFast account using your credentials

  • Click on WooCommerce > Settings > Payments > Pay Fast
  • Enable “PayFast” method and click on “Setup” option.

  • You will be redirected to the settings page where you can customize the available options.

PayFast Payment Gateway

  1. Check the “Enable PayFast” option.
  2. Fill in the “Title” sandbox. Your customers will see this title on the checkout page.
  3. Now fill in the “Description” sandbox as needed
  4. Check “PayFast Sandbox”
  5. Next, add Merchant ID and Merchant Key. (Source the details using the process mentioned above).
  6. Add Passphrase
  7. Tick Send Debug Emails checkbox.
  8. Add an email address where Debug notifications are to be sent
  9. Check/Uncheck “Enable transaction logging for gateway” box
  10. Finally, click on “Save changes”.

How to test the integration?

Pay Fast offers a sandbox (test) option to the users in order to ensure proper functioning of the integration. Sandbox mode can be activated by ticking on “Enable in sandbox (test) mode” checkbox. You can find the option in the PayFast activation window.

test the integration

How does pre-order work in PayFast Payment gateway?

Setting up pre-orders for your online store

On setting up product pre-orders for online stores your customers will be able to place orders for various products and services far before their availability. The info can be released either manually or automatically. You may take the orders when ready. The extension takes care of the process thereafter.

Pre-order settings can be easily customized. PayFast offers both ‘upon release’ and ‘up front’ charging options.

PayFast Payment Gateway

Customization of Pre-order product settings

Merchants can customize the display look of their pre-order products with the help of in-built tools including product messages, button text, Cart/Checkout Display text, and Staging/text. Set the timer so that customers can keep track of the countdown.

To reach the settings page select Woo commerce > Setting > Pre-orders

Customize the settings accordingly.

PayFast Payment Gateway

Note- You’ll need to set an initial fee amount for the Pre-Orders. There are two methods for charging pre-orders fee –

  • Upon Release – In this case merchants charge a nominal Pre-Order Fee.

PayFast Payment Gateway

  • Upfront – Customers pay full charges of the product when placing the order. In this case charging a Pre-Order Fee isn’t mandatory.

PayFast Payment Gateway

Conclusion

PayFast makes it easier for South African e-commerce businesses to accept online payments from both international and local purchasers. Also, it offers the benefit of invoice and e-ticket sales management.

How to Set Up eWAY Payment Gateway in WooCommerce?

The WooCommerce eWAY extension is an ideal option for the merchants to accept card payments from their store without. It eliminates the need to redirect the customers to the partner sites for making the payment. The payment gateway easily integrates with Refunds API and Subscriptions for WooCommerce. Additionally, merchants can also receive token payments through this extension.

The WooCommerce eWAY payment gateway uses version 3.1 API of eWAY which is not only PCI compliant but also offers the benefit of 3D security. It processes the payments much faster and allows purchasers to save their card details for future reference.

Buyers with billing addresses in Singapore, Australia, Macau, and Hong Kong can reap the benefits of eWAY. So, your WooCommerce store must have it configured. Want WooCommerce support services to set up? Use this link. Otherwise, learn How to set up an eWAY payment gateway in WooCommerce by reading ahead.

Requirements

  1. A WooCommerce version 3.5.0 website
  2. A verified SSL certificate
  3. eWAY account
  4. The currency in the account should be MYR, AUD, SGD, NZD, or HKD (corresponding to the nation an individual signs up for) so that you can easily receive the payment.

How eWAY Payment Gateway is a better option?

  • Quick setup – eWAY can be set up in a single day (for the merchant accounts that are approved).
  • Matchless data security – With this payment gateway in use the data of customers’ is completely safe as eWAY is PCI-DSS compliant.
  • Customer support – The customer representatives of the platform are available 24/7 to handle relevant issues.
  • No chance of fraudulent activities – eWAY has high-end fraud protection capabilities. You need not to worry about any kind of theft.

eWAY Payment Gateway Features

  • It is capable of hosting flash sales instantaneously.
  • Helps in generating discount coupons so that customers can get the best deals.
  • Allows customers to publish product reviews on site.
  • Allows Cross-Selling and Up-Selling of the products.

Which plugin is used for the eWAY Payment Gateway?

You may download using this link – https://woocommerce.com/products/eway/ .

Setting up and Configuration of eWAY Gateway

eWAY Plugin Installation

  • Sign in to your WordPress account.

  • Select WordPress Admin > Plugins > Add New and then click on “Upload Plugin” and then “Choose File” buttons. Use the downloaded file for uploading on the site.
  • Now click on “Install Now” and “Activate”.

Setting up and configuration process

  • Select WooCommerce > Settings > Payments > eWay
  • Disable/Enable the eWAY plugin
  • Select “Manage”

Setting up eWAY on the website

  • Click on WooCommerce > Settings > Payments
  • Select eWAY.
  • Click on “Set Up/Manage” and you’ll be redirected to the settings page.

Configure the settings

  • Check/Uncheck to Enable/Disable use of eWAY.
  • Add “Title” in the given sandbox. Keep in mind this title will be displayed before your customers on the checkout page.
  • Next add “Description” – here you can add detailed information for your purchasers.
  • Now enter the “eWay Customer Password” and “eWay Customer API Key” in the given space.
  • Deselect or Select the different “Allowed Card Types” – JCB, Visa, Discover, Mastercard, Diners, AmEx, Laser, Maestro, and UnionPay.
  • Check the “Enable Saved Cards” box.
  • Check “Enable eWay Sandbox” to test the settings before making your site available for public.
  • If you want to enable troubleshooting then turn on the “Debug Mode”.
  • Click on “Save changes”.

After entering the credentials the checkout gateway page will feature the credit card form where the customers can add their details for making the payment.

How many Payment methods are there in eWAY?

eWAY facilitates both customers and merchants with Direct Debit through Credit Card and Bank Account. Plus, Direct Deposit is another payment method featured on eWAY that allows customers to pay directly through their bank account.

Where can the users check eWay transaction history?

eWAY Transaction history allows the individuals to filter transaction dates ranging from a year. Run the report for every particular year if you need transaction data for multiple years. Use export option for obtaining the data in a spreadsheet. Read on to know how you can access the report –

  • Sign in to your MYeWAY account
  • Go to Reporting > Transaction Report

Now you can view all the transactions that have been processed on the platform. You can enhance the scope of your search using “Search Transactions”. Personalize the Duration, Start Date, End Date, Currency, and Transaction ID to filter your search. After entering all the details click on the “Search” button.

Once you are done with the above step you’ll find a detailed list of payments. You may now review and compare the details. Note that the reports can be exported in the file type of your choice. Use the “Export/Print Report” option for the same.

Conclusion

WooCommerce eWAY extension offers countless benefits to both customers as well as merchants. From easy checkout to secure data storing the extension can meet all your unique requirements efficiently. The best part is that it’s accessible through any device. It’s one of the top online payments solution providers indeed. Now you can accept payments anytime, anywhere.

Complete introduction to WooCommerce PayTrace Payment Gateway

Planning to integrate a payment gateway within your online store but not sure if you should go with a free version or a paid. Wondering which plugin to choose for either of the cases?

Don’t worry, as this article is prepared by WooCommerce support experts to introduce a premium payment gateway plugin. Throughout the article, we will talk about the plugin, features offered followed by the step-by-step guide to integrate the plugin within your WooCommerce store.

Without further ado, let’s get started.

What plugin is used?

When setting up a WooCommerce store, you are bound to have a payment portal. However, you cannot pick any gateway as this might threaten the privacy and security of Customer information. Don’t have any plugin in mind? Well you don’t have to scour the web to find the best payment gateway plugin.

PayTrace is one of the paid payment gateway plugins offering all that you need to set up a hassle-free payment system within your store.

As an online payment processing company, PayTrace is one that offers a robust, and secured infrastructure facilitating seamless payment processes. No matter which type of card your customers prefer, PayTrace is compatible with all including Visa, American Express, MasterCard, Discover, and JCB. Additionally, the portal also accepts payments made in US dollars.

When making online payments, it is important that your site has SSL certificates installed and activated. This will encrypt the network ensuring that your customer’s data is safe and protected. With respect to the PayTrace plugin, it renders support to both PayTrace JSON API and PayTrace Post API.

Features:

  • Promotes Sales or Authorization Only transaction
  • Renders support for Subscription-based product payments.
  • Has a system with automated refunds on order cancellation.
  • Pre-Order product payments.
  • Captures information from the past transactions reducing the time taken to process payments.
  • Click Here to download the PayTrace Payment Gateway plugin.


How to connect with WooCommerce?
Now that we have enough information about the plugin, let’s see how we can integrate the same within a WooCommerce store.

Setup and Configuration
Setting up the plugin isn’t as simple as it has been with other WooCommerce plugins. Find below the step-by-step process to install and configure the PayTrace plugin.

Integration Type Settings
Integration Type: To begin with, select the Integration API that would be used. When you land on the Settings page, this one appears at the top and is an important field. Select the right API and save the settings before moving ahead

General Settings

Important note: Only if you select Together in the Payment Forms Display Settings, will you need to fill the Method Title and Description. See “Forms Display Settings” for more information.

  • Enable/Disable: Select the checkbox to activate the plugin and enable the same.

  • Method Title: Add a specific tile. Note that this would be visible to the users.
  • Description: This is the description as viewed by the users.

Credentials Settings

  • PayTrace User Name: This is related to your accessibility. Add a username that you will use to login in.
  • PayTrace Password: Make sure you have a strong password set for the validation.

Form Display Settings

The last section is related to form display settings.

Payment Forms Display: Depicts the manner in which the form is shown on the page.

  • Together‘ shows both Card and Check forms in a single payment method, within the method description.
  • Separate‘ will have separate forms displayed as different methods.

  • Card Method Title (separate only): Determines the title of the method displayed during checkout.
  • Card Method Description (separate only): Regulated the card method description as visible to the users at the time of checkout.

  • Check(ACH) Method Title (separate only): Regulates the title of the Check method visible to users at the time of checkout.
  • Check(ACH) Method Description (separate only): Regulates the description of the Check method visible to users at the time of checkout.

Card Payment Settings

Accepted Cards: You can enter the different types of credit cards that will be displayed at the time of payments.

Check Payment Settings

  • Accept eCheck Payments: Allow the store customers to make payments through eChecks.
  • Set “On-Hold” status for orders paid by eCheck: Displays ‘On-Hold’ for orders that are paid by eChecks. However, if you do not select this, orders are referred to as ‘Processing’.

Vault Settings

  • Enable Payment Vault: To save the Payment information for future references. This will keep saving the last 4 digits of the Credit Card, along with the expiration date, and custom-generated user ID. Users will have the ease to check their information by visiting their ‘My Account’ Page from the dashboard.
  • Require CVC when paying with saved cards: Allow users to enter their CVC number to complete the payment.
  • Save Your Payment Method Text: Display a message on the screen asking customers to save their card information.

Transaction Settings

  • Transaction Type: The transaction type shows whether it is sales or authorization.
  • Send Order Description with Transaction: Selecting this would dispatch the order details to the PayTrace portal.

Client-side encryption:

Enabling client-side encryption means that the card data is encrypted at the client’s end. PayTrace JavaScript Encryption Library is used for the same. What’s important to note here is that the data once encrypted can only be read by PayTrace. None but the PayTrace portal can decrypt the information in a way reducing exposure to PCI compliance.

Note that data encryption is specifically meant for credit or debit card information. In order to set up the feature, do the following:

  • Visit the Paytrace Dashboard and enter your login credentials to validate the same.
  • Next move to the “Integration > Download Public Key“ to get access to the public key.

  • Next, go to WooCommerce, Settings, and then click on Payment (Checkout for WC < 3.4). Here select PayTrace.
    1. Click on plugin settings and then select “Use Client-Side Encryption” setting
    2. Here, enter the Public Key and also the location.

WooCommerce PayTrace Payment Gateway

Process Refunds

In order to automate the order refund process, you can do it using the plugin. Follow the steps given below to see how to process refunds.

  • Move to the Order Edit Page of the Admin.
  • Here, under the meta box of Order Items, select the Refund button.

WooCommerce PayTrace Payment Gateway

  • Now add the amount that you want to return to the users. It could either be a partial amount or the total order amount. Finally, click on the button of Refund.

WooCommerce PayTrace Payment Gateway

  • Once you do that, you will see a prompt on the screen to confirm that you want to refund the said amount to the user. Click on it to start the refund process.
  • In case the refund is successfully transferred, an order line item appears along with an informatory note.

WooCommerce PayTrace Payment Gateway

Process Capture

Lastly, we see how to capture a transaction. To process a transaction capture, there are two different ways.

Capture from “Order Actions”:

  • Move to the “Order Actions”
  • Click on the drop-down to select “Capture Payment (xx.xx)”
  • Either update or click on the arrow just below the drop-down.

Capture from the “Order Items” meta box:

  • Here, tap on the Capture button

WooCommerce PayTrace Payment Gateway

  • Add the figure that you need to capture and click on the Capture Payment button.

WooCommerce PayTrace Payment Gateway

  • You can select “Cancel Capture” to stop the process.

Conclusion

With that being said, you can now get started with the process of downloading the plugin and adding it to your WooCommerce store.

How does the Alipay Payment Gateway work?

If you wish your business to extend in Mainland China, you should most certainly prefer using the Alipay Payment gateway. Half of the entire population of China, which as we know it is the most populated country in the world, loves using Alipay to make any payment online.

Therefore, it makes sense to set up this payment method for your business shop or website if you are targeting the Chinese market. So, in this article, we will use an exclusive WooCommerce plugin – Alipay Cross Border Payment Gateway to receive payments from one of the biggest markets in the world.

Understanding WooCommerce

WooCommerce is, first of all, an open-source platform for WordPress websites. So, if you are thinking of extending your WordPress site with eCommerce functionality, WooCommerce is the first place you should go. Now, the reason most people use this plugin is, primarily, that it is free to use, and most WordPress themes support it.

Now, moving on to the main topic with Alipay Payment Method; we advise you to use the dedicated WooCommerce extension – Alipay Cross Border Payment Gateway, to set up the payment method. So, let us discuss the steps now.

Prerequisites

Before we jump straight into the setup procedure, let us first know what you need before you the installation:

  • You need to make sure whether your WordPress theme supports WooCommerce or not. Most themes do support it, but it is a standard protocol to check.
  • The other thing that you should verify is whether or not the PHP version is a minimum of 5.3. Now, with every new update, the PHP version will upgrade itself. So, you need to keep up to that, every now and then.
  • Finally, you need to go to Alipay website and create an Alipay account first before you can use it on WordPress. You will need approval from Alipay Cross-Border merchants to accept payments from the Chinese market.

The Steps

Though you can hire WooCommerce support to get it configured perfectly and quickly, here are the steps to install and configure the Alipay Cross Border Payment Gateway:

Installation:

  1. The first step is to download the Alipay Cross Border Payment Gateway extension from your WooCommerce account.
  2. Next, to use the WooCommerce extension, you must install in the WordPress server first, and for that, you need to upload the .zip file that you have downloaded. To do that, from the WP Dashboard, hover your mouse pointer over Plugins, and then click on Add New.
  3. Then, at the top, you will find an option, “Upload Plugin.” Click on that, and you are able to upload a file.
  4. Finally, click on Install Now, which will give you the option to Activate the plugin. Do that, and it will activate the plugin for use.

Setup:

  1. First, you need to go to the Alipay Cross Border Payment Gateway settings page. For that, while you are in the WP Dashboard, hover the mouse pointer over WooCommerce, then hover again to Settings, and click on it.
  2. On the next Window, you should see the option “Payment Gateways.” Once you click on that, you will get to see the options in regards to the Alipay Cross Border Payment Gateway.
  3. Now, since we asked you to open and verify your Alipay merchant account beforehand, you should have some of the data that the plugin requires to make it work. Then, you need to type down the “Partner ID” and “Security Code” in its respective fields and click save down below.
  4. The Alipay Cross Border Payment Gateway is ready to use.

Working Confirmation:

The Alipay Cross Border Payment Gateway allows you to test the payment gateway for free. So, before you make your WordPress site live in the Chinese market, we advise you to do some test transactions and verify whether it is going through perfectly or not

Conclusion

One thing that you should know about the Alipay Cross Border Payment Gateway, it is a WooCommerce Extension, and it comes with a subscription amount. You need to pay $79.00 for a year, where you will get every update and support assistance you need. What we would like to conclude is the plugin surely serves the cause and you can seamlessly receive money for the Chinese market with very few issues.

To get Alipay Payment Gateway setup support, use this link.

How to Setup and Integrate WooCommerce USAePay Payment Gateway?

USAePay is one of the most popular online payment portals that accept credit card payments across various websites and mediums. A few services provided by USA ePay include EMV, Payment Engine, Flexible Integration, and various other Merchant Tools.

WooCommerce is an open-source commercial platform that helps many e-commerce businesses to build and operate their stores online. The goal of WooCommerce is to make the democratizing e-commerce and giving entrepreneurs the complete power to

In this article, we are going to share with you the complete process of setting up and integrating your USAePay gateway on WooCommerce.

What Plugin Used to Setup USA ePAY?

The Plugin used for setting up your USAePay account can be easily downloaded from the WooCommerce dashboard. Here is the complete process of installing and configuring the same:

To simplify the process we have divided this complete process into two parts. The first part focuses on the process of installation of the plugin. Whereas the next process helps in setting up an USAePay Account.

Installation of the Plugin:

  1. Go to the WooCommerce dashboard and find the extension under the download options.
  2. Now go to Plugins, select Add New. Here Upload the ZIP file that you downloaded above.
  3. Now click on the Install Now option and select Activate.
  4. For the next step go to WooCommerce and find the settings option.
  5. Under Settings, select Payment, and then click on USAePay Credit Card. The installation process is now complete.

Setting up and Configuration

  1. To obtain your credentials login to your USAePay Merchant dashboard.
  2. Select the Settings tab that can be found on the left of your screen.
  3. Below that, you will find an API Keys option, click on that.
  4. Now you will see an option that reads Add API Keys. Please select that to proceed further.
  5. Now you will arrive on an API Keys Editor page, where you will need to enter the following details:
  • Name of your website.
  • A PIN.
  • For the command options, select all modes other than Cash Sale and Cash Credit.
  • For payment methods, select the options you want to allow on your site except for E-Check.
  • Don’t forget to add your store’s email id to the Email Merchant Receipt To area.
  • After filling in all the other necessary fields save the details by selecting Apply.
  • The Key for your USAePay will be visible on the screen. Copy and Paste the same to your WooCommerce USAePay settings.


What are the Minimum Requirements to Integrate USAePay in WooCommerce?

As previously mentioned the process of integrating USA ePay to WooCommerce is quite simple. Here are the two basic prerequisites one requires for integrating their USA ePay account in WooCommerce:

  1. The first requirement is a USA ePay account.
  2. The only other requirement is that users have PHP 5.3.0 or its updated version installed on their computer.

Why WooCommerce USAePay?

WooCommerce USAePay is loaded with so many amazing features and benefits for its users. Some of the reasons why you should choose WooCommerce USAePay:

  • Payments and Refunds can be directly processed on your WooCommerce store, without going to a third-party website or app.
  • You can easily access previously authorized transactions from the WooCommerce order database.
  • Directly charge an amount for virtual products available on your site without you having to authorize them.
  • On payment of an order automatically transfer the data related to the order to the database.
  • Accepts all the major Credit and Debit cards such as MasterCard, Visa, American Express, etc.
  • Doesn’t allow the customer to leave your store during the checkout process.
  • Displays you a complete decline message at checkout rather than a generic error.

What does the Checkout Process look like?

As we mentioned the customer stays on your website until checkout is finished. This gives you more control of the transaction. You as a business owner get to customize the process, to make it a hassle-free and faster experience for your customers.

Users viewing your site on their mobile devices can also enjoy an upgraded experience. With features like automated formatting and easier input fields make the process easier and faster. In case of a decline message, you can now share the reason for the decline instead of a generalized error message.

How Does Support Work for Automatic Refunds & Voids in USA ePay?

When it comes to issuing refunds on your site, the process for that is made easier as well. Now you need not log into your merchant account to issue refunds. You now get the option to issue both, partial or full refunds. To do that go to the Edit Order screen, and send the transaction amount to the USA ePay amount. You can select the Refund via Credit Card option to reverse any payment.

In some cases, transactions that have not been recorded or settled can become void. Refunds for such transactions can’t be issued. So when you void such a sale transaction the order will get canceled. Depending on the gateway, an unsettled transaction can either be either fully voided or partially voided.

How to Create a USA ePay account?

The process of creating a USAePay account is explained below. By following all the steps you can create your own USAePay account. Then you can continue as explained above to integrate your USAePay Account with WooCommerce.

  1. In case you have login details for a USAePay developer portal, log into the account.
  2. In case you don’t have a Developers account, register on the portal using this link.
  3. The registration can be done by entering details such as Email, Password, with you and your company’s name.
  4. Once you have registered successfully, the next important step is to request a Sandbox Account.
  5. To set up a SandBox, click on the tab that reads Request Test Account.
  6. Now fill the form that asks for details such as your requested Username, Contact Name, name of your Company, and Email id and click on the Submit Request tab.
  7. You should now see a successful submission message on your screen. Depending on your time zone the processing time can vary.
  8. You will receive your login details in your email once your sandbox account is successfully set up. Now you can log into your Sandbox account.
  9. The last step is to switch from development to production. To do this change to the key that was generated from your live account in place of the previous source key.
  10. You also need to change the processing URL to sandbox.usaepay.com/gate.

Conclusion

Having a safe and protected payment gateway for your online business is highly essential. It’s important for protecting your buyers and their privacy while shopping at your store. But also from the store owner’s perspective to identify and validate the details of the customers. By installing the USAePay WooCommerce payment gateway, you can achieve all the above functions with minimal effort.

By following all the above steps, you can easily set up your USAePay Payment account and integrate the same with WooCommerce. We are sure that you found all of the above information helpful and easy to follow. At any stage, you can also contact WPCustomify. Our experts are available around the clock to help solve all your problems related to WooCommerce and payment gateways.

What Types of Payment Methods Elavon Support?

Elavon which was founded in 1991 has gone on to achieve huge success in the last three decades. Elavon which is currently a subsidiary of the U.S. Bancorp is a convenient payment integrating technology that is easy to use and manage. It has the best security implementations so far.

Thousands of businesses are already powered with Elavon Converge and Fusebox, the two major payment gateway solutions provided. However, Converge is a leading gateway used by major big firms. Either of them is capable of doing major transactions in any environment including mail/telephone, Shop, mobile app, and eCommerce. But Converge can be integrated with more than 50 popular shopping carts.

Security Features

  1. The payment is bound with end to end encryption.
  2. No payment data is recorded or stored anywhere in the server unless you specify.
  3. In the case of device damage or being lost or stolen, your payment date is safe with Elavon.

Payment Methods that Elavon Supports

Elavon agrees with the following payment methods:

  • Credit and Debit Cards
  • Mobile Wallets including Google Pay, Apple Pay, and others

How to Integrate Elavon Payment Methods with an Online Store?

Before we get into the process of integrating Elavon with the eCommerce Platform, having a few pre-requirements will surge a quick workflow. Here is a list of things you will require to integrate Elavon with an eCommerce site.

  • An Elavon merchant account is necessary. If you don’t have it, you can contact the Elavon sales team for assistance while creating an account on Elavon.
  • Hosting with SSL certificate to ensure the safety of customer’s payment information.
  • Stores should have a one-Page checkout enabled.
  • The store country should be either the United Kingdom or Ireland. If you are a citizen of none of them, you can still use Elavon through the MyVirtualMerchant payment gateway.

Once you have all the above things finished, you can easily integrate either of Elavon’s offered payment gateways.

Here are the steps elaborated for Elavon Converge integration.

Step 1: But the extension, download and install it.

Step 2: Create an account on Elavon if you don’t have any.

Step 3: Save the credential information and the PIN on the setting page.

That’s it. Now let the payment process.

What Plugin Used for Setup ELAVON?

Talking about the plugin, Elavon converge requires you to install Elavon Converge for WooCommerce gateway plugin which is capable of taking debit and credit cards and eCheck payments on the WooCommerce store and includes the best support of WooCommerce subscription.

Debit and Credit Card Processing

No matter where you go, the most common cashless methods of payment would include debit card payments, credit card payments and digital payments. Elavon Converge can be a great tool to simplify acceptance of these payments anywhere and anytime. We have listed below few cons of using Elavon Converge card processing:

  • It provides features to fit in your customers with all the popular mobile wallets from apple pay to google pay.
  • You can choose the industry-first fraud services of elavon which ensures security from any kind of online card payments.
  • Elavon provides three funding options for businesses with a lot of flexibility and the customers can choose the best suited for their requirements.

How to Make a Refund with Elavon?

Elavon supports automatic refunds. Customers can process refunds directly within WooCommerce. It will save you from logging in to the merchant’s account.

However, there are two options provided for a refund. You can choose either to refund manually or via Elavon Converge Credit card. In any case, the auto refund fails, which is less likely to happen, you can choose to refund it manually.

Why choose Elavon Converge?

  • Elavon Converge seamlessly operates with debit and credit card transactions.
  • It displays authorization messages to customers on your preference.
  • It has an option for the customers to securely store payment information for easier checkout.
  • In the one-time payment, you get a WooCommerce subscription and pre-orders.
  • It accepts all the major credit and debit cards, including American Express, Visa, and MasterCard.

More Features

Seamless Checkout

The Elavon converge provides you with maximum control by limiting the user to a few clicks and a simple checkout process. That means you have a lot of customizations in your hand as a business owner.

Automatic refund

Employees can make refunds directly from the WooCommerce interface rather than the traditional way of logging into the merchants’ account. Employees can make full or partial refunds as well by editing orders. If the transaction finds an issue, a transaction void will be performed as a first measure before proceeding with order cancellation.

Saving Payment Methods

Customers are provided to save multiple credit card details safely on the server for faster checkout. Taking in-depth about the servers, these are Elavon’s secure servers. Customers also have the option to mark active payment methods for even a more enhanced checkout.

Multi-Currency Support

Multi-currency support allows the merchant to make transactions in a currency other than their local one. The merchant will have to purchase a currency switcher to let the customers make choices.

Conclusion

Elavon is a master safe payment integration channel. Converge is its right hand. Although the Fusebox is equally powerful and safe, Converge is leading. Be it the refund or the checkout, eCheck processing, or tokenization, you need not worry about anything.

Want to set it up for your store but not sure about doing it on your own? No worries; leave it to experts. Talk to WPCustomify to get it done, or any Elavon/WooCommerce related support.