Call Us Toll Free - US & Canada : +1-(888) 602-0119

Shipping and Tax Calculation Errors in WooCommerce

Running an online store with WooCommerce is a great way to sell products, but sometimes, issues with shipping and tax calculations can cause problems for both store owners and customers. If shipping rates are wrong or taxes don’t apply correctly, customers may abandon their carts. Fixing these errors is important for a smooth shopping experience.

This article will help you understand common shipping and tax calculation errors in WooCommerce and how to fix them.

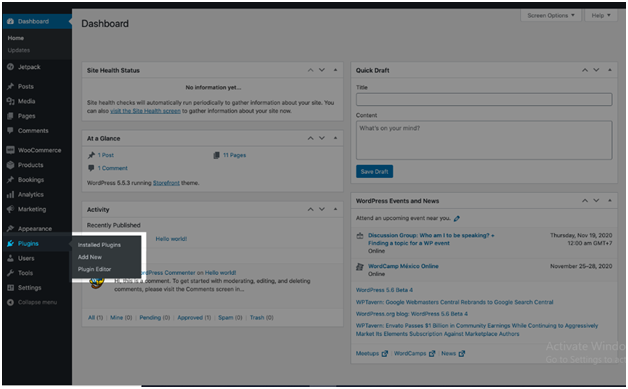
1. Common Shipping Errors & Fixes

(a). Shipping Method Not Showing at Checkout

If your customers can’t see shipping options at checkout, follow these steps to fix it:

  • Check Shipping Zones: WooCommerce requires shipping zones for different locations. Go to WooCommerce → Settings → Shipping → Shipping Zones and make sure you have zones set up for the areas where you sell.
  • Assign Shipping Methods: Each shipping zone must have a method like Flat Rate, Free Shipping, or Local Pickup. If no method is assigned, customers won’t see shipping options.
  • Verify Product Shipping Class: Some products may not have a shipping class, causing them to be excluded from the available shipping methods.
  • Debug Shipping Issues: Add define( ‘WC_DEBUG’, true ); to your wp-config.php file to check logs for errors.

(b). Incorrect Shipping Rates

Sometimes, shipping rates don’t match what they should be. Here’s how to fix them:

  • Verify Shipping Costs: Double-check that you entered the correct shipping rates under WooCommerce → Settings → Shipping → Shipping Methods.
  • Recalculate Cart Totals: Outdated cart data can cause incorrect shipping rates. Use WC()->cart->calculate_totals(); in your theme’s functions file to force recalculations.
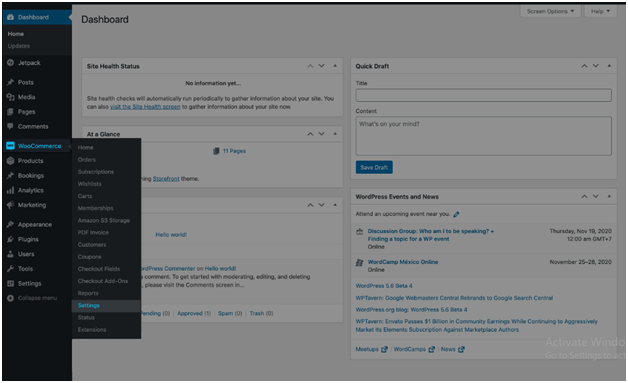
  • Check for Plugin Conflicts: If you use third-party shipping plugins (like UPS, FedEx, or USPS), they might cause conflicts. Disable them one by one to find the issue.

(c). Free Shipping Not Applying

Free shipping is a great way to attract customers, but it may not work properly. Here’s what to check:

  • Ensure Minimum Order Amount is Met: If your free shipping method requires a minimum purchase, make sure the cart meets this condition.
  • Verify Coupon Settings: Some coupons disable free shipping when applied. Go to WooCommerce → Coupons and check your settings.
  • Enable Free Shipping for the Right Zones: Free shipping must be assigned to the correct shipping zones. Check under WooCommerce → Settings → Shipping → Shipping Zones.

2. Common Tax Calculation Errors & Fixes

(a). Taxes Not Being Applied

If taxes aren’t being applied to orders, follow these steps:

  • Enable Tax Calculation: Go to WooCommerce → Settings → Tax and ensure that “Enable Taxes” is checked.
  • Assign the Right Tax Class: Each product should have a tax class, such as Standard, Reduced, or Zero.
  • Verify Customer Location Settings: Taxes are calculated based on customer location. Go to WooCommerce → Settings → General → Selling Location and ensure you are using the correct location settings.

(b) Wrong Tax Rate Calculation

If tax rates are incorrect, here’s how to fix them:

  • Update Tax Rates: Go to WooCommerce → Settings → Tax → Standard Rates and verify that tax rates for different regions are correct.
  • Recalculate Taxes: Outdated tax data may cause errors. Add WC()->cart->calculate_totals(); to force tax recalculations.
  • Clear Cache: Cached data can interfere with tax calculations. Clear WooCommerce transients under WooCommerce → Status → Tools → Clear Transients.

(c) Tax Not Displaying in Checkout

If customers don’t see taxes at checkout, do the following:

  • Enable Tax Display in Cart: Go to WooCommerce → Settings → Tax and ensure “Display Prices in the Cart” is enabled.
  • Check Theme Compatibility: Some custom themes may not support tax calculations properly. Switch to a default theme like Storefront and test.
  • Debug Checkout Page Issues: Enable WooCommerce logs under WooCommerce → Status → Logs to check for tax calculation errors.

3. Advanced Debugging Steps

If you still face issues with shipping and tax calculations, try these advanced troubleshooting steps:

  • Enable WooCommerce Logging: Go to WooCommerce → Status → Logs and check for error messages related to shipping and taxes.
  • Disable Conflicting Plugins: Some plugins may interfere with shipping and tax calculations. Deactivate all plugins except WooCommerce and check if the issue persists. Then, re-enable them one by one.
  • Test in a Default Theme: Switch to the default Storefront theme and see if the issue is theme-related.
  • Clear WooCommerce Cache: Go to WooCommerce → Status → Tools and clear all transients and cache data.
  • Use Debug Mode: Add define( ‘WC_DEBUG’, true ); in your wp-config.php file to log shipping and tax issues.

Conclusion

Fixing shipping and tax errors in WooCommerce is important to ensure a smooth shopping experience for customers. By carefully checking shipping zones, tax settings, and plugin conflicts, you can solve most issues quickly. Keeping WooCommerce and all related plugins updated will also help prevent future problems.

If you’re still facing issues, consider reaching out to WooCommerce support or hiring a professional to assist you.

For more WordPress and WooCommerce tips, visit WP Customify.

How to Fix WooCommerce Checkout Payment Failures Error

A smooth checkout process is essential if you’re running an online store with WooCommerce. However, sometimes customers experience payment failures, or payment gateways stop working, causing frustration and lost sales.

Understanding why WooCommerce payment failures happen and how to fix them can save your business time and money. In this guide, we’ll explain the common reasons for WooCommerce payment gateway errors and provide step-by-step solutions to resolve them.

1. Common Reasons for Payment Failures in WooCommerce Checkout

Payment failures in WooCommerce can happen for many reasons. Below are some of the most common causes:

1. Insufficient Funds or Payment Declined by the Bank

  • Customers’ accounts might not have enough money in them.
  • The bank might decline the payment due to security reasons.
  • Some banks block international transactions.

2. Incorrect Payment Details Entered by the Customer

  • Mistyped card number, CVV, or expiry date.
  • Billing address mismatch with the card details.

3. SSL Certificate or Security Issues

  • SSL (Secure Sockets Layer) is required for secure transactions.
  • If your website is not using HTTPS, many payment gateways will reject transactions.

4. Payment Gateway API Connection Issues

  • Incorrect API keys entered in WooCommerce settings.
  • The payment gateway’s server is down or experiencing issues.

5. Caching or Session Conflicts

  • Issues can occasionally arise from cached browsers or plugins.
  • Clearing the cache or disabling the plugin can fix checkout issues.

6. Plugin or Theme Conflicts

  • Some themes or plugins can interfere with payment gateways.
  • Conflicts between WooCommerce extensions and third-party payment plugins.

2. Types of Payment Gateway Errors in WooCommerce

1 Payment Method Not Showing on Checkout Page

  • Payment gateway settings might not be enabled.
  • Customer location restrictions may apply.

2. Payment Gateway Not Processing Orders

  • The transaction starts but does not complete.
  • Orders remain in “Pending Payment” status.

3. WooCommerce Checkout Error Message: “Payment Failed, Please Try Again”

  • Error message appears after entering payment details.
  • Possible API or server-related issue.

4. Redirection Issues After Checkout

  • Customers are not redirected to the payment page.
  • Payment is successful, but WooCommerce doesn’t update the order status.

3. How to Troubleshoot and Fix WooCommerce Payment Failures

1. Check Payment Gateway Settings

  • Go to WooCommerce > Settings > Payments.
  • Ensure the gateway is enabled and configured correctly.
  • Test different payment methods.

2. Verify API Keys and Credentials

  • Double-check that API keys are correct for both test and live modes.
  • If necessary, regenerate the API keys and re-enter them.

3. Test with Different Payment Gateways

  • If one gateway fails, try another like Stripe, PayPal, or Square.
  • This helps in identifying if the problem is specific to a gateway.

4. Review Error Logs and Enable Debug Mode

  • Go to WooCommerce > Status > Logs to check error messages.
  • Enable debug mode for the payment gateway to see detailed logs.

5. Check for Plugin and Theme Conflicts

  • Deactivate all plugins except WooCommerce and test again.
  • Try a default theme, such as Storefront, and see if there are any issues.

6. Ensure Proper SSL Configuration

  • Verify your SSL certificate is active.
  • Use HTTPS for secure transactions.

7. Clear Cache and Cookies

  • Clear WooCommerce transients and cache from caching plugins.
  • Ask customers to clear their browser cache if they encounter errors.

4. Specific Fixes for Popular Payment Gateways

1. Fixing Stripe Payment Failures

  • Ensure webhook settings are correctly configured.
  • Check for declined payments in the Stripe dashboard.
  • Check that the account is in active mode rather than test mode.

2. Fixing PayPal Checkout Errors

  • Verify that your PayPal account is properly linked.
  • Enable PayPal Instant Payment Notification (IPN) in your PayPal account.

3. Fixing Square Payment Gateway Errors

  • Verify API credentials in WooCommerce > Settings > Payments.
  • Verify if Square is supported in your country.

4. Fixing Razorpay or Other Payment Gateway Errors

  • Confirm that your merchant ID and secret key are correct.
  • Check if Razorpay is in live mode.

5. Preventing Future WooCommerce Payment Failures

1. Keep WooCommerce and Payment Plugins Updated

  • Regularly update WooCommerce and payment gateway plugins.
  • Outdated plugins can cause compatibility issues.

2. Regularly Test Checkout Functionality

  • Run test transactions after updates.
  • Monitor order processing to ensure everything works smoothly.

3. Enable Fallback Payment Methods

  • Offer multiple payment options in case one fails.
  • Consider enabling Cash on Delivery (COD) as a backup.

4. Monitor WooCommerce Logs for Errors

  • Regularly check WooCommerce > Status > Logs for potential issues.

Conclusion

Dealing with payment failures in WooCommerce can be a headache for both store owners and customers. However, you can resolve most issues effectively by identifying common causes and applying the right troubleshooting steps. Routine maintenance, keeping an eye on logs, and updating your payment plugins will ensure a hassle-free checkout process.

If problems persist, don’t hesitate to reach out to your payment gateway provider or seek expert help.

For more WooCommerce troubleshooting tips, visit our website: WPCustomify.

WooCommerce Checkout Abandonment Issue & Recovery: A Complete Guide

Have you ever seen customers fill their shopping carts only to leave before completing their purchase? This is known as cart abandonment, and it’s a major challenge for WooCommerce store owners. Research suggests that nearly 70% of online shoppers abandon their carts, resulting in significant lost revenue.

The good news? You can take effective steps to reduce cart abandonment and recover those lost sales. In this guide, we will cover:

  • The common reasons behind cart abandonment.
  • How to improve the checkout process and keep customers engaged.
  • Practical strategies for recovering abandoned carts.

By the end of this article, you’ll have valuable insights to help increase conversions and boost your WooCommerce sales.

Understanding WooCommerce Cart & Checkout Abandonment

What is Cart and Checkout Abandonment?

  • When a buyer adds items to their cart but leaves before they reach the checkout page, this is known as cart abandonment.
  • Checkout abandonment occurs when a user starts the checkout process but does not complete the transaction.

What Causes Consumers to Drop Their Carts?

These are the most common reasons:

  1. Unexpected Costs – Hidden fees, such as taxes and shipping charges, can catch customers off guard.
  2. Complicated Checkout Process – Lengthy and confusing checkout steps can frustrate users.
  3. Limited Payment Options – Customers may be unable to use their preferred payment method.
  4. Slow Website Performance – A slow-loading site can lead to users leaving before completing their purchase.
  5. Mandatory Account Creation – Some buyers prefer not to register before making a purchase.
  6. Security Concerns – If customers don’t trust your site’s security, they might hesitate to enter payment details.
  7. Distractions & Price Comparisons – Customers may get distracted or leave to compare prices on other websites.

Understanding these challenges allows you to optimize your store and reduce WooCommerce checkout abandonment.

How to Fix WooCommerce Cart Abandonment Issues

1. Optimize the Checkout Process

A complex checkout process is a major cause of cart abandonment. Streamline it by:

  • Enabling Guest Checkout – Let customers buy without signing up.
  • Reducing Form Fields – Only ask for essential details.
  • Using Autofill & Address Validation – Make checkout quick and effortless.
  • Providing Multiple Payment Methods – Accept credit/debit cards, PayPal, Apple Pay, Google Pay, etc.
  • Creating a One-Page Checkout – Minimize steps for a faster experience.

2. Be Transparent with Pricing

  • Display shipping fees, taxes, and total costs before checkout.
  • Offer free or flat-rate shipping to eliminate surprises.

3. Improve Website Speed & Mobile Experience

  • A slow website drives users away. Improve WooCommerce performance by:
    • Choosing a fast hosting provider.
    • Compressing images for quicker load times.
    • Enabling caching to speed up page rendering.
  • Ensure your store is mobile-friendly, as many shoppers buy on their phones.

4. Use Exit-Intent Popups

  • Display a popup when a visitor is about to leave with a discount or free shipping offer.
  • Capture their email for follow-up reminders.

5. Build Customer Trust

  • Show security badges like SSL certification and PayPal verification.
  • Include customer reviews and testimonials to boost confidence.
  • Have a clear return policy to reassure hesitant buyers.

6. Provide Real-Time Support

  • Offer live chat assistance to answer last-minute customer questions.
  • Include a support phone number or email for easy contact.

WooCommerce Abandoned Cart Recovery Strategies

Even after optimizing checkout, some customers will still abandon their carts. Here’s how to bring them back:

1. Automated Abandoned Cart Emails

Email marketing is one of the most effective ways to recover lost sales. Follow this schedule:

  • First Email (1 hour after abandonment) – A simple reminder about their cart.
  • Second Email (24 hours later) – Offer a small discount or free shipping.
  • Third Email (48 hours later) – Create urgency by saying “Your cart is about to expire!

2. Retargeting Ads

  • Show Facebook, Instagram, and Google ads to customers who left items in their carts.
  • Feature the exact product they abandoned.
  • Include a discount or incentive to encourage them to return.

3. SMS & WhatsApp Reminders

  • Send a friendly reminder via SMS or WhatsApp with a direct checkout link.
  • Keep messages short and engaging.

4. Push Notifications

  • Use web push notifications to remind users about their abandoned cart.
  • Create urgency by offering a limited-time discount.

5. Implement a Loyalty & Rewards Program

  • Encourage customers to complete purchases by offering reward points.
  • Give special discounts to returning shoppers.

Best WooCommerce Plugins for Abandoned Cart Recovery

To make cart recovery easy, try these plugins:

  • WooCommerce Cart Abandonment Recovery – Free plugin for automated recovery emails.
  • Retainful – Sends emails, offers discounts, and tracks abandoned carts.
  • Jilt – Advanced email marketing tool for abandoned cart recovery.
  • CartFlows – Helps optimize checkout pages and boost conversions.
  • Abandoned Cart Lite for WooCommerce – Simple and effective cart recovery solution.

These plugins help you win back lost sales automatically.

Tracking & Measuring Success

To know if your strategies are working, monitor these key metrics:

  • Google Analytics – Check cart abandonment rates.
  • WooCommerce Reports – Track sales and recovered carts.
  • A/B Testing – Experiment with different emails, popups, and checkout flows.

Tracking data helps you refine your approach and improve results.

Conclusion

Cart abandonment is a common issue, but it can be reduced with the right strategies. For example, you can optimize checkout, offer multiple payment options, and use recovery methods like email follow-ups and retargeting ads to recover lost sales and boost revenue.

To get started: ✔ Simplify your checkout process. ✔ Provide clear pricing and secure payment options. ✔ Use automated cart recovery techniques to re-engage customers.

Apply these tips today and watch your WooCommerce store’s conversion rates improve! 🚀

If you have any questions or need assistance with WooCommerce Checkout Abandonment, feel free to reach out to us. Visit our website at wpcustomify.com for expert support and guidance.

Checkout Process Issues in WooCommerce

WooCommerce is one of the most popular eCommerce platforms for WordPress. It allows businesses to set up online stores and sell products easily. However, if the checkout process is not working smoothly, customers may leave without completing their purchases. This can hurt sales and customer satisfaction.

A well-functioning checkout process is essential for a successful online store. A broken checkout experience can lead to lost revenue and frustrated customers who may never return. Various factors can cause checkout issues, ranging from technical problems like plugin conflicts to user experience barriers like a complicated checkout form. In this article, we will discuss common WooCommerce checkout issues, their causes, and how to fix them efficiently.

Common Checkout Issues in WooCommerce

Many WooCommerce store owners face problems during the checkout process. Here are some frequently encountered issues:

  1. Errors Preventing Order Completion – Customers may see error messages when they try to place an order. These errors can be caused by payment gateway issues, missing required fields, or system bugs that prevent the checkout process from being completed.
  2. Slow Checkout Loading Times – A checkout page that takes too long to load can frustrate customers and lead them to abandon their purchase. Slow checkout speeds can be due to unoptimized scripts, server issues, or heavy website traffic.
  3. Payment Gateway Failures – Payments may fail due to incorrect API credentials, compatibility issues between the payment plugin and WooCommerce, or customer authentication failures (such as failed 3D Secure verifications).
  4. Cart Abandonment Due to Friction – A complicated checkout process, too many required fields, or forcing account creation can discourage customers from completing their purchases.
  5. Shipping and Tax Calculation Errors – Incorrect shipping rates or tax calculations can confuse customers and lead to abandoned carts. This may happen due to misconfigured WooCommerce settings, location detection errors, or outdated tax rules.

Causes of Checkout Issues

Several factors can cause checkout problems in WooCommerce. Here are some common reasons:

1. Plugin Conflicts
WooCommerce stores often rely on multiple plugins to add functionality, but not all plugins work well together. A conflict between two plugins can cause checkout errors, prevent payments from processing, or even break the entire checkout page. To identify plugin conflicts, deactivate non-essential plugins one by one and test the checkout process.

2. Theme Compatibility Problems
Not all WordPress themes are built with WooCommerce in mind. Some themes may not support WooCommerce’s latest updates, leading to display issues, checkout button failures, or missing payment fields. Using a WooCommerce-friendly theme, such as Storefront, can help prevent such problems.

3. Outdated WooCommerce Version
Running an outdated version of WooCommerce can lead to compatibility issues, security vulnerabilities, and bugs that affect the checkout process. Regularly updating WooCommerce ensures you have the latest fixes and optimizations.

4. JavaScript Errors
JavaScript is essential for interactive features on the checkout page, such as updating shipping costs and validating form fields. If there are JavaScript errors due to poorly coded plugins or themes, these interactive elements may break, preventing customers from checking out.

5. Incorrect Payment Gateway Setup
If payment gateway settings are incorrect, transactions may fail or not process at all. This can be caused by incorrect API keys, missing credentials, or incompatibility between WooCommerce and the payment provider.

6. Server Performance Issues
A slow or overloaded server can cause checkout pages to load slowly or time out, leading to failed transactions. Choosing a high-performance hosting provider and using caching solutions can improve checkout performance.

Troubleshooting Checkout Issues

To fix checkout issues, you need to find out what is causing the problem. Here are some troubleshooting steps:

1. Check WooCommerce Status Logs
WooCommerce provides logs that help identify errors. You can access them under WooCommerce > Status > Logs. Checking logs can reveal issues related to payment gateways, shipping calculations, or API errors.

2. Debug JavaScript Errors
Use the browser’s developer console (press F12 in most browsers) to check for JavaScript errors on the checkout page. Fixing JavaScript issues often requires disabling conflicting scripts or adjusting the theme’s code.

3. Deactivate Conflicting Plugins
Disable all plugins except WooCommerce and then enable them one by one to find out which plugin is causing the issue. Once identified, check for plugin updates or consider replacing it with an alternative.

4. Switch to a Default WooCommerce Theme
Try using the Storefront theme. If the checkout works correctly, your current theme may be the problem. Consider contacting the theme developer for support or switching to a more compatible theme.

5. Update WooCommerce and WordPress
Keeping WooCommerce and WordPress up to date ensures compatibility with payment gateways, themes, and plugins. Updates often include bug fixes and security patches that improve checkout reliability.

6. Test Payment Gateways in Sandbox Mode
Most payment gateways offer a sandbox mode for testing transactions. Use it to ensure your payment settings are correct and transactions go through smoothly.

Fixing Payment Gateway Problems

1. Verify API Credentials
Ensure that API keys and credentials for your payment gateway are entered correctly. Even a small mistake in these details can cause payment failures.

2. Enable SSL for Secure Transactions
A valid SSL certificate is required for secure payments. You can enable it under WooCommerce > Settings > Advanced. SSL encrypts transactions and builds customer trust.

3. Check Transaction Logs
Payment gateways provide logs of transactions. Reviewing these logs can help identify failed transactions and reasons for declines.

4. Resolve 3D Secure Authentication Issues
Some gateways require 3D Secure authentication. Make sure your settings comply with these requirements to avoid payment rejections.

Handling Slow Checkout Performance

1. Optimize Database and Caching
Using caching plugins like WP Rocket can speed up checkout by reducing server load. Cleaning up the database with WP-Optimize can also improve performance.

2. Reduce Unnecessary Scripts and Styles
Some plugins load extra scripts that slow down checkout. A plugin like Asset CleanUp can help disable unnecessary scripts.

3. Use a Lightweight Theme
Choosing a fast, WooCommerce-compatible theme like Storefront improves performance.

4. Enable Lazy Loading for Checkout Assets
Lazy loading ensures that only necessary elements are loaded when needed, reducing page load time.

Preventing Cart Abandonment

1. Enable Guest Checkout
Allow customers to checkout without creating an account to reduce friction.

2. Simplify the Checkout Form
Remove unnecessary fields to make the checkout process faster.

3. Offer Multiple Payment Methods
Providing options like PayPal, Stripe, and Apple Pay makes it easier for customers to pay.

4. Use Exit-Intent Popups
An exit-intent popup can offer a discount when a user is about to leave the checkout page.

Conclusion

Ensuring a seamless WooCommerce checkout experience is essential for maximizing sales and keeping customers happy. By recognizing frequent challenges and resolving them proactively, you can enhance usability and drive more conversions.
By following the steps in this guide, you can resolve checkout issues and ensure your WooCommerce store provides a hassle-free shopping experience.

For more WooCommerce tips and solutions, visit our website: wpcustomify.com.

A Guide to Solving Tax Misconfiguration Issues in WooCommerce

WooCommerce is one of the most popular eCommerce platforms, known for its flexibility and ease of use. However, if not set up properly, even small errors in tax and shipping configuration can lead to major problems. One of the most common issues store owners face is tax misconfiguration impacting shipping rates. These issues can result in incorrect charges, unhappy customers, and even legal troubles. In this article, we’ll explore what tax misconfiguration is, how it affects shipping, and steps to fix and prevent these problems.

What is Tax Misconfiguration in WooCommerce?

Tax misconfiguration occurs when the tax settings in WooCommerce are not properly set up or aligned with your store’s needs and regional tax laws. Taxes play a critical role in determining the total cost of a customer’s order, including shipping fees. When tax settings are incorrect, it can lead to errors in shipping charges, such as overcharging or undercharging customers.

For example:

  • If you forget to apply taxes to your shipping methods, your customers may pay less than required.
  • Misconfigured tax rates might charge customers from certain regions too much.
  • Some countries or states have rules where shipping is tax-exempt, but incorrect settings could still apply taxes.

These problems may seem small initially, but they can quickly add up, harming your business’s reputation and profitability.

Common Shipping Issues Caused by Tax Misconfiguration

Let’s take a closer look at how tax misconfiguration can specifically affect shipping in WooCommerce:

  1. Shipping Cost Discrepancies: When taxes are not applied correctly, customers might see inconsistent shipping costs during checkout.
  2. Unapplied or Incorrect Tax Rates on Shipping: Taxes might not be applied to shipping fees when they should be, or they might be applied in regions where shipping is tax-exempt.
  3. Shipping Method Not Showing at Checkout: If tax rates conflict with shipping zones or methods, some options may not appear during checkout.
  4. Pricing Confusion: Tax-inclusive or tax-exclusive pricing can create confusion if the settings are inconsistent, leading to unexpected charges.
  5. Regional Shipping Issues: Different countries or states have varying tax laws, and failing to configure these properly can result in compliance issues.

Root Causes of Tax Misconfiguration

Tax misconfiguration can happen for several reasons. Here are some of the most common:

1. Incorrect Tax Settings:

  • Forgetting to enable taxes in WooCommerce settings.
  • Leaving tax rate tables incomplete or incorrect.

2. Overlapping or Conflicting Tax Rules:

  • Having multiple tax rates that apply to the same region.

3. Failure to Account for Regional Tax Rules:

  • Not understanding specific tax laws for shipping in different areas.

4. Plugin Conflicts:

  • Third-party plugins used for shipping or tax automation may introduce errors or conflicts.

5. Outdated Software:

  • Using outdated versions of WooCommerce or related plugins can lead to bugs and configuration errors.

How to Diagnose the Issue?

If you suspect tax misconfiguration is causing shipping issues, here are steps to identify the problem:

1. Review WooCommerce Tax Settings:

  • Go to WooCommerce > Settings > Tax and check if taxes are enabled.

2. Inspect Shipping Method Settings:

  • Ensure tax classes are assigned to all shipping methods (e.g., Flat Rate, Free Shipping).

3. Check Tax Rate Tables:

  • Go to WooCommerce > Settings > Tax > Standard Rates and verify if the correct tax rates are listed for each region.

4. Test Different Scenarios:

  • Use test addresses from various regions to see how taxes and shipping charges are applied at checkout.

5. Enable Debugging:

  • Turn on debugging options in WooCommerce to log any errors related to taxes or shipping.

Fixing Tax Misconfiguration in WooCommerce

Here’s a step-by-step guide to fixing tax misconfiguration issues:

1. Enable Taxes:

  • Navigate to WooCommerce > Settings > General and ensure the “Enable taxes” option is checked.

2. Set Up Tax Rates Correctly:

  • Go to WooCommerce > Settings > Tax > Standard Rates and add the appropriate tax rates for your shipping zones. Make sure to include country codes, state codes, and ZIP codes if needed.

3. Assign Tax Classes to Shipping Methods:

  • Open your shipping methods (e.g., Flat Rate) and assign the correct tax class under the “Tax Status” field.

4. Ensure Pricing Consistency:

  • Decide whether you want to display prices inclusive or exclusive of tax. Update this setting under WooCommerce > Settings > Tax > Prices entered with tax.

5. Update WooCommerce and Plugins:

  • Keep WooCommerce and all related plugins up to date to avoid compatibility issues.

6. Test After Making Changes:

  • Once you’ve fixed the settings, test your checkout process thoroughly to ensure taxes and shipping charges are applied correctly.

Preventing Future Issues

To avoid tax misconfiguration problems in the future, follow these best practices:

1. Regularly Update Tax Rates:

  • Tax rates can change frequently. Make it a habit to update your tax rate tables regularly.

2. Use Automated Tax Calculation Plugins:

  • Tools like TaxJar, Avalara, or the WooCommerce Tax plugin can automate tax calculations based on real-time data.

3. Keep Your Software Updated:

  • Update WooCommerce and plugins regularly to ensure compatibility with the latest features and fixes.

4. Document Your Settings:

  • Maintain records of your tax and shipping configurations so you can quickly identify any changes or errors.

5. Test Before Going Live:

  • Use staging environments to test any new settings or plugins before applying them to your live site.

Role of Regional Tax Laws

Tax laws vary widely across countries, states, and even local municipalities. For example:

  • United States: Shipping may be taxable in some states but not in others. For instance, California considers shipping tax-exempt if the shipping fee is separately stated and reflects actual costs.
  • European Union: VAT rules apply to shipping, and rates can vary by country.
    Understanding these laws is critical to configuring your tax and shipping settings correctly. Always research tax regulations for the regions you operate in to ensure compliance.

Tools and Plugins to Simplify Tax Management

To avoid tax and shipping issues altogether, consider using the following tools:

1. TaxJar: Automates sales tax calculations for U.S. regions.

2. Avalara: Provides automated tax compliance services for global markets.

3. WooCommerce Tax: A free plugin that helps calculate taxes for WooCommerce stores.
These tools can save you time and reduce the risk of human error in tax configuration.

Conclusion

Tax misconfiguration in WooCommerce can lead to shipping issues that frustrate customers and hurt your business. By understanding how taxes and shipping interact, diagnosing problems, and implementing best practices, you can avoid these headaches. Regularly update your tax rates, test your configurations, and consider using automation tools to simplify the process.

With the right setup, you can ensure a smooth and compliant checkout experience for your customers while maintaining your store’s reputation. If you’re still facing challenges, visit WP Customify for expert WooCommerce solutions tailored to your needs.

Best WooCommerce Points and Rewards Plugins

Introduction

In today’s competitive online market, keeping customers engaged and encouraging repeat purchases is key to success. WooCommerce stores can achieve this by using points and rewards systems. These systems motivate customers to buy more by offering incentives. In this article, we’ll explore the best WooCommerce points and rewards plugins to help you decide which one suits your needs.

1. Loyalty Program by Advanced Coupons

Loyalty Program by Advanced Coupons

Overview: Advanced Coupons is a feature-rich plugin that helps create a powerful loyalty program. It’s designed to keep your customers coming back. The plugin allows you to reward customers for various actions like purchases, referrals, and reviews.

Key Features:

  1. Earning Points:
    • Customers earn points for completing actions like buying products, referring friends, or leaving reviews.
    • You can assign custom point values to different products or categories.
  2. Redeeming Points:
    • At checkout, points can be converted for discounts..
    • Customers can choose how many points to use per transaction.
  3. Notifications:
    • Automated email reminders to inform clients of their Points.
    • Customizable templates for better communication.
  4. Analytics and Reporting:
    • Detailed reports to track points earned and redeemed.
    • Insights into customer engagement.
  5. Seamless Integration:
    • Fully compatible with WooCommerce and Advanced Coupons.

Why Choose This Plugin? This plugin is perfect for businesses aiming to implement an easy-to-manage loyalty program that effectively boosts customer retention and drives repeat sales.

2. YITH WooCommerce Points and Rewards

WooCommerce Points and Rewards Plugins

Overview: YITH WooCommerce Points and Rewards offers a versatile solution for incentivizing customer loyalty. It enables you to reward your shoppers for their purchases and various activities, creating a more engaging shopping experience. The plugin even includes gamification features like levels and badges to make the shopping experience fun.

Key Features:

  1. Point Allocation:
    • Allocate points to specific products or categories.
    • Reward customers based on their spending.
  2. Expiration Dates:
    • Set expiration dates for points to encourage quicker use.
    • Automated notifications for point expiry.
  3. Redemption Rules:
    • Define how customers can use their points.
    • Set minimum and maximum point limits for each transaction.
  4. Gamification:
    • Add levels and badges to engage customers.
    • Display achievements on customer profiles.
  5. Custom Notifications:
    • Send emails to update customers about their points and rewards.

Why Choose This Plugin? It’s perfect for businesses looking to engage customers with creative reward systems and gamification.

3. WPLoyalty

WooCommerce Points and Rewards Plugins

Overview: WPLoyalty is a modern plugin designed to boost brand loyalty. It offers an easy-to-use interface for both store owners and customers. With its interactive features, you can make your rewards system highly engaging.

Key Features:

  1. Action-Based Rewards:
    • Reward customers for actions like purchases, social sharing, and referrals.
    • Encourage customers to leave reviews for extra points.
  2. Interactive Widgets:
    • Add a customizable launcher widget to display available rewards.
    • Allow customers to redeem rewards directly from the widget.
  3. Custom Rules:
    • Create rules based on order value, product type, or customer groups.
    • Tailor the rewards system to suit different types of customers.
  4. Detailed Analytics:
    • Track points issued and redeemed.
    • Measure the effectiveness of your loyalty program.
  5. Integration:
    • Compatible with WooCommerce and other popular plugins.

Why Choose This Plugin? It’s a great choice for businesses that want a visually appealing and engaging loyalty program.

4. SUMO Reward Points – WooCommerce Reward System

Overview: SUMO Reward Points is a versatile plugin. It lets you create a rewards system that matches your business goals. The plugin offers detailed customization, making it suitable for a wide range of stores.

Key Features:

  1. Flexible Point Allocation:
    • Assign points at the product, category, or global level.
    • Offer different point values for specific actions like purchases and referrals.
  2. Redemption Options:
    • Customers can redeem points for discounts, free products, or cashback.
    • Customizable redemption rules.
  3. Point Expiry:
    • Set expiration dates for unused points.
    • Send reminders about expiring points via email.
  4. Admin Controls:
    • Manage customer points directly from the admin dashboard.
    • Export and import point data for analysis.
  5. Integration:
    • Works seamlessly with WooCommerce subscriptions and bookings.

Why Choose This Plugin? It’s ideal for businesses that need a highly customizable rewards system.

5. WooRewards

WooCommerce Points and Rewards Plugins

Overview: WooRewards is an advanced plugin with multiple reward program options. It allows you to create temporary promotions, layered rewards, and more. The plugin is designed to maximize customer engagement.

Key Features:

  1. Multiple Programs:
    • Set up different reward programs for various customer segments.
    • Create seasonal or temporary promotions to boost sales.
  2. Referral Rewards:
    • Encourage customers to refer friends by offering points.
    • Share referral links via email or social media.
  3. Flexible Redemption:
    • Points can be redeemed for discounts, free products, or exclusive perks.
    • Customers can save points for bigger rewards.
  4. Customizable Design:
    • Personalize badges, messages, and other elements to match your brand.
    • Show rewards and achievements on user accounts.
  5. Detailed Tracking:
    • Monitor points earned and used by customers.
    • Analyze program performance with detailed reports.

Why Choose This Plugin? It’s perfect for businesses that want to offer unique and dynamic rewards programs.

How to Choose the Right Plugin

When deciding on a points and rewards plugin, consider the following:

  1. Business Goals:
    • Do you want to increase repeat purchases or referrals?
    • Choose a plugin that aligns with your objectives.
  2. Ease of Use:
    • Pick a plugin with a user-friendly interface.
    • Ensure it’s easy for customers to earn and redeem points.
  3. Budget:
    • Some plugins are free, while others offer premium features at a cost.
    • Consider the return on investment.
  4. Customization Needs:
    • If you need specific features, choose a plugin that offers flexibility.
    • Look for options like point expiration, gamification, and detailed reporting.
  5. Integration:
    • Ensure the plugin works seamlessly with WooCommerce and other tools you use.

Conclusion

A points and rewards system is an excellent way to enhance customer loyalty and increase your store’s revenue. By choosing the right WooCommerce plugin, you can create a tailored rewards program that aligns with your business needs. From simple point systems to advanced gamification features, the plugins mentioned above cater to a variety of requirements. Evaluate the features, ease of use, and compatibility with your store to select the best option. Once implemented, a well-designed rewards system can transform casual buyers into loyal customers, boosting both sales and brand recognition.

If you have any questions or need assistance setting up your WooCommerce points and rewards system, feel free to reach out to us. Visit our website at wpcustomify.com for expert support and guidance.

Benefits of Teachable WooCommerce integration

Teachable is Avante-Garde coaching creation and online courses. This tool allows businesses, creators, and entrepreneurs of all sizes to develop personalized coaching products and engaging online courses. You can manage these with quizzes, lectures, and videos.

You can collect your payments using Teachable. Hence, you can manage anything around author payments, taxes, and VAT.

You can easily host your course with these incredible tools.

What does Teachable Offers?

  • User Management
  • Course hosting
  • Checkout system
  • Affiliate management
  • Web development suite

WooCommerce is an open-source and flexible e-Commerce plugin with customizable options. It allows you to add features as well as functionalities to your online store. This plugin can help you to handle humungous endeavors like managing merchandise and other store activities.

Benefits of Teachable WooCommerce Integration

  • Usability

With Teachable WooCommerce integration, you can build your website and manage all the admin tasks. People with no technical knowledge can easily check for click navigation.

You get multi-selection options for making huge changes to the courses that you uploaded earlier.

  • Branding and identity

You can display your content uniquely by integrating Teachable with WooCommerce. You can tweak details more aesthetically.

  • Accepts Multiple Currencies

Any business can easily bestow the advantages and profits from Teachable WooCommerce integration. You can implement different types of gateways like Apple Pay, PayPal, Stripe, etc.

How to do Teachable WooCommerce Integration?

WP Customify can help to integrate Teachable with WooCommerce. You can host your online courses effortlessly. We can help to build your online shop easily. We have specialized experts in fixing technical glitches and complex errors.

WooCommerce Xero integration: How to enable it?

People love purchasing online rather than visiting physical stores nowadays. Hence, businesses must focus on investing time and resources in advent strategies. Leading WooCommerce support can provide you with better assistance and the right marketing techniques to rule the market.

Xero

It is an accounting software that is purely based on subscription. Xero was listed as the best accounting software by Business News Daily. Any users having access to Xero’s data file can complete their tasks easily.

Xero is a sumptuous platform and a great resource for growing your business online. You can approach different approaches with minimal effort with this indigenous platform. You can identify as well as analyze the drivers that are key financial and non-financial.

For staying abreast and taking benefit of tech-based opportunities, entrepreneurs are experimenting with every option. Most businesses seek cloud-based platforms like Xero.

WooCommerce

WooCommerce rules the online market because of customization options, low prices, splendid features, and functionalities, etc.

There are many WooCommerce Xero Integration plugins that can help in effectively managing financial data.

Is it easy to do WooCommerce Xero integration?

Yes, it is easy and quick to integrate WooCommerce with Xero. You can build invoices in Xero. You can share and track the data on shipping, items, tax, and discounts.

Setting up a Xero account is the first thing to integrate WooCommerce with Xero. Download the .zip file. Upload the plugin and hit the options such as “Install Now” and “Activate” for the WooCommerce Xero integration.

Tips to Integrate WooCommerce with Xero.

Choose the WooCommerce Xero integration plugin to integrate WooCommerce with Xero.

Sign into WooCommerce.

Choose Plugins on your WP account. Tap Add New for WooCommerce Xero integration.

Add plugin

Hit Upload Plugin and click the option “Choose File”.

Press the button “Install Now” for activating the extension.

Navigate to your Xero account, log in, and tap “New app”.

On the screen, you will see the “Xero Developer portal”.

New App

Make sure to fulfill all the prerequisites of the Xero app.

Add new app

Complete the form to integrate WooCommerce with Xero:-

  • App Name
  • OAuth 2.0 grant type
  • Application or Company URL
  • OAuth 2.0 redirect URI

Xero For Woocommerce

Hit the option Create app to integrate WooCommerce with Xero.

My Integration app

Copy the Client id and paste it. Browse the Xero app and hit the option Generate a secret. Navigate back to the Xero account and hit the option Save.

Browse to WooCommerce Xero Admin Panel and hit Save.

Activate the command Sign in with Xero!!

Sign in with Xero

You will be directed to the website login.xero.com.

Allow Access

Hit Connect for WooCommerce Xero integration.

Connect

Here, you will get confirmation of the status.

Woocommerce Xero Aurtrization

You are done with WooCommerce Xero integration.

A quick way to do MailerLite WooCommerce integration

MailerLite is a magnificent marketing tool that can help you to create aesthetic newsletters. You can easily boost your business using automated e-Commerce campaigns.

This tool allows you to win back the deals that are lost.

Why MailerLite?

You need to consider MailerLite because you can:-

  • Sync the account of MailerLite with newsletter customers and subscribers.
  • Store the details like the information related to orders, Name, email address, phone number, etc.
  • Build segments automatically to the subscriber group of MailerLite.
  • Monitor the revenues and emails and understand how it affects sales. Using this, you can optimize the content of email for better business.
  • Import the order information within seconds from an eCommerce store.
  • Integrate images, links, and text directly into the MailerLiter newsletter builder.
  • Send abandoned cart emails.
  • Send automated messages and offers.
  • Generate landing pages and pop-ups.

How to do MailerLite WooCommerce integration?

1. Hit the option “Integrations” from the menu of the dropdown for MailerLite WooCommerce integration. This you will find under the section MailerSupport.

Integrations

2. Hit “WooCommerce” and click the option “Use”.

Select Woocommerce

3. Browse the section E-commerce Integration and click the option “ON”.

On E-commerce Integration

4. Go to “Your account API key”. Hit “Copy” for MailerLite WooCommerce integration.

Account API Key

5. Visit the WP dashboard.

6. Hit “Plugins” for MailerLite WooCommerce integration and click “Add New”.

Install Plugin

7. On the search field type, “WooCommerce-MailerLite”.

8. Hit “Install” and then “Activate” to integrate MailerLite with WooCommerce.

Mailerlite Plugin

9. Hit “WooCommerce” and click “Settings”.

10. Click “Integrations”.
11. On the Mailer Lite API field, paste the API from 4 Step to integrate MailerLite with WooCommerce.
12. On the MailerLite API field, paste the API. Paste the details from Step No. 4. Click “Validate Key”.

Woocommerce settings

Mailerlite API key

13. Pick the subscribers group for the checkout process.
14. Implement “Consumer Key” as well as “Consumer Secret” to integrate MailerLite with WooCommerce.

Go to “WooCommerce” to get Consumer Key or Consumer Secret.

Hit “Settings” to integrate MailerLite with WooCommerce and then click “Advanced”. Choose “REST API” and navigate to “Key”.

Hit “Generate API key”. Copy as well as paste it.

15. Finally, click “Save changes”.

You are done with MailerLite WooCommerce integration.

WP Customify can help to do MailerLite WooCommerce integration. We are also adept in providing maintenance services. We are 24×7 available for WordPress and WooCommerce support.

The simple way to do Flodesk WooCommerce integration

Email marketing is one of the prudent strategies employed by businesses nowadays. This strategy is a great source for designing and building alluring emails. You can easily intimidate your users.

Flodesk

The founders, Rebecca Shostak and Martha Bitars launched this tool in 2019. It is best for those who are naive in marketing or do not hold any technical skills/ experience.

This tool is known for its great conversion rates. It has alluring templates with a simple interface. Flodesk is best for like-minded creatives to take a successful turn. This platform is the right inquisitive among various innovative platforms.

WooCommerce

It is the best eCommerce platform that offers flexibility and quantified results. WooCommerce is enormously used by businesses because of its security features. It allows customization and modification to the complete store.

Flodesk WooCommerce integration

WooCommerce is a cost-effective solution with advanced inventory management, built-in features, etc. Flodesk WooCommerce integration is the best state of action to connect with the audiences aptly. Hiring WooCommerce support will make things simpler.

Why opt for Flodesk WooCommerce integration?

You need to opt for Flodesk WooCommerce integration for the following reasons:-

  • Develop consistent emails

With Flodesk WooCommerce integration, you can do more than marketing. You can build styled emails easily. You can also easily build layouts.

  • Connect savvy email sections for the online store

Flodesk has a savvy framework. It does not penalize businesses if they have subscribers from varied segments. You can target large audiences to be your email subscribers. You can give them access to your newsletters, coupons, or downloads.

Flodesk utilizes a savvy framework that will not penalize you if you have email subscribers from different segments.

You can send personalized emails to your customers based on their purchasing trends.

  • Per item emails

Assuming your businesses sell actual and computerized products from your online store, follow-up messages are the best way.

Businesses must ensure to send follow-up emails the moment the product is delivered at the customer’s place.

  • Automated email workflows

Flodesk WooCommerce integration allows you to send limitless follow-up email series.

  • Track email marketing analytics

You can simply track the email analytics of your business. It allows you to check if the email marketing program of your business is properly functioning or not.

Since Flodesk segregates confounded analytics such as click-through rates. You can check the order details in a visual and understandable format.

The simple way for Flodesk WooCommerce integration

1. Follow the guidelines for Flodesk installation

Most business owners avoid this. Ensure to follow the guidelines (offered) to add codes to your website’s header.

2. Build the plugin form

Make sure to design the form to integrate Flodesk with WooCommerce. Also, complete all the fields like First Name, Email Address, etc.

You can incorporate as many fields as you wish to ask your customers. Include a checkbox like “by checking this box” for Flodesk WooCommerce integration.

       3. Building form in Flodesk

Try creating the form in Flodesk. Rightly, you will be getting plenty of choices for building forms.

      4. Creating hidden field

Do not stop anywhere in the middle of the Flodesk setup until you get to the pasting code. Hit “Advanced Options“. Pick the option “Get Genesis eNews Snippets” for Flodesk WooCommerce integration. You can hide or conceal any fields in this step.

You can manage this in two ways:-

  • Ninja Forms
  • Gravity Forms

Click the option “Advanced” in Gravity Forms. The box, “Default Value” will be automatically displayed in Ninja Forms.

From Action

Hit the button “Copy” to copy the URL. Technically, you need only value=”reallylongstringoflettersandnumbers”.

This field constrains copying the complete URL. Hence, ensure that you cut out things other than strings that are near the “value= part”.

Hit “Save” for Flodesk WooCommerce integration.

      5. Building Webhook

Webhook allows sending data via a form. The process of building webhooks differs in Ninja Forms and Gravity Forms. Let’s check the process:-

PROCESS TO BUILD WEBHOOK

  • Gravity Forms

You can opt for a premium/ basic license for pulling webhooks in Gravity Forms. Hit “Settings” to integrate Flodesk with WooCommerce. Then, hit “Confirmations” and select “Redirect”.

Hit “Pass Field Data Via Query String“. Include capitalization for Flodesk WooCommerce integration.

  • Ninja Forms

Opt for a professional subscription for accessing webhooks. You get multi-page forms, layout, and conditional forms in professional subscriptions.

After purchasing the license, upload the webhook add-ons to the WP site. Do not forget to activate it. Refresh the page after activating.

Click the option “Emails & Actions” for Flodesk WooCommerce integration. Hit the sign “+” for adding a new field. Copy and paste it from the page of Flodesk.

Make sure the remote URL is https://form.flodesk.com/submit and post the remote technique. Ensure the capitalization (such as using camel case) matches Flodesk on the key side.

Click “Done” for Flodesk WooCommerce integration and hit “Publish”.

Ninja Forms vs Gravity Forms: Argumentative Topic

You have to build the URL yourself in the case of Gravity Forms. On the other hand, the sections are managed automatically in Ninja Forms.

Make sure that you do not leave spaces for Flodesk WooCommerce integration.

Tap “Save Confirmation” to integrate Flodesk with WooCommerce.

  • 6. Test

Testing is vital to check if the process is simpler in Flodesk WooCommerce integration.

7. Styling the form

Add the shortcodes to forms if you are creating one. You can ignore this step if this is not your first form.

Final Note

Flodesk WooCommerce integration is a fine way to manage on-patterns at the present time. It will allow sending automated emails to your potential clients based on the customer’s interaction with your online store.

×

DO YOU NEED HELP?

24x7wpsupport
Join the Course