Call Us Toll Free - US & Canada : +1-(888) 602-0119

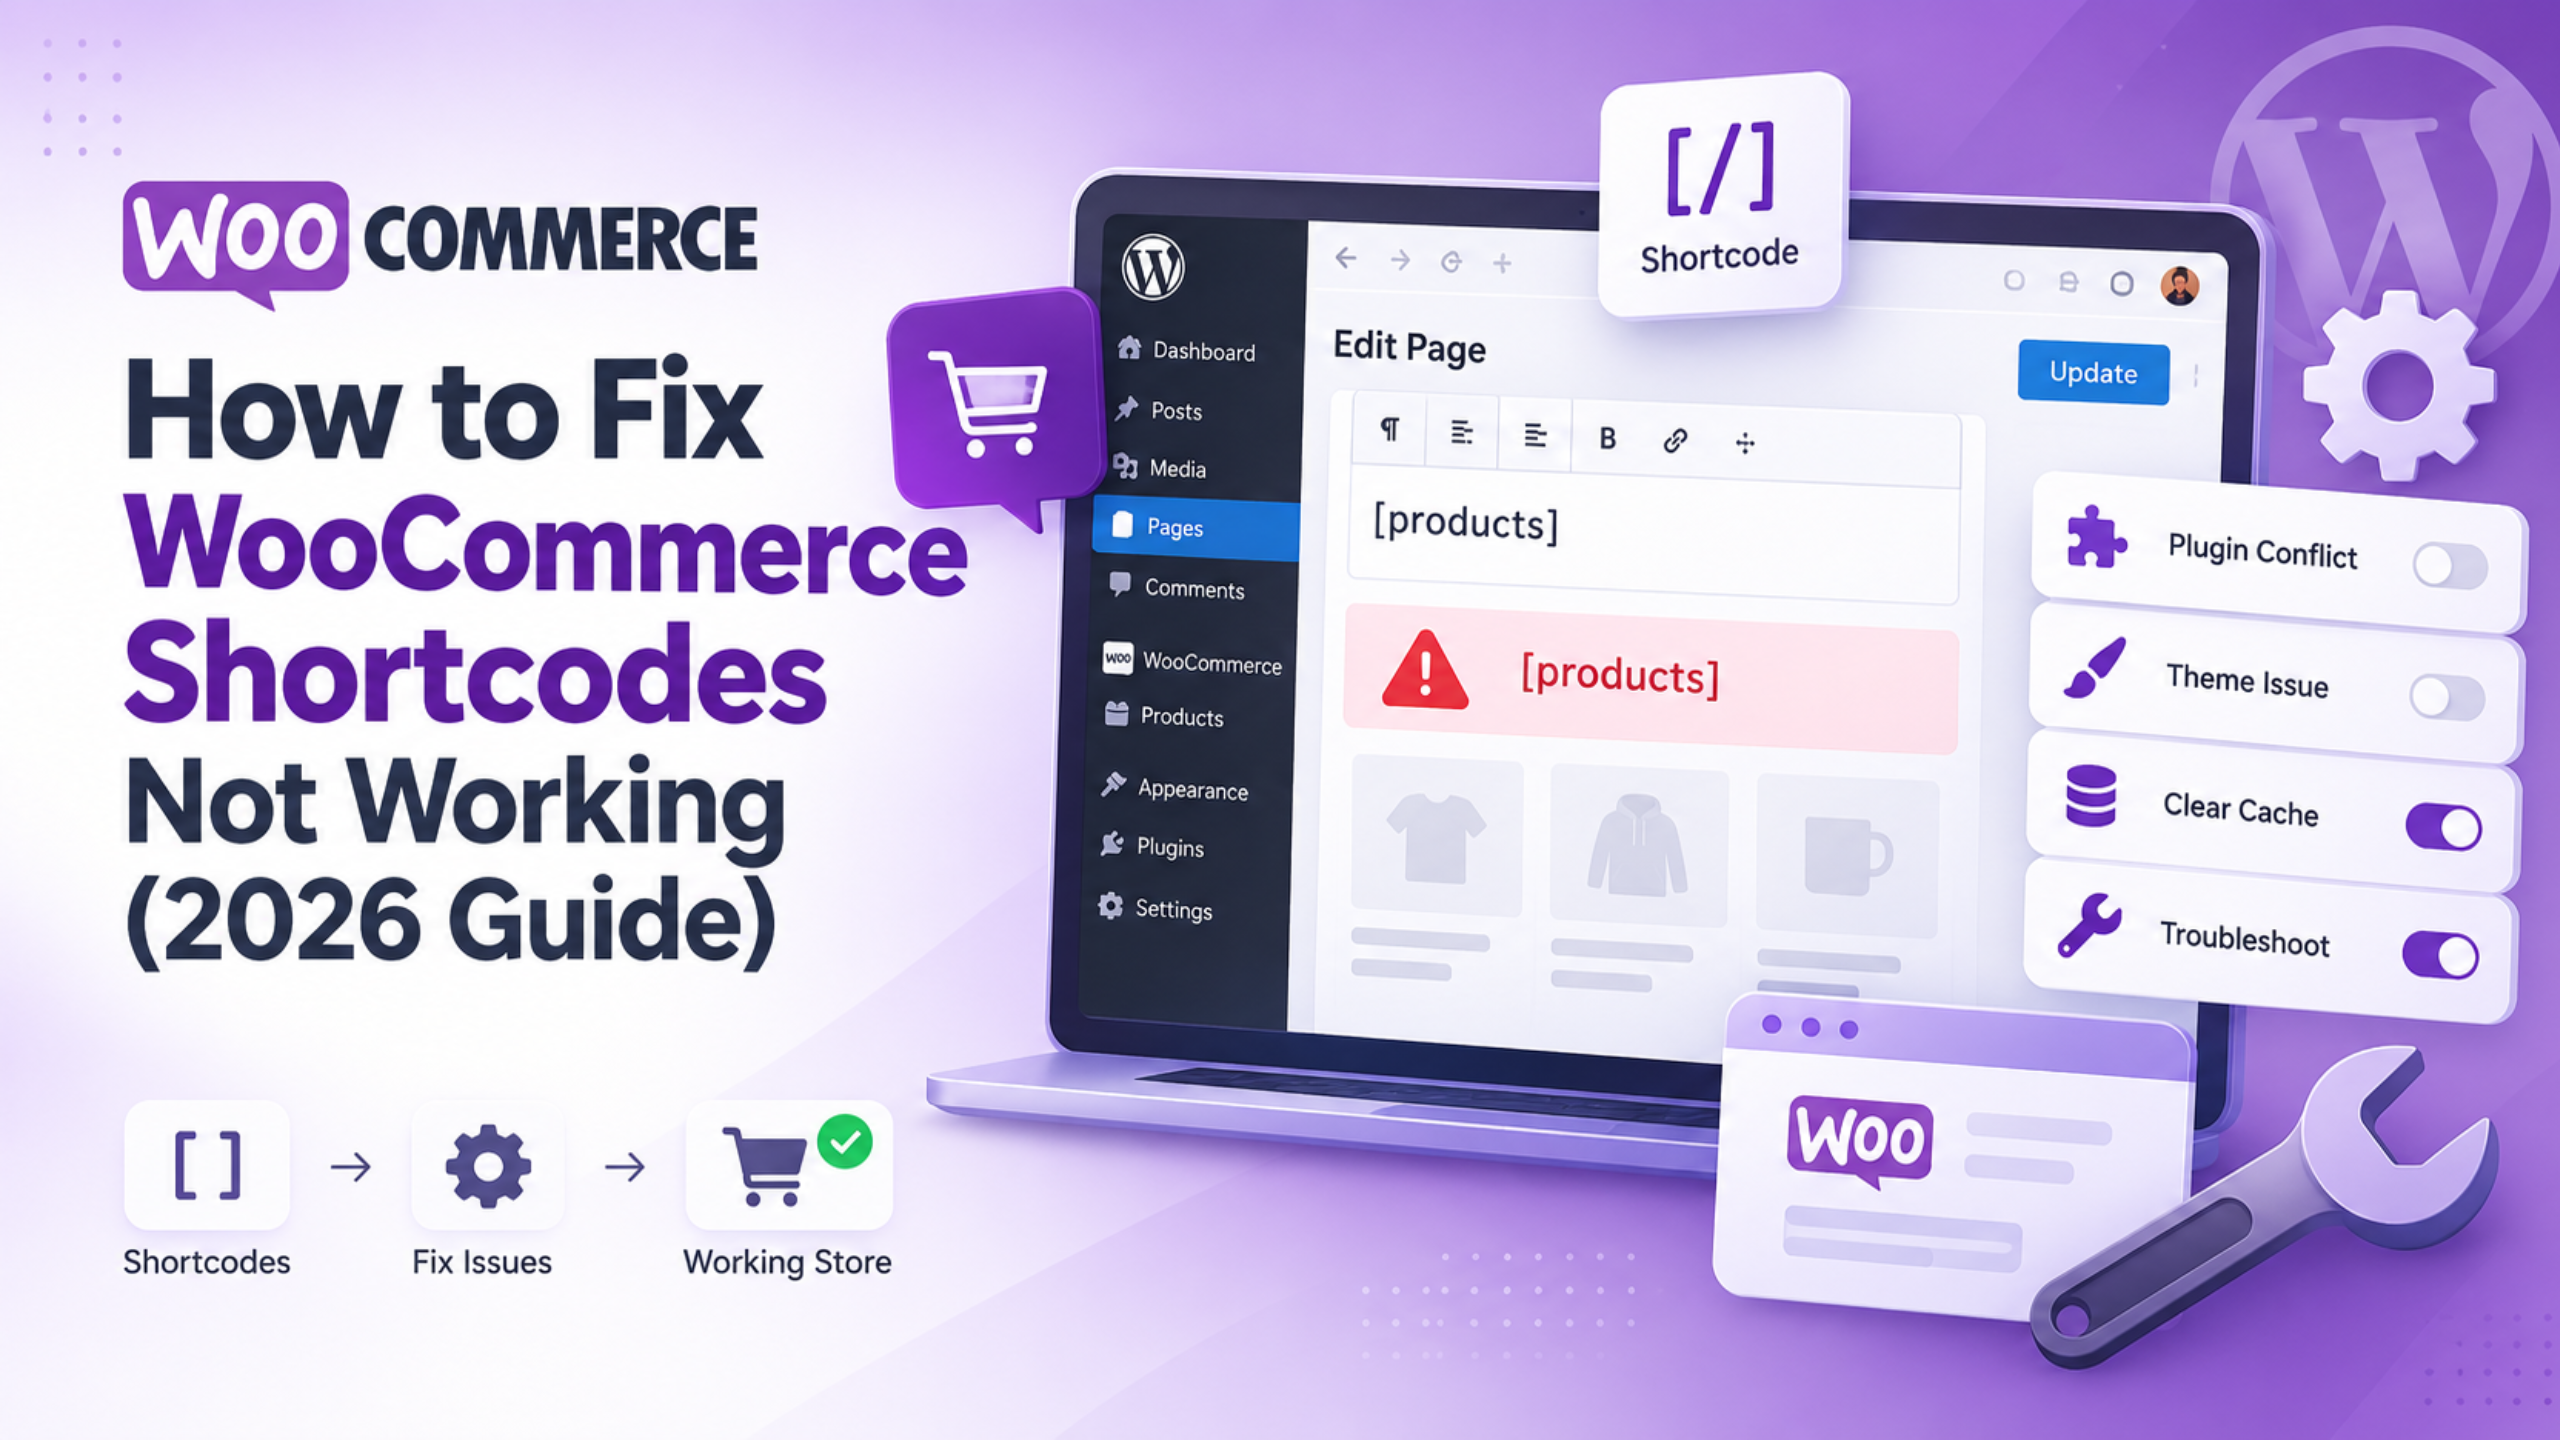
How to Fix WooCommerce Shortcodes Not Working (2026 Guide)

Introduction

WooCommerce shortcodes help store owners place products across many pages. They can show product grids, categories, carts, and account areas. However, even a small error can stop proper shortcode output.

When WooCommerce shortcodes not working becomes an issue, start carefully. Do not change several settings at the same time. First, check what visitors actually see on the page. The visible result often points toward the real cause.

A shortcode may appear as plain text on-screen. It may also disappear and leave an empty space. Sometimes it works but displays completely different products. These problems may look similar at first. However, each one needs a different troubleshooting approach.

If you are new to these commands, our guide to using WooCommerce shortcodes explains how they work and where they can be used.

Identify Your WooCommerce Shortcode Problem First

Open the affected page in a private browser window. This shows the page much like a normal customer sees it. Then check how the WooCommerce shortcode behaves.

Shortcode Appears as Raw Text

You may see something like [products limit="4"] on-screen. This usually means WordPress did not process the shortcode. The problem often comes from its placement inside the editor.

The shortcode itself may still be correct. WordPress simply treats it like normal written content. This is common when using unsuitable editor blocks.

WooCommerce Shortcode Shows Nothing

Another common problem is a completely empty content area. The shortcode disappears, but no products replace it.

This can happen when no products match its conditions. Product status or catalog visibility may also affect results. A missing shortcode registration can create similar blank output.

Shortcode Displays the Wrong Products

A WooCommerce product shortcode may run but show unexpected items. It might display too many products or incorrect categories.

This usually points toward incorrect shortcode attributes. Missing quotes can also change how WooCommerce reads filters. Product sorting settings may produce unexpected results as well.

Check the WordPress Block Holding Your Shortcode

Gutenberg includes a dedicated Shortcode block for this purpose. Using this block helps WordPress process shortcode commands correctly.

Code and Preformatted blocks behave very differently. They are designed to display code as visible content. Therefore, a shortcode placed there can appear as plain text. The Custom HTML block may also behave differently with shortcode processing.

Open the page editor and select the shortcode area. Check which block contains the shortcode. Replace an unsuitable block with the Shortcode block.

Also inspect every quotation mark inside shortcode attributes. Copying content from documents can create curly quotation marks. These characters may look correct but break shortcode parsing.

When unsure, type the shortcode again manually. Check every bracket, quote, and attribute before testing again.

How to Fix WooCommerce Shortcodes Showing Nothing

Start with a simple shortcode on a blank page:

[products limit="4"]

If products appear, the original shortcode likely contains an error. If nothing appears, continue checking the store setup.

Check Whether WooCommerce Is Active

Open Plugins > Installed Plugins inside WordPress. Confirm that WooCommerce is installed and active.

WooCommerce provides its own shortcode functions. If the plugin is inactive, those functions cannot work normally.

Check Product Publication Status

Next, review the products used by your shortcode. Products should normally have a Published status.

Draft, private, or scheduled products may not appear publicly. Always check product status before changing shortcode attributes.

Check WooCommerce Catalog Visibility

Catalog visibility can also affect shortcode output. A hidden product may not appear in normal product displays.

Check whether each product should appear in search results, shop pages, or both. If needed, read our guide about how to hide products in WooCommerce. It explains how catalog visibility affects product access.

Verify Product Category Slugs

Category filters require the correct category slug. The visible category name may not work as expected.

For example, use:

category="winter-coats"

Avoid using:

category="Winter Coats"

Finally, confirm products match every filter used by the shortcode. Check category, featured status, sale status, SKU, and attributes.

Fix WooCommerce Shortcodes Showing the Wrong Products

Some shortcode problems do not create blank pages. Instead, the shortcode works but shows the wrong products.

When WooCommerce shortcodes not working correctly involves product results, inspect the attributes first. Small syntax mistakes can completely change the final product display.

Check Shortcode Syntax Carefully

One missing quote can change how WooCommerce reads a command. The shortcode may still run, but its output becomes incorrect.

Check each opening and closing quotation mark carefully. Also confirm every shortcode attribute uses the correct spelling.

Understand Common Product Shortcode Settings

The limit value controls how many products appear. The columns value controls the product grid layout.

The orderby option controls how products get sorted. The order option controls ascending or descending order.

If these settings are missing, default behavior may apply. This often explains unexpected product numbers or sorting.

Check Conflicting Product Filters

Product filters should also be combined with care. Options like on_sale, best_selling, and top_rated target different product groups.

Adding too many filters can create confusing results. Keep the query simple while testing the problem.

Display Featured Products Correctly

For featured products, a common format is:

[products visibility="featured"]

Product SKUs also need an exact match. Spaces, characters, or leading zeros can affect the result.

Start testing with a simple shortcode:

[products limit="4"]

Then add one attribute at a time. Test after each change. This process quickly identifies the setting causing trouble.

Check Legacy WooCommerce Shortcodes

Older WooCommerce stores often contain shortcodes added years ago. Some pages may still use formats from older tutorials.

You might find shortcode formats such as [featured_products], [sale_products], or [recent_products]. Older content may also contain [best_selling_products] or [top_rated_products].

Modern product displays can often use the main [products] shortcode instead.

For featured products, use:

[products visibility="featured"]

For sale products, use:

[products on_sale="true"]

For recent products, use:

[products orderby="date" order="DESC"]

Do not only check recently created pages. Older shortcodes may remain inside landing pages and widgets.

They can also appear inside sidebars, footer areas, category descriptions, or old page-builder layouts.

Check Theme and Plugin Shortcode Changes

Not every WordPress shortcode belongs directly to WooCommerce. Themes and plugins can register their own shortcode commands.

If you remove the related plugin, that shortcode may stop. Changing themes can cause the same problem with theme-specific shortcodes.

Think about when the problem first appeared. Did you recently change your WordPress theme?

Was a plugin removed, replaced, or updated? Did the problem begin after changing the PHP version?

The timing of the failure provides a useful troubleshooting clue. Check recent changes before making unrelated adjustments.

Check Where the WooCommerce Shortcode Is Used

A valid shortcode may fail inside certain website areas. Its location can matter as much as its syntax.

Post Excerpts

WordPress excerpts may remove or ignore shortcode output. A shortcode working inside full content may fail inside listings.

Email Templates

WooCommerce email content follows a different rendering process. Standard page shortcodes should not be expected everywhere inside emails.

Product Category Descriptions

Category description behavior can depend on the active theme. Test the shortcode before relying on this location.

Page Builders

Elementor, Divi, WPBakery, and other builders use special content modules. Choose their dedicated shortcode element when one is available.

Custom WordPress Templates

A custom theme template may process content differently. This can explain why one shortcode works elsewhere.

When a shortcode fails only on one template, compare both templates. That difference can reveal the real issue quickly.

Fix WooCommerce Shortcodes Not Working on Cart and Checkout Pages

Product shortcodes are only one part of WooCommerce. Core store pages also use special store functions and shortcodes.

These areas include Cart, Checkout, My Account, and order tracking. Problems here require more careful testing.

Check Important WooCommerce Page Shortcodes

The Cart page can use:

[woocommerce_cart]

The Checkout page can use:

[woocommerce_checkout]

The account area can use:

[woocommerce_my_account]

Order tracking can use:

[woocommerce_order_tracking]

These store pages work differently from normal product displays. They also rely on the correct WooCommerce page setup.

If these pages are already causing wider problems, review our guide about WooCommerce cart and checkout pages not working.

Check WooCommerce Page Assignments

Open WooCommerce > Settings > Advanced inside your dashboard. Check the assigned Cart, Checkout, and My Account pages.

A deleted or wrongly assigned page can create strange behavior. Customers may see blank pages or incorrect store content.

Duplicate store pages can also cause confusion. WooCommerce follows the pages assigned inside its settings.

A broader WooCommerce checkout process issue can sometimes look like a shortcode failure. Check the complete checkout flow when the shortcode itself looks correct.

Check Problems That Look Like WooCommerce Shortcode Errors

Sometimes, the shortcode is not the real problem. Caching can make a corrected page still appear broken.

Caching Problems

A page cache can store old shortcode output. Hosting and CDN caching can do the same.

Browser cache may also display outdated page content. Clear each cache layer before testing the shortcode again.

WooCommerce Session Problems

Cart and checkout pages use changing customer information. They should not behave like normal static pages.

Aggressive caching can interfere with dynamic store sessions. This may create symptoms that resemble shortcode problems.

Plugin Conflicts

Product filters, page builders, and optimization plugins can change queries. WooCommerce extensions may also modify product results.

Theme Conflicts

Some themes modify WooCommerce product queries or template output. These changes can affect shortcode results on selected pages.

Custom PHP Problems

Custom code can also change shortcode behavior. Check theme functions and code snippet plugins carefully.

How to Troubleshoot WooCommerce Plugin Conflicts Safely

Before conflict testing, create a current website backup. Include both website files and the database.

For active stores, a staging website is much safer. It provides a separate place for troubleshooting without disturbing customers.

On staging, disable non-essential plugins one at a time. Test the affected shortcode after each plugin change.

If the shortcode starts working, investigate the last disabled plugin. Re-enable other plugins to confirm your findings.

Theme testing can follow the same approach. Test a compatible default theme on staging.

If the shortcode starts working there, inspect your active theme. Avoid testing major changes directly on a busy store.

Test WooCommerce Shortcodes After Making Changes

Never assume a shortcode works because administrators can see it. Customers may receive different results from logged-in users.

Log out and open the page privately. This provides a cleaner view of actual customer behavior.

Clear WordPress, hosting, CDN, and browser caches. Then reload the page and test the shortcode again.

Check desktop and mobile layouts too. Product grids can behave differently on smaller screens.

You can also review the page source. Search for the shortcode brackets inside the generated source.

If shortcode text remains visible, WordPress did not process it. If it disappears without output, no content was returned.

Finally, verify the products themselves. Check count, category, sorting, stock, and catalog visibility.

How to Prevent WooCommerce Shortcodes From Breaking

Fixing a shortcode solves the current problem. Preventing another failure protects your store for much longer.

Regular checks can reduce many common shortcode problems. Updates, plugins, themes, and page edits can all affect output.

Keep WordPress and WooCommerce Updated

Keep WordPress, WooCommerce, themes, and plugins on supported versions. Updates often include security and compatibility improvements.

However, avoid major updates without testing them first. Changes can affect themes, plugins, or custom website code.

Use a staging site before installing major changes. Then review product grids and important store pages.

Avoid Old or Unsupported Shortcodes

Older stores may contain shortcodes created many years ago. Some depend on old plugins or removed theme features.

Review old landing pages and product sections regularly. Replace outdated shortcode formats when a supported option exists.

Keep your shortcode syntax simple. Too many filters make later troubleshooting much harder.

Keep Category Slugs and SKUs Stable

Category slugs and product SKUs may appear inside shortcode filters. Changing them can affect existing product displays.

If you change either value, review related shortcodes immediately. This prevents product sections from becoming unexpectedly empty.

Check Shortcodes Before Removing Plugins or Themes

Before removing software, determine whether pages depend on its shortcodes. Search pages, widgets, templates, and older content.

Theme changes need the same care. Theme-specific shortcodes can disappear after activating a different design.

Keep WooCommerce Core Pages Properly Assigned

Review Cart, Checkout, and My Account page assignments regularly. This is especially important after migrations or redesigns.

Also avoid incorrect caching on dynamic store pages. Cart and checkout information changes between customer sessions.

Test Important Pages After Major Changes

Test shortcode pages after WordPress and WooCommerce updates. Also test after theme, plugin, PHP, or hosting changes.

Review product sections, Cart, Checkout, and My Account pages. Check both desktop and mobile versions.

When testing checkout changes, following a full WooCommerce checkout testing process helps confirm the customer journey works from cart through order completion.

Quick WooCommerce Shortcode Troubleshooting Checklist

When a shortcode fails, begin with the simplest checks. Confirm WooCommerce is active and the shortcode syntax is correct.

Check whether the shortcode sits inside the correct block. Review all quotation marks, brackets, and shortcode attributes.

Next, check product publication and catalog visibility settings. Make sure category slugs and SKUs match real products.

Review whether old shortcode formats are still being used. Check recent plugin, theme, PHP, or WooCommerce changes.

Then clear every available cache layer. Test the page again while logged out.

If the problem remains, compare it with a working page. Differences in templates or plugins can provide useful clues.

When WooCommerce Shortcodes Not Working Needs Technical Troubleshooting

Some shortcode problems go beyond standard WordPress settings. A shortcode may work everywhere except one custom template.

This can happen when theme code changes WooCommerce queries. Plugin filters may also change which products get returned.

Custom PHP inside functions.php can affect shortcode output. Code snippet plugins can create similar conflicts.

WordPress debug logs may reveal hidden errors. PHP error logs can also show compatibility or code failures.

The WooCommerce status report is another useful place to check. It can reveal template overrides and environment information.

Hooks and filters deserve attention when product results appear incorrect. Custom query changes may also require code-level review.

If standard troubleshooting fails, avoid changing random PHP code. Controlled testing is much safer for an active store.

Conclusion: Fix and Prevent WooCommerce Shortcodes Not Working

WooCommerce shortcodes not working can mean several different things. The shortcode may appear as text, return nothing, or show incorrect products.

The best fix starts with identifying that exact symptom. From there, check block placement, syntax, product status, and visibility.

For product shortcodes, review categories, SKUs, filters, and sorting settings. Older shortcode formats should also be checked on long-running stores.

Cart and checkout shortcode problems need extra care. Correct page assignments, customer sessions, and caching all matter there.

Plugin and theme conflicts can make valid shortcodes fail unexpectedly. Testing changes on staging helps protect the live shopping experience.

Prevention is just as important as fixing current problems. Keep your software updated and review shortcode pages after major changes.

Always test important pages while logged out. Check both desktop and mobile views before considering the problem solved.

A methodical approach makes shortcode errors much easier to diagnose. It also reduces the chance of creating new store problems.

For more practical WooCommerce guides and troubleshooting resources, explore WP Customify.

How to Fix WooCommerce Stock Not Reducing After an Order (2026 Guide)

Introduction

WooCommerce stock not reducing after an order is one of the fastest ways to oversell a product. The order lands. The money arrives. But the quantity on the product page never drops. So the next shopper buys an item you no longer have. This problem has several different causes, and they need different fixes. Guessing wastes an afternoon. Start with the check below instead. It tells you in about three minutes which branch you are on.

Run This Three-Minute Check First

Open any recent order in WooCommerce → Orders. Scroll to the Order notes box on the right. You are looking for one line.

WooCommerce writes a note that begins “Stock levels reduced:” whenever it takes stock off a product. The note names the item and shows the old and new counts. That note is the truth. Everything else on screen can lie to you.

If the note is there, stock did reduce. Your real problem is display. Something is showing a stale number, and you can skip straight to the caching section below. If the note is missing, stock never reduced at all. Keep reading in order.

Now check two more things on the same screen. First, the Status field at the top left. Note what it says. Second, whether this order was placed by a customer or created by you in the dashboard. Admin-created orders behave differently, and that catches a lot of people out.

Do this on three or four orders, not one. A single odd order tells you little. A pattern tells you everything. If every order missing the note shares one status, you have found your cause already.

Pick a mix of orders for this test. Include one paid online, one paid on delivery, and one you entered by hand. Include a variable product too, such as a size or colour option. Those four cover almost every path stock can take through a store. Write down which ones had the note. That short list points you at the right section below.

Know When WooCommerce Actually Reduces Stock

Stock does not come off the moment a customer clicks Place Order. It comes off when the order reaches a status that counts as paid or held.

WooCommerce reduces stock when payment completes, and when an order moves to Processing, Completed, or On hold. It does not reduce stock for an order sitting in Pending payment. It does not reduce stock for a Failed order either. That is by design. An unpaid order should not lock away your inventory.

The reverse also happens. Move an order to Cancelled, Pending payment, or Failed, and WooCommerce puts the stock back. Many owners see this as a bug. It is not.

So if your orders sit at Pending payment, the count is behaving correctly. Your gateway is not confirming payment. That is a payment problem wearing a stock costume. Our guide to errors preventing order completion covers why orders stall at that step.

There is one more rule worth knowing. WooCommerce marks each order once stock has been taken. It stores a flag so the same order can never reduce stock twice. This protects you from double deductions when a gateway sends two notifications. It also means a manual status change on an old order will not reduce stock again, because the flag is already set.

Turn On Stock Management in Both Places

Stock tracking has two switches. Missing either one produces the same symptom.

The first is store wide. Go to WooCommerce → Settings → Products → Inventory. Tick Manage stock at the top. With this off, WooCommerce keeps no counts at all. Products can only be marked in stock, out of stock, or on backorder. No number will ever move.

The second switch is per product. Edit the product, open the Inventory tab in the Product data box, and tick Manage stock?. A Quantity field appears once you do. Enter your real count and update.

Here is the part people miss. The store-wide switch does not turn on tracking for products you created earlier. Each product keeps its own setting. So a store can track ten products correctly and ignore forty others. Use the Products list to check quickly. The Stock column shows a number for tracked items and a plain “In stock” label for untracked ones. Any product showing the plain label is not being counted.

Fix them in bulk. Tick the products, choose Edit from the Bulk actions menu, and apply. Set Manage stock? to Yes, then set the quantity per product afterwards.

Fix WooCommerce Stock Not Reducing on Variable Products

Variable products have a third layer, and it trips up nearly everyone.

A variable product can track stock at the parent level or at the variation level. These are separate settings. Ticking Manage stock? on the parent tracks one shared pool for every variation. Ticking it inside a single variation tracks that variation on its own.

Open the product and click the Variations tab. Expand a variation. You will see its own Manage stock? checkbox. If that box is clear, the variation has no count of its own. It falls back to the parent. And if the parent is not tracking either, nothing reduces anywhere.

Watch for a half-configured setup. Some variations tracked, others not, is the most confusing case of all. Sizes that sell out correctly sit beside sizes that never move. Owners then chase a plugin conflict that does not exist. Expand every variation and check each one.

Bulk editing helps here too. Above the variation list is a dropdown of bulk actions. Choose Toggle “Manage stock” to switch them all at once, then set quantities. If your variations misbehave in other ways as well, see our guide on WooCommerce product variations not working.

Manual, Imported and Edited Orders Behave Differently

Orders you create yourself do not touch stock on their own. This surprises almost every store owner the first time.

Add an order in the dashboard, add line items, set it to Processing, and the counts stay put. WooCommerce waits for you to say so. Open the order, find the Order actions box, and choose Reduce stock. Click the arrow to run it. A “Stock levels reduced:” note then appears, and the counts move.

Phone orders and wholesale orders are the usual source of drift here. A shop can look perfectly configured and still creep out of sync, purely because staff never run that action.

Imported orders behave the same way. A CSV import writes the order record without firing the normal status hooks. So no stock changes. If you migrated a store recently, expect your counts to be wrong from day one. Do a physical count and reset the numbers rather than trying to replay the history.

Editing line items on an existing order is the third trap. Change a quantity after stock was already reduced, and the adjustment is not always clean. Check the notes afterwards. If the numbers look wrong, correct the product quantity by hand. It is faster than tracing the edit. Exporting your orders first makes that audit easier, and our guide on exporting orders from a WooCommerce store shows how.

The Count Reduced but the Page Shows the Old Number

This is the branch you reach when the order note is present. Stock moved. The page did not.

Check the truth first. Open the product in the dashboard and read the Quantity field. If that number is correct, your data is fine and only the front end is stale.

Page caching is the usual culprit. A cached product page holds whatever count was true when it was saved. Clear your cache and reload in a private window. Many hosts run caching at the server level as well, so clearing a plugin cache alone may not be enough. Clear both.

Object caching causes a quieter version of the same thing. It stores the product record itself, so even a fresh page render reads an old number. Flush the object cache after any manual stock edit.

A content delivery network adds a third layer. Purge it last, after the other two, or you will simply pull the stale copy back in. If a page still shows the old count after all three, check whether your theme is printing a hard-coded stock message.

Shop and category pages can lag behind single product pages too. They are cached separately and often for longer. If only your listings look wrong, our guide on a WooCommerce shop page not showing products covers how those archives are built.

Settings That Make Stock Look Wrong When It Is Not

Three settings on the Inventory screen change what customers see without changing the count itself.

Hold Stock (minutes) holds inventory for unpaid orders. When the limit passes, WooCommerce cancels the pending order and releases the stock. So a count can appear to bounce back up on its own. That is the hold expiring, not a fault. Note that this applies only to orders in Pending payment, not orders On hold.

Out Of Stock Threshold sets the count at which an item is treated as sold out. Leave it at zero and a product stays buyable until it hits zero. Set it to two and the product reads out of stock while two units remain. Stock is still reducing correctly. The label just changes earlier.

Stock Display Format controls what shoppers see. Choose Never show amount and the page shows only “In stock”. The number is still moving behind the scenes. Set it to Always show stock while you are testing, so you can watch counts change in real time.

Backorders are the last piece. If a product allows backorders, it keeps selling past zero and the count goes negative. Customers then see a “Available on backorder” label. Nothing is broken. Turn backorders off in the product Inventory tab if you do not want that.

Get Expert Help With Your WooCommerce Store

Overselling costs more than the refund. It costs the customer. Someone pays for an item, waits, and then gets an apology email instead of a parcel. That is the sale you do not get back. So it is worth fixing properly rather than patching one product at a time.

Most stores in this position have two or three causes stacked together. A few untracked products. A batch of phone orders that never reduced. A cache holding old numbers on top. Fix one and the symptom half improves, which makes the remaining causes harder to see. That is why a full audit beats a quick guess.

Our team traces the whole path for you. We check every product and variation setting, confirm the order statuses your gateway actually sets, review the caching layers, and reconcile your counts against a real stock take. Then we set up the alerts so you hear about low stock before a customer does.

If your inventory numbers have stopped making sense, we can help. Visit WP Customify and tell us what your order notes show. We will find the cause, correct the counts, and make sure the next order reduces stock the way it should.

How to Fix WooCommerce Product Variations Not Working (2026 Guide)

A store with WooCommerce product variations not working loses sales quietly, and the cause is nearly always one of five things. Four are setup mistakes. One is a script conflict. They look identical from the shop page, which is why people fix the wrong one. This 2026 guide starts with a two-minute check. It tells you which fault you have. Then it gives you the exact steps for that fault, and what to try when the obvious fix does nothing.

Run This Two-Minute Check First

Open the product page as a customer would. Use a private browser window. What you see there tells you the cause.

No dropdowns at all. The page shows one plain price and a normal Add to cart button. Your product is not set as a Variable product, or the attribute is not marked for variations.

Dropdowns appear but stay empty. The select boxes are there. They contain nothing to choose. Your attribute has no terms assigned to this product.

Dropdowns work, but no price or button appears. You pick a size and colour. Nothing loads underneath. Your variations have no price set.

You get an error message. Note the exact wording. Two different messages point at two different faults, covered in their own sections below.

Nothing responds at all. The dropdowns are dead. Selecting a value changes nothing on screen. This is a broken script, not a setup problem.

Pick the line that matches. Then read only that section. Skipping this step is how a ten-minute fix turns into a whole morning.

Why WooCommerce Product Variations Are Not Working After Setup

Variations need four separate things to be true. Miss any one and the front end goes quiet. Most stores miss the same one.

Open the product and look at the Product data dropdown. It must read Variable product. Simple product is the default, and it cannot hold variations at all. Change it and the tabs on the left change with it.

Next, open the Attributes tab. Add your attribute, then add its values. Now find the checkbox labelled Used for variations. Tick it. Click Save attributes and wait for the panel to reload. This checkbox is the single most missed step in WooCommerce. Without it the attribute is treated as plain product information. It shows in the description table and does nothing else.

Then open the Variations tab. Attributes alone create nothing. You must generate the combinations. Use Generate variations to build them all, or add them one at a time.

Finally, give every variation a price. This is the fourth condition and the quietest one. A variation without a price is treated as unavailable. It will not appear, and it throws no warning.

Free items trip people up here. Leaving the price box empty does not mean free. Type a zero instead. Then the variation is valid and customers can add it to the cart.

Fix Variations That Never Appear on the Product Page

You saved everything and the dropdowns are still missing. Work through these three checks in order.

Check that the attribute terms are on this product

Global attributes behave differently from custom ones. A global attribute lives at Products > Attributes and holds its own list of terms. Adding the attribute to a product does not add its terms. You have to select them in the Attributes tab, on that product. An attribute with no terms selected renders an empty dropdown or none at all.

Custom attributes work the other way. Their values are typed into the product itself, separated by a vertical bar. They are quick to set up but cannot be filtered or reused. Convert them to global attributes if you plan to grow the catalogue.

Check the variation stock status

Open the Variations tab and expand each row. Look at Stock status. A variation set to Out of stock still shows in the dropdown. It just cannot be bought. If every variation is out of stock, the whole product reads as unavailable. Managed stock is stricter. A variation with a quantity of zero and backorders off behaves the same way.

There is a setting worth knowing here. Under WooCommerce > Settings > Products > Inventory you can hide out of stock items from the catalogue. Turn that on and sold-out variations vanish from the dropdowns rather than showing as unavailable.

Check the product is actually visible

If the product itself is hidden, nothing on it will render. Look at Catalog visibility in the Publish box. Also confirm the product is Published, not draft or private. A scheduled product behaves like a draft until its date arrives, and it gives no warning on the front end. Our guide on how to hide products in WooCommerce explains what each visibility option really does. If whole sections of your catalogue are missing, read our fix for the WooCommerce shop page not showing products instead.

Fix “No Products Matched Your Selection”

The full message reads “Sorry, no products matched your selection. Please choose a different combination.” It means the customer picked a set of options that has no matching variation.

Sometimes that is correct. You may genuinely not stock a red item in extra large. More often it is a gap you did not intend.

Go to the Variations tab and count. Two attributes with four values each need sixteen variations for full coverage. If you built ten, six combinations are dead. Every dead combination shows this message.

There are two ways to close the gaps. Regenerate all combinations, then delete the ones you do not sell. Or use the Any option. Setting an attribute to Any on a variation makes it match every value of that attribute. One variation with Any Colour and size Large covers every colour in Large. This keeps large catalogues manageable.

Watch for a subtler cause. If you edit or rename attributes after building variations, the links break. The variation still exists but points at a value that is gone. Rebuild the variations after any attribute change. This is the most common reason a working product suddenly stops working.

Fix “Please Select Some Product Options”

This message appears on Add to cart. The full text is “Please select some product options before adding this product to your cart.” WooCommerce is saying it did not receive a full selection.

The honest cause is the common one. Your product has two attributes and the customer only chose one. Both must be set. Nothing to fix there.

The frustrating cause is different. The customer did choose everything, and the message still appears. That means the form value did not reach the server. Check the attribute slug first. Go to Products > Attributes and look at the slug column. Accented letters, ampersands, slashes and spaces in a slug can break the form field name. Rename the slug to plain lowercase letters and hyphens. Then rebuild the variations, because the old ones point at the old slug.

Long attribute names cause the same failure. WordPress limits taxonomy names to 32 characters. An attribute name that runs past that limit gets truncated behind the scenes. The form then submits a value the product does not recognise. Keep attribute names short and this never happens.

What Changes Above Thirty Variations

Variation behaviour changes once a product passes a threshold. By default that number is thirty. This surprises store owners who add a size and suddenly find the page acting differently.

Below the threshold, WooCommerce loads every variation into the page. The dropdowns are smart. Choose Red and the sizes you do not stock in red grey out immediately. Customers cannot pick a dead combination.

Above the threshold, that data is too heavy to send. WooCommerce switches to loading each variation on demand instead. The dropdowns now show every value all the time. Nothing greys out. The customer only learns a combination is unavailable after selecting all of it, and then they see the no-match message.

Nothing is broken here. It is a deliberate trade for page speed. If your product has forty variations and you want the smart dropdowns back, a developer can raise the threshold with the woocommerce_ajax_variation_threshold filter. Raise it carefully. Every extra variation adds weight to the page, and slow product pages cost more sales than clumsy dropdowns do. Products with hundreds of variations are usually better split into several simpler products.

Rule Out Cache, Theme and Script Conflicts

If the dropdowns are completely dead, your setup is probably fine. A script is failing before it can run.

Start with the browser console. Right-click the product page, choose Inspect, then open the Console tab. Reload the page. A red error naming a missing file or an undefined function tells you where to look. The variation form depends on a WooCommerce script called add-to-cart-variation. If that file fails to load, every dropdown goes inert.

The usual culprit is optimisation. Combining or minifying JavaScript can reorder files and break dependencies. Deferring scripts can run the variation form before its libraries exist. Turn off JavaScript optimisation for product pages and test again. If that fixes it, add the variation script to your optimiser’s exclusion list.

Caching plugins cause a slower version of the same problem. A page cached before you added variations keeps serving the old markup. Clear every layer. That means the plugin cache, any server cache, and any network cache in front of the site. Then test in a private window.

If the console is clean, do a conflict test. Switch to a default WordPress theme. If variations work, your theme overrides the variation template. If they still fail, disable other plugins one by one. Filter, swatch and speed plugins are the usual suspects. For pages that will not render at all, see our guide on not being able to view WooCommerce product pages.

Get Expert Help With Your WooCommerce Store

Broken variations are expensive in a quiet way. The product page still loads. Nothing looks obviously wrong. Customers simply cannot buy, and most of them leave without telling you. A single unpriced variation can hide a whole product line for weeks.

The good news is that the causes are few and they repeat. An untouched Used for variations checkbox. A variation with no price. A renamed attribute that orphaned its combinations. A minifier that broke one script. Run the two-minute check at the top of this guide and you will land on the right one straight away.

It is also worth tidying the product pages while you are in there. Clear option labels and a good summary reduce the questions that reach your inbox. Our guide on how to add a short product description in WooCommerce covers that part.

If your variations still refuse to behave, we can take a look. Our team fixes WooCommerce stores every day. We check the product setup, the attribute data, your theme templates and your script stack. Then we tell you plainly what is wrong and what it takes to fix it. Visit WP Customify for expert WooCommerce support today.

How to Export Orders From a WooCommerce Store (2026 Guide)

Store owners who try to export WooCommerce orders usually hit one of four walls. The download never starts. The file arrives but rows are missing. The WordPress export tool hands back an empty file. Or the totals do not match the store. Each wall has its own cause. Fix the wrong one and you lose an afternoon. This 2026 guide shows you how to tell them apart in about two minutes. Then it walks you through the fix that matches your store.

Start With the Symptom, Not the Fix

Most guides open with a long list of steps. That wastes your time. Order exports fail in four distinct ways. Match your symptom first, then jump to that section.

Nothing downloads. You click Download and the screen just sits there. Nothing lands in your downloads folder. This is normal for larger date ranges. Your file is being built in the background and mailed to you.

The file arrives, but rows are missing. You know there were 90 orders last month. The file holds 61. This is almost never a bug. It is a filter you did not know was on.

The file is completely empty. You used the WordPress export screen, not the store report. That screen reads the wrong database table on modern stores.

The numbers look wrong. Your report data is cached. It may also be keyed to a date field you did not expect.

Write down which line matches you. One of these four covers nearly every case. The sections below follow the same order.

How to Export WooCommerce Orders From the Analytics Report

WooCommerce ships with a working order export. You do not need to add anything. It lives inside the reports, which is why so many people miss it.

Go to Analytics > Orders in your WordPress admin menu. This is a separate top-level menu from WooCommerce. Set your date range with the picker at the top. You get presets such as Today, Last Week and Last Month. Pick the Custom tab if you need exact dates.

Now scroll to the table below the chart. Look at the top right corner of that table header. There is a Download link. Click it.

What happens next depends on size. If every row fits on one screen, the file saves straight away. If the data runs to more than one page, WooCommerce builds it in the background instead. It then emails you a link. That email goes to the address on your own WordPress user profile. It does not go to the store admin email.

The default page size is 25 rows. So any export above 25 orders takes the email route. That single number explains most “my export never downloaded” reports.

You can raise the rows per page in the table footer. Set it higher than your order count and the file downloads on the spot. That trick is handy for a quick check of forty or fifty orders. It is a poor idea for a full year, because the browser has to hold the whole report.

The same Download link sits on every Analytics report. Revenue, Products, Coupons and Taxes each export the same way. Learn it once and you can pull any of them.

Why Your Order Export Is Missing Rows

A short file is the most common complaint. It has three usual causes, and all three are settings.

Some order statuses are hidden by default

Go to Analytics > Settings and look at Excluded Statuses. Out of the box, WooCommerce leaves out Pending payment, Cancelled and Failed orders. Those orders exist in your store. They simply never reach the report, so they never reach your file. Uncheck a status to bring it back in. Do this before you download, not after.

This matters most for tax work and fraud reviews. It matters less for revenue reports. If you are chasing orders that stalled before payment, our guide to errors preventing order completion covers why they pile up.

The report uses Date paid, not Date created

Still on Analytics > Settings, find Date type. The default is Date paid. An order placed on 30 June and paid on 1 July lands in July, not June. Bank transfer and cheque orders can sit unpaid for weeks. Those orders fall outside your chosen range entirely. Switch to Date created if you need the order date instead.

Pick one setting and stick with it. Half your team exporting by paid date and half by order date is how month-end figures stop agreeing. Note your choice somewhere your bookkeeper can see it.

The report data is out of date

Analytics keeps its own cached tables. On recent versions it refreshes on a schedule, roughly every twelve hours. Very new orders may not be in there yet. Look for the data status line at the top of the report. It shows the last update and gives you an Update now button. Use it, then export again.

Older orders are a different case. If you moved from another platform, or turned reports on late, that history may never have been indexed. Go to Analytics > Settings and scroll to Import historical data. Run it once with the range set to All. Large stores should import a year at a time to spare the server.

Why the WordPress Tools Export Comes Back Empty

Many store owners reach for Tools > Export in WordPress. It offers an Orders option. It produces an XML file. On a modern store, that file is often empty or badly short.

The reason is a storage change. WooCommerce now uses High-Performance Order Storage, known as HPOS. Orders live in their own database tables. They are no longer stored as posts. The WordPress export tool only reads the posts table. So it finds nothing to hand you. This is a known gap, not a broken install.

You have two clean options. The simple one is to stop using that screen and use the Analytics download instead. It reads the correct tables.

The second option suits anyone mid-migration. Go to WooCommerce > Settings > Advanced > Features. There you can switch order storage back to legacy posts, or turn on syncing between both. Syncing copies orders into the posts table as well. The old export tool then sees them. Be careful here. Syncing costs write time on busy stores, so switch it back off when you are done.

If you are unsure which mode your store runs, check WooCommerce > Status. The report names your order storage method near the top.

When the Download Email Never Shows Up

You clicked Download. A notice said the file was being prepared. Nothing landed in your inbox. Work through these in order.

Check the address on Users > Profile first. The link goes to the email on your own account. On sites with several admins, only the person who clicked gets the mail. A shared login with an old address is a common trap.

Next, check your spam folder. The mail carries a download link, so filters are harsh on it. Whitelist your own domain if this keeps happening.

If nothing arrives at all, your site probably cannot send mail. Most hosts block the default PHP mail function. Test this by asking WordPress to send a password reset to yourself. If that does not arrive either, the export is not the problem. Your whole site is silent, which also means customers get no receipts.

One more cause is worth knowing. The file is built by a queued background task. If that queue is stuck, the job never runs. Look at WooCommerce > Status > Scheduled Actions. A long list of pending actions with old dates points at a stalled queue. A real cron trigger on the server fixes this for good.

Make the File Match Your Accounting Records

An export that opens is only half the job. It also has to reconcile. Three habits save hours here.

First, decide what counts as revenue. Completed orders are money you kept. Refunded orders reduce it. Export both statuses in one range so the net figure is right. Exporting only Completed gives you a gross number that never ties out.

Second, be precise about tax. Order totals include tax unless your store is set to show prices without it. If your books need net figures, pull the Taxes report separately for the same range. Mismatched tax settings cause most reconciliation gaps. Our notes on tax misconfiguration issues in WooCommerce explain the usual setup errors.

Third, watch how the file opens. A CSV is plain text. Spreadsheet software often guesses badly at it. Long order numbers turn into scientific notation. Leading zeros vanish. Dates flip between day-first and month-first formats. The safe route is to import rather than double-click. Use the import option in your spreadsheet tool, then set the encoding to UTF-8 and the delimiter to comma. Accented customer names stay readable that way.

Exporting Before a Store Move or a Backup

A report export is a snapshot for analysis. It is not a backup. This distinction catches people out during migrations.

The Analytics file holds what the report shows. It does not hold every custom field on the order. It skips internal order notes. It skips refund records tied to each line. It does not carry the link between an order and a registered customer account. Restore from that file and you get a spreadsheet, not a working store.

For a real move, take a full database export instead. Ask your host for a database dump, or use the backup tool built into your hosting panel. That captures the order tables intact, along with everything attached to them.

There is a second trap in migrations. Order numbers are not guaranteed to survive. Sequential numbering is often added by a plugin. Move the store without it and numbering can restart. Record your highest order number before the move. Check it afterwards. If you are also rebuilding the front end, our guide to checkout process issues in WooCommerce is worth reading before you go live.

Get Expert Help With Your WooCommerce Store

Order data sits at the centre of every store. When exports go wrong, the fix is rarely a plugin. It is usually a setting three menus away from where you were looking. Excluded statuses hide rows. The date field shifts orders into the wrong month. A stalled queue swallows the file before it is built. None of that is obvious from the screen you are on.

That is where most owners lose time. They try tool after tool when the store was fine all along. Working through the four symptoms above in order will save you that trip.

If your store still will not hand over clean order data, we can look at it for you. Our team works on WooCommerce every day. We check your storage mode, your report settings, your mail delivery and your scheduled tasks. Then we tell you plainly what broke and what it costs to fix. Payment problems are a common neighbour to this one, so it is worth reviewing why a WooCommerce payment gateway is not showing as well. Visit WP Customify to get started with expert WooCommerce support today.

How to Fix WooCommerce Cart Not Working (2026 Guide)

WooCommerce cart not working covers five different faults, and the fix depends entirely on which one you have. Items may refuse to add. The cart may empty itself between pages. Quantities may not update. The cart page may load blank. Or the mini cart may show a stale number while the real cart is fine. Naming your symptom first saves hours, because a fix for one of these cannot touch the others.

Which Cart Symptom Do You Actually Have?

Run this test before changing anything. Log out and open the store in a private window. Then add one simple product to the cart and watch carefully.

Nothing happens on click. The button spins forever, or does nothing at all. Your problem is the add to cart request. Skip to the button section.

The item adds, then disappears. The counter goes to 1, but the cart page says “Your cart is currently empty”. This is a session or caching fault, not a product fault.

The cart page loads blank. No table, no totals, no empty-cart message either. That is a page setup problem, and it is the fastest of the five to fix.

Quantities will not change. You type 3, click update, and it stays at 1. The cart works; the update request does not.

Only the header number is wrong. The cart page is correct but the mini cart disagrees. That is a caching problem confined to one fragment of the page.

Write down which one you saw. Then test a second product. If a simple product works and a variable one does not, the fault is in the product configuration rather than the store.

WooCommerce Cart Not Working Because the Page Is Missing

Handle this first, because it is quick and it explains a blank cart page completely.

Go to WooCommerce > Settings > Advanced. Look at the Cart page dropdown. It must name a published page. If it is empty, or points at a page in the trash, shoppers get nothing. Set it and click Save changes.

Now open that page in the editor. It needs either the Cart block or the [woocommerce_cart] shortcode. A page with neither renders as an empty white area, which looks like a serious bug but is not.

Watch for duplicates. Sites often end up with two cart pages after a redesign, and WooCommerce only honours the one named in settings. Shoppers who reach the other page see an empty cart no matter what they added. Check Pages > All Pages and search for “cart”.

Check the checkout page in the same screen while you are there. A broken cart and a broken checkout usually arrive together, since both are page assignments in the same place. Our guide to checkout process issues in WooCommerce covers the checkout half in detail.

Fix Add to Cart Buttons That Do Nothing

Now the page exists but the button will not work. Read what the button does before you touch settings.

If you see “Please choose product options before adding this product to your cart.”, the product is variable and no variation is selected. Check that every attribute is set to Used for variations, and that each combination has a price. A variation without a price cannot be purchased, and the button silently refuses.

If you see “Sorry, this product cannot be purchased.”, the product itself is the problem. It has no price, or its status is not Published, or its stock status is out of stock.

If you see “You cannot add another item to your cart.”, the product has Sold individually ticked under Product data > Inventory.

If there is no message at all, open your browser console and reload. The button uses an AJAX request on shop and category pages. A JavaScript error from any script on the page stops it firing. The error often comes from something unrelated, which is why this one is hard to trace.

One setting worth knowing: WooCommerce > Settings > Products controls whether AJAX add to cart is enabled on archives. Turning it off makes the button reload the page instead. That is a useful diagnostic, because a button that works without AJAX confirms a JavaScript fault.

Fix a Cart That Empties Itself

Items add correctly, then vanish. The cart is stored against a session, and the session is being lost.

Page caching is the usual cause. Cart, checkout and my account pages must never be served from cache. Most caching layers exclude them by default, but a renamed cart URL slips past those default rules. Confirm the exclusions match the actual page slugs your store uses.

Cookies are the second cause. WooCommerce sets a cookie to link the visitor to their session. Say your site answers on both www and non-www. A cookie set on one address is invisible on the other, so the cart looks empty. Check Settings > General in WordPress. The site address and home address must match exactly. Then force one canonical version of the URL.

Object caching is the third. WooCommerce keeps sessions in the database. An aggressive object cache, or a cleanup job that trims those rows early, drops carts at random. The tell is that it affects some shoppers and not others.

There is a useful reset at WooCommerce > Status > Tools. The Clear customer sessions tool wipes stored sessions. Use it on staging first, since it logs shoppers out and empties every live cart.

Fix Quantities and Totals That Will Not Update

The cart holds its items but refuses to change them. This is a form submission problem rather than a session problem.

Check that the update button is actually enabled. On the classic cart, the Update cart button stays greyed out until you change a quantity field. Shoppers who type a number and press Enter often miss it entirely.

Then check the quantity limits on the product. Under Product data > Inventory, a stock quantity of 2 caps the field at 2. Typing 5 silently reverts to 2, which reads as “the cart will not update” to a customer. If you see “Sorry, we do not have enough items in stock”, that is exactly what happened.

Security plugins and firewalls are the other frequent cause. The cart update posts to a WooCommerce endpoint, and rules that block unusual requests sometimes block it too. The symptom is a page that reloads with no change and no error. Check your firewall log at the moment you clicked update.

Nonce expiry produces the same silence. A cart page left open for hours carries a stale security token, so the update is rejected. Reload the page and try again before assuming anything is broken.

Fix a Mini Cart Showing the Wrong Number

Here the cart page is right and the header is wrong. Only the fragment is stale.

WooCommerce refreshes the mini cart with a separate background request called cart fragments. It runs after the page loads and rewrites the counter. When that request fails or is blocked, the header keeps whatever number the cached page contained.

Test it directly. Add an item, then hard refresh the page. If the number corrects itself on refresh, fragments are not running. If it stays wrong even after a refresh, the whole page is cached and you are back to the caching section above.

Two things commonly block fragments. Some performance plugins disable them deliberately, because the request runs on every page and costs speed. That trade is reasonable on a brochure site and harmful on a shop. Check your optimisation settings for anything naming cart fragments.

A content delivery network can also cache the response. The fragments request must always be dynamic. If your network caches it, every visitor receives the first shopper’s cart count, which is both wrong and a privacy problem worth fixing quickly.

If the counter is slow rather than wrong, that is a performance question instead. Our post on slow checkout loading times covers the same request path.

Rule Out Plugin and Theme Conflicts Safely

Save this for last. The checks above solve most cart faults, and this one carries real risk.

Work on a staging copy. Deactivating plugins on a shop that is taking orders will cost you money, and cart bugs are hard to reproduce once you have disrupted live sessions.

Deactivate everything except WooCommerce, then test the cart. If it works, reactivate in batches rather than one at a time. Halving the list finds the culprit in a few rounds instead of twenty. Then switch to a default WordPress theme and repeat.

Pay closest attention to anything that changes prices, quantities or the cart display. Discount engines, currency switchers and quantity field plugins all hook the same cart calculations. Two of them adjusting the same total will produce results that look random.

Custom code in your theme deserves the same scrutiny. Snippets pasted into a theme file years ago are a common cause, and they survive plugin testing entirely because they are not plugins.

If a discount is involved in the failure, check the coupon rules separately. Our guide to WooCommerce coupons not working at checkout walks through those rejections.

Confirm the Fix as a Real Shopper

Do not trust a cart that works in your admin session. Prove it the way a customer would meet it.

Log out and use a private window. Admin accounts skip some stock and visibility rules, so a cart can behave for you and fail for everyone else. This is the single most common reason a fix gets called done too early.

Clear every cache layer first. Then add a simple product, refresh the page, and confirm the item is still there. Refreshing is the important part, because that is where a lost session shows itself.

Now change the quantity and click update. Watch the line total and the cart total both move. Then add a second product and check the mini cart number in the header matches the cart page.

Test a variable product too. Pick a variation, add it, and confirm the correct option is listed in the cart. Variable products fail in ways simple ones never do.

Finally, walk through to checkout and place a test order. A cart that survives to a completed order is fixed. One that only survives to the cart page is not.

Get Your Cart Working Again

A broken cart is the most expensive fault a store can have. Every other problem still lets someone buy. This one stops the sale at the exact moment a shopper decided to spend money, and almost nobody emails to tell you about it. They simply leave.

That is also what makes it hard to catch. Carts often fail for guests but not for logged in admins, or on one browser but not another, or only when a cache is warm. If you cannot reproduce it yourself, you are not looking at a settings problem you can click your way out of.

WP Customify works on WooCommerce stores every day. We repair add to cart buttons that do nothing, stop carts emptying between pages, fix stale mini carts, and sort out the caching and session rules underneath them. You get a cart that holds what your customer put in it. Visit WP Customify and tell us what your shoppers are seeing. We will find the cause and fix it properly.

How to Create WooCommerce Cart Discounts in Your Store (2026 Guide)

WooCommerce cart discounts are built from coupons, not from a separate discount screen. New store owners hunt for that screen and never find it. There is no such page. Every price cut in WooCommerce core starts as a coupon record. You set a rule once. Then you hand out a code. This guide covers the three discount types, the settings that shape them, and the quiet traps that make a working coupon look broken.

Which of the Three WooCommerce Cart Discounts Do You Need?

Pick the type first. Choosing wrong is the most common setup error, and it costs real money. WooCommerce core gives you three options in the Discount type dropdown.

Fixed cart discount takes a flat amount off the whole cart. A $10 coupon on a $60 cart removes $10. One cart, one deduction. Use it for “$10 off your order” promotions.

Percentage discount removes a share of the price. A 10% coupon on that same $60 cart removes $6. Use it when order sizes vary a lot. The discount scales with the basket.

Fixed product discount is the one that bites people. It takes the amount off each matching item, not off the cart. Three shirts at $20 with a $10 fixed product coupon means $30 off, not $10. Three items, three deductions. That is by design.

Ask one question to decide. Should the discount grow when the shopper buys more? If yes, use percentage or fixed product. If no, use fixed cart. Store owners who want “$10 off” and pick fixed product often give away far more than they planned.

There is a second question worth asking. Does the discount need to target certain products? Fixed cart cannot really do that, because it works on the cart as a whole. Percentage and fixed product both can, once you name the products or categories. Answer both questions before you open the coupon screen, and the rest of the setup takes minutes.

Turn On Coupons Before You Build Anything

The coupon field can be switched off store-wide. If it is off, your discount works in the admin but never reaches a shopper. Check this first.

Go to WooCommerce > Settings > General. Find the Enable coupons row. Tick Enable the use of coupon codes. Click Save changes at the bottom. The box is ticked by default on a fresh install, but themes, staging imports and setup wizards do untick it.

Now look at your cart page. On the classic cart shortcode you should see a coupon box near the totals. On the block-based Cart and Checkout you see a small Add coupons link instead. The field is collapsed behind that link by default. Shoppers miss it constantly, which shows up as “nobody used my coupon” rather than as an error.

Worth knowing: the two layouts behave differently. If your cart page still uses the classic shortcode, our guide to WooCommerce shortcodes explains which shortcode renders which page. Confirm the layout you have before you blame the coupon.

Create a Fixed Cart Discount Step by Step

Coupons live under Marketing > Coupons. Not under Products. Not under WooCommerce. That path alone stalls a lot of first attempts.

Click Add new coupon. Then work through the screen in this order.

Type a Coupon code in the title field, or click Generate coupon code for a random one. Codes are not case-sensitive. SAVE10 and save10 are the same coupon. Special characters like &, $, – and @ are allowed, but plain letters and numbers travel better in print and email.

Add a Description. Customers never see it. Use it for the campaign name and end date, so a teammate can read the coupon list six months later and know what each code was for.

In the General tab, set Discount type to Fixed cart discount. Enter the Coupon amount as a bare number. Type 10, not $10 and not 10%. WooCommerce adds the symbol from your currency settings. A stray symbol here saves without warning and then applies oddly.

Leave Allow free shipping unticked unless you mean it. Set Coupon expiry date if the promotion ends. Then click Publish.

Percentage and Fixed Product Discounts in Practice

The build steps are the same. Only the amount field changes meaning.

For a percentage discount, enter 15 to mean 15% off. WooCommerce applies it to the cart subtotal by default. If you fill the Products or Product categories box under Usage restrictions, it applies to those lines only. That is how you run “20% off winter stock” without discounting the rest of the store.

Fixed product discounts need one of those boxes filled almost every time. Leave them empty and the coupon takes the amount off every single line in the cart. On a ten-item basket a $5 coupon becomes $50 off. Fill in Products, and only those lines get the deduction.

There is a rounding detail worth knowing. WooCommerce applies coupons to product prices before tax, and splits a fixed cart discount across the cart lines in proportion. This keeps tax maths accurate. It also means the per-line figures in an order will look slightly odd if you check them by hand. Nothing is wrong. If your store margins depend on volume rather than single orders, a tiered pricing setup may serve you better than a flat code.

Usage Restrictions That Protect Your Margin

The Usage restrictions tab decides who qualifies. Most discount leaks happen because this tab was left blank.

Minimum spend sets the smallest subtotal that can use the code. This is the single most useful field on the screen. It stops a $10 coupon from wiping out a $12 order. One trap: WooCommerce compares against the subtotal plus tax. On a tax-inclusive store, a $50 minimum triggers a little earlier than you expect. Test it with a real cart.

Maximum spend caps the other end. It is rarely needed, but useful for percentage codes on high-value carts.

Individual use only blocks the code from stacking with any other coupon. Tick it on every deep discount. Without it, a shopper who finds two codes can apply both.

Exclude sale items keeps the coupon off products that already have a sale price. Note the documented quirk: per-cart coupons do not behave as expected when a sale item is added after the coupon. The shopper sees a discount that seems to survive when it should not.

Allowed emails ties a code to specific billing addresses. Wildcards work, so *@example.com lets a whole domain through.

Usage Limits and Expiry Dates Done Right

The Usage limits tab has three fields and one hidden dependency.

Usage limit per coupon is the total number of uses across all shoppers. Set it for anything you post publicly. A code that leaks to a deal forum with no cap is how stores lose a month of margin overnight.

Usage limit per user caps how often one customer can redeem it. Here is the catch most guides skip: this check leans on the account or billing email. A guest shopper who checks out with a new email each time is not reliably blocked. If a one-per-customer rule really matters, require an account at checkout.

Limit usage to X items only works if the Products field in Usage restrictions is filled. Leave Products empty and this field does nothing at all. It saves without complaint, which makes it look active when it is not.

On expiry, set the date and then check Settings > General in WordPress for your site timezone. Expiry follows the store clock, not the shopper’s. If a campaign must run through a specific evening, test the code late on that day before you promote it.

Settings That Break Discounts Quietly

These are the ones support engineers see weekly. None of them throw an obvious error.

Coupons never reduce shipping. They apply to cart items, and shipping is not a cart item. A code that covers the full product total still leaves a $10 shipping charge to pay. The only exception is a free shipping coupon, and that needs two pieces: Allow free shipping ticked on the coupon, plus a Free Shipping method set to require a valid coupon. Miss the second half and nothing changes. Our post on free shipping not applying walks through that pairing.

A coupon in the Trash still holds its code. Try to create a new coupon with the same code and it will clash. Empty the Trash under Marketing > Coupons first.

Scheduled coupons trip people up too. The Publish box lets you set a future date. A coupon scheduled for next week is not live now, and applying it returns a “does not exist” style message rather than a helpful one.

Finally, stacked codes do not compound by default. Two 10% coupons give 20% off the original subtotal, not 19%. Plan promotions with that in mind, or tick Individual use only.

Test Every Discount Before You Announce It

Never send a code out untested. Five minutes of checking prevents most refund requests.

Test as a real shopper, not as an admin. Open a private browser window and log out. Admin sessions can carry cached cart data and skip rules that a normal visitor hits. This one habit catches more problems than any other step.

Build the smallest cart that should qualify. If your minimum spend is $50, try a $49 cart first. The coupon should be refused. Then add an item to cross the line and confirm it applies. You have now proved both halves of the rule.

Check the totals block, not just the coupon message. Read the discount line and the final total. A fixed product coupon on a multi-item cart is where the number usually surprises people. Compare it against what you expected to give away.

Then place a full test order and open it under WooCommerce > Orders. The order should list the code and the amount deducted. If the coupon vanished between cart and order, you have a session or caching problem rather than a coupon problem. Our notes on checkout process issues in WooCommerce cover that split.

Finally, check the coupon list. The Usage / Limit column should now read 1. If it still reads 0, the order did not record the redemption, and your usage limits will not hold.

Get Your WooCommerce Discounts Set Up Properly

Discounts look simple until one behaves in a way you cannot explain. A fixed product coupon multiplies. A minimum spend fires early. A code works for you in the admin and fails for a real shopper. Each of those has a specific cause, and none of them announce themselves.

If a promotion is close and the numbers are not adding up, get a second pair of eyes on the configuration before you send the email. A short review of your coupon rules, tax settings and cart layout is far cheaper than a discount that runs away for a weekend. It is also faster than working through every field on your own.

The team at WP Customify works on WooCommerce stores every day. We set up discount rules, fix coupons that refuse to apply, and audit checkout so the code your shopper types actually lands. If you would rather spend the week selling than testing coupon combinations, we can take it off your plate. Visit WP Customify and tell us what your promotion needs to do. We will handle the rest.

How to Fix WooCommerce Coupons Not Working at Checkout (2026 Guide)

WooCommerce coupons not working at checkout is rarely one problem. It is four or five different problems that all end with an unhappy shopper. The good news is that WooCommerce usually tells you which one you have. The message under the coupon box is a specific string, not generic filler. Read it first, and you can skip most of the fixes below. This guide maps each message to its cause, then covers the silent failures that show no message at all.

Start With the Error Message, Not the Settings

Do not open the coupon and start changing fields. Reproduce the failure first and write down the exact wording. Each string points at a different part of the system.

Open a private browser window. Log out. Add the same products your customer had. Then apply the code and read what appears.

You will see one of four families of message. “Coupon “X” does not exist!” means WooCommerce cannot find that code at all. That is a lookup problem, not a rules problem. “This coupon has expired.” and “Coupon usage limit has been reached.” are different. The coupon was found. It was then rejected on a date or a count. “Sorry, this coupon is not applicable to your cart contents.” means it was rejected on the cart itself. No message at all means the request never reached WooCommerce.

Those four families need four different fixes. Guessing between them is why this issue takes people a whole afternoon. Sort the message first and you cut the work by three quarters.

WooCommerce Coupons Not Working With No Error Shown

Silent failure is the hardest case, so handle it early. Nothing happens when the shopper clicks Apply. No red banner. No green banner.

First check that coupons are switched on store-wide. Go to WooCommerce > Settings > General and confirm Enable the use of coupon codes is ticked. If it is off, the coupon field does not render at all on the front end. Some themes and setup wizards untick this.

Next, work out which cart layout you have. The block-based Cart and Checkout hide the field behind a small Add coupons link. Shoppers who never click the link report the coupon as broken when it was simply collapsed. On the classic shortcode cart, the box sits near the totals instead.

Then open your browser console on the checkout page and look for red errors. The coupon form on the classic cart submits by AJAX. A JavaScript error anywhere on the page can stop the handler from firing, so the click does nothing at all. That error is often thrown by an unrelated script, which is why the cause is so hard to spot.

Finally, confirm the page really is a cart or checkout page. A coupon form placed on a plain page with no cart context will accept a code and do nothing.

Fix “Coupon Does Not Exist” Errors

This message means the lookup failed. The code the shopper typed does not match a published coupon.

Go to Marketing > Coupons and search for the code. Check three things in order.

Is it published? A coupon left as a draft is invisible to the front end. So is one scheduled for a future date. Look at the Publish box and confirm the status and date. A coupon dated for next Monday will refuse to work today, and this exact message is what shoppers see.

Is it in the Trash? A trashed coupon keeps its code reserved. If someone rebuilt the coupon after trashing the old one, you may now have two records fighting over the same code. Empty the Trash, then check the live coupon still works.

Is the code what you think it is? Codes are stored in lowercase and are not case-sensitive, so SAVE10 and save10 both match. What does not match is a stray space, a curly quote, or a hyphen that a word processor turned into a dash. Copy the code out of the coupon screen and paste it into your test cart. If the pasted version works and the printed one does not, you have a character problem in your marketing material.

Fix Cart Restriction Errors

Now the coupon exists but the cart does not qualify. The wording narrows it down further.

“The minimum spend for this coupon is…” points straight at the Usage restrictions tab. Open the coupon and read the Minimum spend value. One detail catches people out: WooCommerce compares against the subtotal plus tax. On a tax-inclusive store the threshold triggers slightly earlier than the raw product total suggests. Test with a cart just above and just below the line.

“Sorry, this coupon is not valid for sale items.” means Exclude sale items is ticked and something in the cart carries a sale price. Check the product for a leftover sale price with no end date. Old promotions left in place are the usual culprit.

“Sorry, this coupon is not applicable to your cart contents.” is the vaguest of them. It fires when the Products, Exclude products, Product categories or Exclude categories fields do not line up with the cart. Read all four. A common mistake is filling Products for a fixed product discount, then forgetting that the cart must contain one of those exact items. Variations count as separate products here, which trips up variable product stores constantly.

“Sorry, coupon “X” has already been applied and cannot be used in conjunction with other coupons.” means Individual use only is ticked on a code already in the cart.

Fix Expiry and Usage Limit Errors

“This coupon has expired.” looks simple and often is not. Open the coupon and read Coupon expiry date. Then go to Settings > General in WordPress and read your site timezone. Expiry runs on the store clock, not on the shopper’s clock. A store set to UTC will cut off a promotion hours early for customers further west. If a campaign must run through a specific evening, set the date one day later and test late in the day.

“Coupon usage limit has been reached.” sends you to the Usage limits tab. Compare Usage limit per coupon against the Usage / Limit column in the coupon list.

Two behaviours here surprise store owners. Failed and cancelled orders can still count against the limit. A shopper whose payment dropped may then be locked out of retrying the same code. The second is Usage limit per user. It relies on the account or billing email. A guest using a fresh email each time is not reliably blocked. A family sharing one address may be blocked when they should not be.

If the count looks wrong, raise the limit rather than deleting and rebuilding the coupon. Rebuilding loses the redemption history you may need later.

When the Coupon Works in the Cart but Drops at Checkout

This one is different. The code applies, the total updates, and then the discount disappears on the next page.

Watch for this message: “Sorry, it seems the coupon “X” is invalid – it has now been removed from your order.” A coupon lives in the customer session. If the session is lost between pages, the coupon goes with it.

Page caching is the leading cause. Cart and checkout pages must never be served from cache. Most caching layers exclude them by default, but a custom cart page or a renamed URL can slip through that rule. Confirm the exclusion covers the actual page slugs your store uses.

Session storage is the second cause. WooCommerce stores sessions in the database, and an aggressive cleanup job or an object cache flushed on every request will break them. If shoppers also report emptying carts, the session is the problem, not the coupon.

The third cause is a mismatch between the billing email and an Allowed emails restriction. The check runs at checkout, not in the cart, so the coupon passes and then fails once an email is entered. Our guide to checkout process issues in WooCommerce covers the wider session picture, and a slow checkout often shares the same root.

Rule Out Plugin and Theme Conflicts Safely

Leave this step until last. It is slow, and the earlier checks solve most cases.

Work on a staging copy, never on the live store. Deactivating plugins on a shop that is taking orders will cost you sales.

Deactivate every plugin except WooCommerce. Test the coupon. If it works, reactivate in small batches and test after each batch. Halving the list each time finds the offender faster than going one by one. Then switch to a default WordPress theme and test again.

Pay attention to anything that touches pricing, cart totals or checkout fields. Discount and pricing extensions frequently hook the same filters WooCommerce uses to validate coupons. Two plugins adjusting the cart subtotal can produce a coupon that passes one check and fails the next. Currency switchers cause similar trouble, because a minimum spend set in one currency may not convert the way you expect.

Also check whether a coupon extension has taken over the native rules entirely. If you have added one, the core fields may no longer control behaviour. Our roundup of WooCommerce coupon tools explains where those overlaps usually sit.

Confirm the Fix With a Real Test Order

A coupon that applies in the cart is not proof of a fix. Finish the job with a full test order.

Log out first. Use a private browser window. Admin sessions behave differently and can hide the very bug you just chased. This step alone catches false fixes.

Add the smallest cart that should qualify. Apply the code. Check the discount line in the totals, not just the success banner. The number should match what you intended to give away. Fixed product coupons are where that number often surprises people.

Move to checkout and enter a billing email. Watch the totals again. If the discount survives this step, your session and email restrictions are both fine. Then place the order.

Open the order under WooCommerce > Orders. The coupon code should be listed on the order with its amount. Now return to Marketing > Coupons and read the Usage / Limit column. It should have gone up by one. If it still reads zero, the redemption was not recorded. Your usage limits will not hold, and the same shopper can use the code again.

Repeat the test with a cart that should be refused. A fix is only proven when both outcomes are correct.

Get Your Checkout Discounts Working Again

A coupon that fails at checkout costs more than the discount. The shopper has already decided to buy. They have entered an address. Then something refuses them at the last step, and most of them leave rather than email you about it. That makes this a revenue problem, not a settings problem.

If you have read the error, checked the restrictions and still cannot explain the behaviour, the cause is probably outside the coupon screen. Session handling, caching rules and pricing plugins all interfere in ways that look identical from the front end. Finding which one takes a proper look at the store, not more guesswork in the admin.

WP Customify works on WooCommerce checkouts every day. We trace coupons that vanish between pages, fix restriction rules that reject the wrong carts, and clean up the caching and session settings behind both. You get a store where the code you advertise actually works when a customer types it. Visit WP Customify and tell us what your shoppers are seeing. We will find the cause and fix it properly.

How to Fix WooCommerce Payment Gateway Not Showing (2026 Guide)

A WooCommerce payment gateway not showing at checkout is one of the few store faults that costs you money by the minute. The buyer has picked a product, filled in their address, and reached the point of paying. Then the payment box shows up empty. Or it offers one method, and not the one they wanted. So they leave.

The odd part is that the gateway looks fine in your admin. It is on, the keys are saved, and the settings page shows no warning. So why does it not reach the buyer? Almost always, WooCommerce runs a check at checkout time and the gateway fails it in silence. This guide shows you how to spot which check is firing, before you change a single setting.

Why Your WooCommerce Payment Gateway Is Not Showing: Start Here

Five separate faults all produce the same empty payment box. The fixes have almost nothing in common. Guessing wastes an afternoon. Two minutes of checking narrows it to one.

Start with the error text itself. The wording tells you a great deal. On a classic checkout page you will see “Sorry, it seems that there are no available payment methods for your state. Please contact us if you require assistance or wish to make alternate arrangements.” That means WooCommerce checked your gateways and each one turned down the cart or the address. The gateway is installed and running. Something is ruling it out.

On a block checkout you will more often see “There are no payment methods available. This may be an error on our side. Please contact us if you need any help placing your order.” That wording points somewhere else. It tends to mean the gateway never signed up with the block checkout at all. That is a plugin fit problem, not a settings problem.

Now check whether the gateway shows for anyone at all. Open your store in a private window. Add a cheap boxed product. Enter an address inside your own country. Does the method show for that cart but not the first one? Then the cart or the address is the trigger. Skip to the parts on selling location and cart rules. Does it show for nobody? Then work through the next two parts first.

Confirm the Gateway Is Enabled and Fully Configured

Go to WooCommerce → Settings → Payments. This screen lists each gateway with a toggle beside it. A gateway that is installed but toggled off will never show at checkout. That toggle resets more often than people think. It happens most after a plugin is turned off and on again during a fix.

Turning it on is not enough on its own. Click Manage or Set up beside the gateway. Read that settings screen with care. Most gateways refuse to serve buyers until every key field is filled. Many still read as enabled in the list while they quietly hide. The cause is a blank API key, or a link that has run out.

Check three things on that screen. First, make sure the gateway is not left in test or sandbox mode. Some gateways hide from live buyers in that mode. They show only for a logged-in admin. Second, check that the account link still reads as active, not lapsed. Tokens do run out. Third, look for a “method title” field left blank. On a few gateways that yields an option with no label, which no buyer can click.

Is the gateway missing from the Payments list at all? Then the fault sits upstream. The plugin is either switched off, or it is on but failing to sign up. That tends to mean a version clash. Check Plugins → Installed Plugins. Make sure it is both active and up to date.

Selling Location, Currency and Country Restrictions

This is the top cause of a gateway that works fine for you and never shows for one buyer. WooCommerce screens gateways against the billing address. Gateways also screen themselves against the regions they cover.

Open WooCommerce → Settings → General and find Selling location(s). Is it set to “Sell to specific countries”? Then a buyer whose country is off that list gets turned away. Set it to Sell to all countries for a moment and test the failing address again. If methods show up, you have found it. Now add back only the countries you want. Do not leave the store wide open.

Check the store currency on the same screen. Many gateways cover a fixed set of currencies. If yours is not on that set, they pull out in silence. This one tends to bite right after a store opens a new market. No gateway setting changed, so nobody thinks to look at currency.

Some gateways also hold their own country rules, set apart from the store-wide one. Look for a field named “accepted countries” or “allowed billing countries” on the gateway’s own screen. A rule set there beats any open setting you made across the store.

Block Checkout Versus Classic Checkout

This has become the top cause of the problem. It is also the one people spend longest on, because every setting looks right.

The block checkout does not read gateways the way the classic shortcode checkout does. It talks through a separate layer. A gateway must be built for that layer to show up in it. A plugin not updated for block checkout works fine on a classic page and stays hidden on a block one. No error is logged anywhere.

To test this, make a new page. Add nothing but the shortcode [woocommerce_checkout]. Publish it. Set it as your checkout page under WooCommerce → Settings → Advanced. Now run a test order. Does the gateway show on the shortcode page but not the block page? Then you have your cause.

From there you have two honest choices. Update the gateway plugin. Most have added block support by now, and an old version is the usual reason. Or keep the classic checkout page until the developer ships support. Do not force a gateway into the block checkout with custom code. A method that shows but does not charge is far worse than one that never shows. Our guide on testing WooCommerce checkout and payments covers how to check either setup before you put it live.

Cart Conditions That Silently Disable Gateways

A gateway can be on, set up right, and still pull out based on what is in the cart. These rules are real. They are there by design. And not one of them gives you a warning.

The clearest case is a cart worth nothing. When a coupon drops the order total to zero, WooCommerce has nothing to charge. So payment methods vanish, and the button switches to place the order straight away. Buyers report this as broken checkout when it works just as it should. If your discounts are acting up here, our article on common checkout process issues in WooCommerce is a useful companion.

Order limits are the next cause, both the low and the high end. Plenty of gateways hold these limits in their settings. A cart outside that range makes the method pull out with no message. Has your store added a low-priced product of late? Then this is a strong bet.

Product type counts too. Some gateways stick to boxed goods, or to carts that need shipping. Others rule out plans that bill again and again. So a cart of downloads alone can show a different set of methods than a cart with one boxed item in it.

Shipping setup can spill into payments as well. If no shipping method fits the buyer’s address, some checkouts stop before the payment step is drawn at all. That looks just like a payment fault. So check shipping first, using our guide to shipping methods not showing at checkout.

Caching and an Empty Payment Section

Checkout changes per buyer, so it should never be cached. But cache layers are greedy, and a bad setup is common. The sign is clear. The payment box flashes up and vanishes. Or it shows options that do not match your settings. Or it works for you and fails for everyone else.

That last one is the giveaway. Most cache tools skip the cache for logged-in users. So if checkout works when you are logged in and fails in a private window, suspect the cache first.

Leave the cart, checkout and account pages out of every cache layer you run. There are usually several. A plugin. A server cache from your host. Often a delivery network too. Skip the plugin cache alone and the host still serves old pages. You then get a fix that works now and then, which is worse than no fix at all. Purge every layer after the change. Test again in a fresh private window.

Isolating a Plugin or Theme Conflict Safely

If nothing above fixes it, some code is editing the list of gateways. WooCommerce offers a filter that lets any plugin add or drop payment methods. Currency switchers, checkout field editors, fee tools and role-based pricing tools all use it for good reason. One of them may be dropping more than it should.

Do not switch plugins off one by one on a live store during trading hours. Copy the site to a staging server first. If you have no staging, use a health-check tool. It turns plugins off for your own session only, and leaves buyers alone.

On staging, switch off all plugins but WooCommerce and the gateway. Then move to a default WordPress theme. Test checkout. If methods show, turn plugins back on in batches of five. Test after each batch. Then narrow down inside the batch that fails. This finds the clash in about six tests, not thirty. Once you name it, check for an update before you drop the plugin. Clashes like this are often fixed in a release the store never took.

Turn on WooCommerce → Status → Logs while you test. Gateways often log the exact reason they pulled out. That reason never reaches the buyer message. Reading one line there can save you the whole hunt. The Status screen also flags old templates and failed database updates. Both can break how checkout is drawn. If orders are reaching checkout but failing after that, our guide to errors preventing order completion covers it.

Keeping Payment Methods Visible After Updates

A WooCommerce payment gateway not showing is nearly always the result of a change, not bad luck. A few habits stop most repeats.

Keep your stack current. WooCommerce now expects WordPress 6.9 or newer, PHP 8.3 or 8.4, MySQL 8.0 or MariaDB 10.6, and at least 256 MB of PHP memory. Gateways drop old versions faster than most plugins do. They are bound by card industry security rules, not by choice.

Test checkout after every WooCommerce update and every gateway update. Not now and then. Place one real low-value order through each method you offer, then refund it. Reading a settings page proves nothing. That page is exactly what looks right while the gateway stays hidden.

Last, watch for silence. A method that vanishes throws no error and raises no ticket. All you see is a slow drop in orders through it. Check your order reports each month for a method whose share has hit zero. That pattern is nearly always a gateway that stopped showing weeks ago and went unseen.

Get Expert Help With Your WooCommerce Checkout

A checkout that cannot take payment is the costliest fault a store can have. The causes sit across settings, plugin fit, caching and server setup. Working through them on a live store while orders fail is stressful and easy to get wrong. One missed cache layer, or one country rule you did not spot, keeps the fault alive after all else is fixed.

Maybe your payment methods will not show. Maybe checkout broke after an update. Maybe you need a store moved to block checkout without losing a gateway. Our WooCommerce team works all three out on a staging copy, then ships the fix with no downtime. Visit WP Customify to talk to our team about your checkout. Tell us the exact message buyers see, and which methods are missing. We can often name the cause before any work starts. And we will say so plainly if the fix is a five-minute setting change you can make yourself.

How to Add a Short Product Description in WooCommerce (2026 Guide)

Adding a short product description in WooCommerce takes thirty seconds once you know where the field is. Finding it is the hard part. It hides behind a checkbox on some sites. It moves to a new panel depending on which product editor you run. And on many stores it saves fine, then never shows up on the front end. Owners then hunt through theme settings for a problem that lives elsewhere.

This guide covers all three cases. Where the field lives in each editor. What to write in it. And how to find the exact reason yours is not showing.

First, Identify Which Product Editor Your Store Uses

Everything below turns on this one answer, so settle it first. WooCommerce ships two ways to edit a product. The short description sits in a different place in each.

Open any product for editing. Look at the top of the screen. Do you see a row of tabs marked General, Inventory, Shipping and Linked Products in a box titled “Product data”? That is the classic product editor. It is still the default on most stores.

You may instead see a side menu listing General, Organization, Pricing and Inventory as one long form. That is the newer product editor. It is opt-in. The switch lives under WooCommerce → Settings → Advanced → Features.

One more split matters. Your product template may be classic PHP, or built from blocks. Check Appearance in your admin menu. An Editor item instead of Customize means you run a block theme. Note the answer. It decides which fix below applies to you.

Adding a Short Description in the Classic Product Editor

Go to Products → All Products and open the product you want to edit. Scroll past the main text box and past the “Product data” box. Below both sits a panel titled Product short description, with its own small toolbar.

Type your text there and click Update. That is the whole job. The panel takes basic styling, so bold text, italics and bullet lists all work. Switch to the Text tab in the corner to paste or clean up HTML.

When the Short Description Panel Is Missing Entirely

This is the top reason people think WooCommerce has dropped the feature. It has not. The panel is a standard WordPress box, and those boxes are switched off per user. So a panel one admin can see may be hidden for the next admin on the same site.

Click Screen Options in the top right of the product edit screen. Find Product short description in the list and tick it. The panel shows up at once. The setting is stored against your own account. So a colleague who reports the field missing must tick it in their own login, not yours.

If the checkbox is not in Screen Options at all, something is removing the box. That is nearly always a page builder or a bulk product add-on that replaces the default edit screen. Turn off suspects one at a time. Check Screen Options after each.

Why the Field Is Sometimes Labelled “Excerpt”

Under the hood, this is not a special WooCommerce field at all. It is the standard WordPress post excerpt, stored in the post_excerpt column and simply renamed for products. That fact is worth holding on to, because it explains several odd quirks. Import and export tools often map the data to a column called “excerpt” instead. Custom code that changes excerpts will hit your product text too, whether the author meant it to or not. And any tool that claims excerpt support will work here with no changes at all.

Adding a Short Description in the New Product Editor

In the newer product editor the field sits in the General section. It is marked Summary, not “Short description”. You will find it just below the main Description area. It uses a block-style writing space with a small toolbar for bold, italic and links.

Two quirks here catch people out. First, this field is simpler than the classic panel by design. Complex HTML may be stripped on save. Keep products that rely on tables or custom markup in the classic editor. Second, text edited through the block screen does not always save. The field then reads as empty after a refresh. If your text vanishes, move that product back to the classic editor and use the Product short description panel. The data lands in the same column either way, so mixing the two costs you nothing. Check one saved product on the front end before you write the rest. You will catch this in a minute, not after fifty products.

What to Actually Write in a Short Description

The short description takes the most valuable space on your product page. It sits beside the image, above the fold, under the price and next to the buy button. It is the last text an unsure buyer reads before they decide. Treating it as a cut-down copy of the long text wastes that spot.

How Long It Should Be

Aim for two to four sentences, or 30 to 50 words. Most SEO tools flag text over 50 words as too long for this slot. Under about 150 characters looks thin beside a large product image. There is no hard limit in the code. But themes rarely hold more than a few lines of space. Anything longer pushes the buy button below the fold on a phone. That one result matters more than any word-count rule. So test a long version on a phone before you roll it out across the store.

A Structure That Converts

Open with what the product is and who it suits, in plain words. Follow with the one fact a buyer needs at this stage. That may be a size, a material, a capacity or a fit note. Close with the doubt that most often stops a sale. Often that is fit, delivery time, or whether the item works with what they own. Save the full spec table, care notes and tech detail for the long text below.

Write each one fresh. Copied text creates near-identical pages. This text also feeds marketplace listings, so the copying spreads well beyond your own site. For variants of one base product, change the opening line and the key fact, not just the colour name.

Diagnosing a Short Description That Will Not Display

You saved the text. It is still there after a refresh. The product page shows nothing. Before you change any settings, run this two-minute check. It tells you which of three causes you have.

Open the product page and view the page source in your browser. Search that source for a phrase from your text. Is the phrase in the HTML but not on screen? Then your theme’s CSS is hiding it, and you have a styling bug. Is the phrase missing from the source? Then the template never printed it. Skipping this check is why people spend an afternoon clearing caches for a CSS bug.

The Text Is Missing From the Page Source

On a classic PHP theme the text is printed by woocommerce_template_single_excerpt(). That function hangs off the woocommerce_single_product_summary hook at priority 20. It loads the template file single-product/short-description.php. Two things break that chain. A theme or child theme may have replaced the product template and dropped the call. Or a snippet may run remove_action on that hook, often left over from old custom work.

Switch to a default WordPress theme for a moment and reload the product. If the text appears, the override lives in your theme. If it still does not, the cause is code in a plugin or a snippets tool.

Block Themes and the Product Summary Confusion

Block themes drive a growing share of these reports. In a block-built product template, a block reads the post excerpt and prints it. That block may be set to build an excerpt from the long text on its own, and ignore what you wrote. Or it may cut the text at a fixed word count, mid-sentence.

Open Appearance → Editor and edit the single product template. Click the summary block. Check its settings for an excerpt-length or auto-build option. Set it to show your own text in full. If the block is missing, add it above the buy button.

Formatting Is Stripped but the Text Appears

Do your bullets and bold text print as one flat block? Then something is stripping the tags. The output runs through the woocommerce_short_description filter. SEO plugins and theme code both hook that filter to clean or shorten text. Either can strip markup you wanted to keep. Some block templates treat the excerpt as plain text as well, and drop tags by design. Test on a default theme with other plugins off to find the layer to blame. Then unhook it, or move that styling into the long text instead.

Adding Short Descriptions in Bulk

Editing several hundred products one by one is not real work. The built-in CSV importer is the route for a large store. Export from Products → All Products → Export, open the file, and fill in the Short description column. Import it back through Products → All Products → Import. Tick Update existing products on the import screen. Miss that box and you copy your whole store instead of updating it, which is slow to undo.

Map the column with care at the import step. If the tool leaves Short description unmapped, or ties it to the wrong field, your text lands in the long description and wipes what was there. Run a test import with five products first. Check the result on the front end before you load the full file.

Two warnings apply to any bulk run. Take a backup first, because the importer has no undo. And watch your row count on shared hosting. Large imports can time out part way and leave half the store updated.

Showing Short Descriptions on Shop and Category Pages

By default, WooCommerce prints this text on product pages only. Shop and category pages show the title, price and button. Many owners want a line of copy in the grid too. That helps most in stores where product names alone do not tell items apart.

On a block theme, edit the shop template in Appearance → Editor. Add an excerpt block inside the product template area. Then cap its length so the grid stays even. On a classic theme you hook the output onto an archive hook in your child theme’s functions file. Either way, keep the grid version short. Long text in a grid makes rows of uneven height. That ragged layout costs you more than the extra copy earns. Are products missing from those pages altogether? That is a separate issue, covered in our guide to fixing a WooCommerce shop page that is not showing products.

Mistakes That Quietly Cost You Sales

A few patterns show up again and again in store audits. Pasting maker copy is the worst one. That same text sits on every rival page stocking the item. Search engines then get no reason to pick yours. Repeating the product title wastes the slot, since the title sits right above it. Stuffing the keyword in three times reads badly to the only audience that counts. One natural mention is enough. The rest is noise a buyer has to read past.

Filling the field on some products and leaving it blank on others makes the layout uneven. The gaps read as a broken site, not a choice you made. Remember too that this text does nothing if the product itself is hidden. That is worth checking against our guide to hiding products in WooCommerce. And if the page will not load for buyers at all, start with our article on product pages you cannot view in WooCommerce.

Get Expert Help With Your WooCommerce Store

Short descriptions are small. But they sit at the exact point where a visitor decides to buy. A template fault that hides them across a whole store is easy to miss and costly to leave. The fix is rarely hard once you know which layer is at fault. Finding that layer is where most owners lose a day.

Maybe your text will not show on a block theme. Maybe a bulk import has scrambled your product data and you need it pulled back from a backup. Maybe your store just needs several hundred lines written well. Our WooCommerce team handles all three. We work on live stores without taking them offline. Visit WP Customify to talk to us about a one-off fix or ongoing support. Tell us what your product pages do now, and what you expected. We will name the layer at fault before you spend a thing. In most cases we can do that from your product URL alone.