Call Us Toll Free - US & Canada : +1-(888) 602-0119

An exemplary guide for WooCommerce Sendinblue integration

Are you planning to get more out of WooCommerce and Sendinblue? Do you want a smooth workflow that saves your resources and time? Well, you can manage with no coding with WooCommerce Sendinblue integration.

There are numerous perks of implementing WooCommerce Sendinblue integration. They are as follows:-

1. Loading of data in any direction

With WooCommerce Sendinblue integration, you can do data transformations, data filtering, etc. You can update records or insert new records that exist in the target already. As a result, you can import data without developing any duplicates for the present target records.

2. Synching of data two ways

You can do bi-directional synchronization of data between WooCommerce and Sendinblue. In addition, you get the benefit of powerful mapping features with WooCommerce Sendinblue integration. You can also synchronize data with variant structures.

3. Updating and syncing new data one-way

You can modify or upload new data with WooCommerce Sendinblue integration.

4. Mass Deletes and Updates

Here, you can manage all types of DML operations. This includes DELETE and UPDATE. As a result, you can manage operations of mass data or delete mass data.

Key features of Loading data in any direction, Updating and syncing new data one-way, & Mass Deletes and Updates

  • Support for all operations

You can build new records, delete source records, and update existing records from the target. You can also get support for the operation like upsert, which allows you to import the data without creating any duplicates.

  • Preserving data relations

A leading service provider with this feature will help you to build relations between the following:-

  • Imported objects
  • Tables
  • Files

You can preserve everything here.

  • Data Transformation

You can enjoy strong features of mapping for data transformation. Hence, you can easily import the data even when the target and source have varied structures. It allows you to manage data splitting, using lookups, complex formulas, and expressions.

One-way synching of modified data

With upsert support and data filtering, you can configure the imports easily to manage one-way sync. Hence, it is best to integrate Sendinblue with WooCommerce.

Key feature of Synching data two ways

  • Strong Mapping

Adept professionals can help you to custom objects and fields & allow you to sync the data. You can map string expressions and employ powerful mathematical & lookups. You can even map to multiple tables with a single table.

How to integrate Sendinblue with WooCommerce?

In the first step, do the installation & activation of Sendinblue in the WooCommerce plugin directory.

Enter the Sendinblue API key under the account of your Sendinblue. Hit Settings and click the API key to integrate Sendinblue with WooCommerce. As soon as you enter the API key, it allows you to configure any other plugin setting of your choice.

You are done!

In a conclusion

WooCommerce Sendinblue integration makes things easier for businesses. It can help to cultivate relationships with customers and grow businesses. So, make your way to integrate Sendiblue with WooCommerce and grow your business effectively.

You can automate emails as per the actions of your customers. For instance, if they have abandoned some product on their cart, you can automate an email reminding them of that product.

Apart from this, you can segment the list of your customer and send emails to a targeted customer base.

How to migrate from BigCommerce to WooCommerce?

BigCommerce is the best hosting platform and home for 49,795 websites. It is known for its superlative attributes like security, support, etc. But when it is compared to WooCommerce, it is not that popular.

WooCommerce has incredible power, built-in solid features, security, and flexibility. Hence, most businesses migrate from BigCommerce to WooCommerce.

Advantages of BigCommerce over WooCommerce

  • Synching with WordPress

WordPress is the best CMS that is widely used by most businesses. It powers 41% of the worldwide web. You can manage everything on WordPress from blogs to eCommerce shops.

WooCommerce was introduced by Automatic. It was specifically built for WordPress. Hence, you will get support (in and out) because it is handled by experts who know the entire thing about the platform.

On the other hand, BigCommerce is just designed for eCommerce shops. It is not meant for website and blogging management. You have to use a plugin to integrate BigCommerce with a WordPress website.

Synching with WordPress

WooCommerce can help you to manage orders, add products, and update the settings of shops. You can even create pages, respond to reviews, and craft pages. Now, if you go for WooCommerce payment extensions, you can track deposits and monitor the charges. With it, you can also handle disputes with a seamless process.

  • Affordable

1. Base price

WooCommerce and WordPress are completely free. However, you need to just invest in the hosting plan.

On the other hand, you need to pay for BigCommerce in order to run an eCommerce platform. The plan of BigCommerce starts at $29.95 a month. This varies as per the business size.

2. Load time

If you do not have a website then be prepared to bid farewell to traffic. Even search engines recommend a website that loads quickly. Now, if your website takes extended time, then you will lose all favor for ranking.

BigCommerce takes an average time of 2.2 seconds to load. On the other hand, WordPress takes 1.93 seconds with managed WooCommerce hosting provider.

3. Traffic and SEO Tools

SEO will only help you to make money through your WooCommerce store or eCommerce business.

WordPress websites are built keeping search engines in mind. The code of WordPress websites is lean and designed to load quickly. The configuration of WooCommerce and WordPress is SEO friendly.

It is easy to customize permalinks and URLs. But, if you are handling bulk SEO, then you need to employ plugins to customize meta descriptions and page titles.

Some premium BigCommerce themes include Accelerated mobile pages of Google. This helps in load time and page speed.

How to migrate from BigCommerce to WooCommerce?

To migrate from BigCommerce to WooCommerce, you need to create a backup of your existing store. It will save you from problems or any potential risks after migration.

  • Back-up products and its images

Visit the BigCommerce’s dashboard. Click “Export” after choosing the “Product” to migrate from BigCommerce to WooCommerce.

View Products

You will see a screen with “Export”. On the section “Template”, choose the option “Bulk Edit”.

Export Template

You will see a pop-up. On that choose ‘Export my Products to a CSV file’.

Products

Your file will be ready in the downloadable form. Next, press ‘Download my Product File.

Check new store

You will be ready with the back-up of your product as well as product images.

1. Back up the data of customer

Visit “Customers” and tap “Export

Customers

You have to repeat the same steps.

2. Backup order data

Browse for “Order” and press “Export”.

View Orders

  • Pick Hosting Provider

Since WordPress is a leading name, you can get plenty of compatible hosting providers. You need to choose hosting providers that have:-

  • Built-in performance-boosting caching
  • SSD storage
  • SSL certificate
  • 24/7 live chat support

Next, we will be proceeding to set up a new store of WooCommerce. It will serve as your destination website. If you are already having a website, log in. Otherwise, you need to sign up and create your account.

Choose the option “Add Server” for launching your server.

Server

You will be taken to a page where you need to fill in the details of the server and application.

Application Server Details

Complete all the details and Press “Launch Now”.

In the details of application, choose “WooCommerce”. This will launch your application.

Your server is ready in this stage. Tap “www” and get access to the details of your application. On the page of Access details, tap the URL that you see in the admin panel.

Access Details

You will be taken to the login page where you can see the username and password on the admin panel.

You have to log in to WooCommerce store to check the dashboard of the admin

dashboard login

You are done setting up a new WooCommerce store to migrate from BigCommerce to WooCommerce.

Wordpress Dashboard

3. Selection of Migration Method

You need to pick the most-suited migration method to get a brand-new store ready.

a. For instance, you can use extensions to migrate from BigCommerce to WooCommerce.
b. Set-up of source

You must add the details of BigCommerce API for setting up the source cart.

Setup

Complete the source cart URL by pasting the URL of your BigCommerce store. For API path, you need to open the Dashboard of BigCommerce. Choose the option “Advanced Settings”.

Advance Seattings

Tap ‘API Accounts

API Account

  • Next, to migrate from BigCommerce to WooCommerce, click “Create API Account”.

Create API Accounts

Complete all the details asked in ‘Create Account page‘.

In the section of token type, you need to choose V3/ V2 API Token and name it.

Create Account

Change the status to “Modify” and click “Save”.

Modify

Your file will be download to your personal computer with the credentials.

Target the Set-up of card

Complete all the information of Target Cart URL and Target Cart Type.

try migration

Download the Connector extension of your choice. You have to upload this to the root folder of target store once you extract the zip file. You can employ any FTP client of your choice to meet your requirements.

Configure Migration

Click ‘Next‘.

Configuration of migration settings

You have to choose your dinctinictive concept to migrate from BigCommerce to WooCommerce i.e to a new store. You can choose “All” or “Few”.

configuration

It is easy to migrate the possibilities using extensions. You can also use order status mapping and language to display in your new store.

Additional Option

Migration Initiation

Next, you have to initiate the process of migration. Click ‘Demo Migration‘.

Start free demo migration

Once done you will be taken to the page where must check all the entities that need to be migrated.

Demo Migration

Tap the icon ‘Full Migration‘ to migrate from BigCommerce to WooCommerce.

Method #2: Manual Migration

It is one of the toughest methods of migration. If you hold the technical expertise, you will not face much trouble. But if you lack then hire professional support.

Extract the product’s CSV file

You need to extract the CSV file.

Download plugins

As soon as your download the CSV file, visit the WooCommerce store. Click the URL on the admin panel.

Application URL

On Login page, complete the fields of Password and Username in the log in and Admin panel.

Admin login

Visit “Plugins” and tap “Add New”.

Plugin

Activation of plugins like WP All Import WooCommerce Add On plugin and WP All Import Plugin should be done once you install it.

Add plugin

Import Products from XML and CSV

CSV file Import

Browse to “All Imports” to migrate BigCommmerce to WooCommerce. Next, tap “New Import”.

All import

You have to upload the CSV file of the product once you enter the Import page.

New Import

Choose “WooCommerce Products” as soon as you upload the file.

New item

Repeat the earlier step.

Upload Files

Do Mapping

Imported

Then continue with the earlier steps.

Drag and Drop

You have to manually drap and drop to the columns that are relevant. You must be cautious in this step.

Configure to step 4

You have to continue to earlier step when you are done here.

Import Settings

You need to drag & drop the ID of the product in Unique Identifier. Also read about how to use WooCommerce shortcodes.

Configure

Next, press “Continue” to migrate from BigCommerce to WooCommerce.

Confrim and Run

Press ‘Confirm & Run Import‘.

Confirm

You are done!! You have successfully migrated from BigCommerce to WooCommerce. Next, you have to do the verification of the migration.

In a conclusion

We hope this simplified guide would have helped you to migrate from BigCommerce to WooCommerce.

If you find trouble to migrate from BigCommerce to WooCommerce, hire WPCustomify.

We are enriched WordPress development company with a strong base worldwide. Our WordPresss developers are talented and experienced. They are proficient enough to work on the most complex tasks.


How WooCommerce tiered pricing option can enhance sales?

Pricing is a major key player in the success and sales of an eCommerce business. WooCommerce tiered pricing option can enhance sales and can help you to boost conversion rates. You can make the visibility of your brand well in the market with quality audience targeting and a better customer experience.

Excellent tiered pricing is a strategy that brings in corresponding levels of pricing with numerous service options and products. It is like bargaining digitally when you are bulk selling. You can introduce new ranges of quantity via tiered pricing.

WooCommerce tiered pricing option can enhance sales and compels the clients to purchase products via quantity ranges. This will provide you with complete coverage to purchase and sell in the eCommerce market.

Introduction

WooCommerce tiered pricing has changed the dynamics of the wholesale market. So, this is high time to turn your path towards WooCommerce tiered pricing.

Different pricing options will allow customers with different priorities and budgets to purchase. Options of high volume with lower rates will lower the cost and boost sales.

If you open better pricing opportunities for your potential customer flow, it will increase your RoI. There are numerous reasons why you require special pricing or price drop. But, you must have an ultimate aim i.e to improve your products sales.

This you can set for selected products and users. Moreover, you can apply discounts and offers for your products. This can be applied storewide or for individual products. You can easily manage them with the use of extensions or plugins on your WooCommerce store.

Let us learn about WooCommerce tiered pricing in simple language.

Do you know you can restrict Shipping To Logged-In WooCommerce Users? No!! Check this link!!

Definition with example

WooCommerce tiered pricing is a case wherein the businesses give their clients a discount. This depends upon the unit products the customer purchases. So, a customer gets a discount when they purchase more products.

Once any customer meets the product number threshold, they get a lower rate on each product. This is WooCommerce tiered pricing that is implemented by most businesses.

Let’s get this more simply with the help of an example

For instance, you are running a Black Friday sale. We all are well aware of how customers are keen on purchasing during this time. We have to run more discounts and offers in order to engage more clients.

You can create four tiers (it’s an example)

  • 1-20 units of products will cost your customer $15 each
  • 21-50 units of products will cost your customer $10 each
  • 51-75 units of products will cost your customer $8 each
  • 76 units or more will cost your customer $8 each

Now, if a shopper purchases an order of 60 units, they will have to pay:-

(10×8)+ (30×10)+ (20×15)

This will be equal to $680

The total cost decreases as the shoppers meet the eligibility criteria of each tier.

Now, we are pointing this out because most people mix volume pricing with WooCommerce tiered pricing.

Compared to tiered pricing, Volume pricing sets pricing for every unit within the range. The total cost for the same units will be $480 (i.e. 60 * 8) for the same tiers in volume pricing.

Features of WooCommerce tiered pricing

There are plenty of features of WooCommerce tiered pricing. It covers all the conditions of the wholesale market and B2B.

  • Customizable table color and font size
  • Different pricing for different kinds of users. For instance, you can display the different prices for guests and your loyal customers
  • Adjust the decreasing or increasing percentage types, fixing prices and markups
  • Quantity or single-base pricing for B2B users, wholesale, and retailers
  • Applying discounts in pricing for bulk products using rule-based management. This can be applied to selected categories and products
  • Enforce maximum & minimum quantity
  • Customizable table color and font size
  • Tiered display of pricing table
  • Custom text for custom button and pricing for the feature “Add to Cart”
  • Add to cart option by hiding price for registered users and guests
  • Hide selected categories and products. Learn how to hide products in WooCommerce.
  • Adjust costs with each variation for variable products

Advantages of employing WooCommerce tiered pricing

Implementing WooCommerce tiered pricing will give your business plenty of advantages. Let’s see some of the key benefits:-

  • Engage shoppers to buy large quantities of units
  • Improve earnings per product sale
  • Gives clients various alternatives to pricing
  • Bottom line boosts
  • Creates bundles of product
  • Encourage the user to purchase clearance items
  • Setting up a quick reward program for the existing client
  • Place price adjustments to attract new clients to your eCommerce store
  • Reward existing clients
  • Improve retention rates

WooCommerce tiered pricing is best for those who sell bulk items and larger stores. It is also an ideal option for wholesale sellers and B2B.

WooCommerce tiered pricing and different ranges

1. Adding Role-based cost

You can set up different prices for your VIP, general and regular customers. You can set these prices differently from that of visitors. With it, you can even hide the cost for unregistered users. This will instigate your visitors to get themselves registered in order to collect the discounts.

pricing and different customer

2. Adding Tiered Quantity based cost

The cost falls for wholesale items with the quantity increase. It will allow you to set variant prices for variant quantity ranges. The pricing tables that are quantity-based allow the clients to understand the discounts.

You can adjust the costs in 5 ways using this:-

  • Fixed prices
  • Fixed discounts
  • Fixed markups
  • Fixed percentage
  • Percentage markups

Woo album

3. Customer and Role-based Tiered Cost

This feature is an added benefit for the merchants. It enables them to provide discounts to the customers they prefer. You can offer similar and different prices for each role of the user.

Products Data

4. Cost Adjustments in bulk

The extension works as per the rule-based management. This allows updating costs in the bulk of specific products and categories. You can use it to define variant prices for vivid categories, user roles, and products.

Wholesale tiered pricing

While crafting the rule for future reference, you can set unique titles. It also has features such as adding options for:-

  • Specific Categories
  • Specific products
  • Role-specific cost
  • Customer-specific cost
  • Priority

Edit Rule

5. Add to Cart and Hide Price Button

As per the user roles, you can hide categories and products for unregistered users or visitors. You can also implement the button “Add to Cart”. It is a handy feature when guests and visitors need to log in to check the prices.

Hide Price button

6. Applying discounts to special or Standard Cost

You can save yourself from double discounts. How? Well, by applying discounts and markups on standard or special prices.

For instance, if you are already running special prices on products you can save yourself by not giving double discounts on those products. WooCommerce Tiered Pricing is one of the best solutions that can assist you in those cases.

Wholesale tiered pricing seattings

7. Enforce maximum and minimum quantities

It is very easy to enforce the maximum and minimum quantities which a customer can order. You can avoid customers placing their order at a standard cost outside the price ranges that are quantity-based and pre-defined.

You can also customize and add error messages and display the false entry. So, it will provide you great assistance when the user adds an entry to the cart outside the predefined range.

Price settings

Mark values for your business

Surprise your loyal customers with cost-cuttings on the products with WooCommerce Tiered pricing. It will help you with the possibility to maximize your visitors to join you as loyal customers. You can give hefty discounts on different ranges of quantities.

Plugins: Your co-pilot that will help you to rule your customer’s heart

With WooCommerce tiered pricing, you can manage to do well with your store. It has user-friendly and conventional features that will hike your sales. You and your business must go for this extension.

Final Note

WooCommerce tiered pricing is an excellent way to incentivize your business. It is one of the highly effective and better deals that can help you to marvel well in the market.

WPCustomify has distinguished itself as an excellent service provider of WooCommerce Support. Our team believes in growing together and working in synergy.

Hire us and escalate your business in the digital world today!!

Tips to hide products in WooCommerce

The visibility of WooCommerce products is an essential feature. Some businesses hide it while some remove the products from an online store. But do you know deleting the product may hurt your search ranking?

WooCommerce, the genius platform gives you an option to hide products. Yes, you read it right. You can hide products in WooCommerce from your wholesale or retail customers.

Reasons to hide products in WooCommerce

Some businesses face selling distress because they simultaneously handle B2B buyers and retail users (clients). Or, the business owners want to share exclusive products with members only.

There are numerous methods to hide products in WooCommerce. Let us check some cases where hiding products is proven beneficial.

Read also: How To Test WooCommerce Checkout And Payments?

  • Shipping is not possible for specific locations

Amazon.com (see the image below) is not shipping this product to certain locations in India.

Shipping

Source

Have you seen similar cases while browsing the internet?

Some items cannot be internationally shipped. This may be because of legal or logistical reasons. It is better to hide products in WooCommerce for shoppers who are outside your shipping zone.

  • Some products in your inventory are seasonal

There are certain products that are sold at a specific time of the year. For instance, Christmas trees, Halloween costumes, etc. It does not make great sense if you display it off-season unless you are planning for a clearance sale.

  • You sell custom tailored or branded products

There may be cases wherein you have to hide items if they are exclusively meant for a certain person or store. You may have to hide products in WooCommerce for other users. These products will not be visible to the people who are not on the list.

  • Products for registered users (clients)

There may be occasions when you want to give special offers to your loyal customers. You can buy the products in WooCommerce from shoppers who are not your members yet. It is also the best way to instigate a user to create an account with your business for exclusive deals.

Tips to hide products in WooCommerce

A. Use WooCommerce Settings to hide products in WooCommerce

When you go for this method, there is a caveat. Your product will be hidden from your shop pages. Now, if your user gets a link to the product page, then they can access it.

Hence, this method is not a mere solution as you cannot make your product private entirely. It is inefficient because you have to manually make the changes for each product.

You will be stressed to efficiently assign the products to a particular category and then hide it.

If you do not have any problem accessing the product using a direct link, then go for this.

1. Log in to the account of WooCommerce

Go to the admin dashboard on your WordPress website, and log in for this.

2. Click “Products Menu”

Please check the image for reference. Tap the button “Product Menu” and navigate to the product. Hide it by using the option of visibility.

Product Menu

3. Choose Product

To access the product you need to edit the screen. From the list, select the product you wish to hide. Tap the button “Edit”.

Products

4. Press “Catalog Visibility”

On the editing screen, you will see the option “Catalog visibility” on the product’s right side. Please check it below to publish the meta box.

Click the link for the dropdown menu and tap “Hidden”.

5. Go for “Hidden”

Tap “OK” when you check “Hidden” and press “UPDATE” to complete.

Edit Product

It’s done!! Please try other methods if this one does not work well for you.

B. Use Plugin to hide products in WooCommerce

Here you can see how to hide products on WooCommerce using the plugin.

You can use the plugin “WooCommerce Members Only”. This plugin gives an upper hand to hide items on WooCommerce in many ways.

It can help you to hide all products, individually, or by category.

  • Hide products

Open this on the Edit Product Page to hide WooCommerce products individually. Next, you have to scroll to the area of Product data. Choose the option “Members only”.

Simple Products

Select “ Restriction method” from the menu of the dropdown.

For instance, if you choose the option “Password”, you will see prompt messages for password. Only through this, the users may unlock the product.

Now if you want to hide WooCommerce products based on the category, visit WooCommerce. From the WordPress website’s admin panel, you need to click “Settings” and click “Members Only”.

Restricted Content

Make sure to set the option “Restricted Content” after selecting “Restriction Method” to specified categories.

C. Hide products in WooCommerce as per User Role

Based on the roles of the user, you can hide products in WooCommerce. You can do this for an individual product or multiple products.

Please remember that you have set this up in a few minutes.

Restricted method

Visit “WooCommerce” and go to “Settings”.

Navigate for “Members Only” and choose “Restriction Method” for the user role.

Using the option of “Restricted Content”, make a decision whether you want to hide all/ certain category product (s).

If you are choosing “Specified Categories” the section on Restricted Categories will allow you to define the restriction. Please note this is for WooCommerce product categories.

Under the section “Permitted User Roles”, pick one or more user roles. The users with this role can access the hidden products of WooCommerce.

D. Hide products in WooCommerce based on log-in status

If you own a membership website you can hide the WooCommerce products based on the log-in status of the user. You can even create hidden items of WooCommerce by log-in status.

Login Status

Browse for “WooCommerce” and tap “Settings”. Click “Members Only”. You need to set “Log in Status” for the Restriction Method.

Use the option Restricted Content. Come into a decision whether you want to hide all/ certain category WooCommerce products.

You need to specify the product categories of WooCommerce in the section of Restricted Categories.

E. Hide products in WooCommerce with Passwords

You can apply for single or multiple passwords using the WooCommerce Members Only plugin. You can also apply it for WooCommerce products and WooCommerce product categories in your shop.

This is the best solution for business owners who are looking for simple methods to execute promotions and marketing campaigns.

Password

Navigate to “WooCommerce” and tap “Settings”. Go for “Members Only”. For the Restriction Method, you have to set the Password.

Make a decision whether you are planning to hide one or all products of WooCommerce using the option of Restricted content.

Choose the categories of the WooCommerce product that you want to hide in the section of Restricted Categories. The option of Password Form Page will allow you to pick the page to display the password form.

With a multiple or single password, you can hide individual WooCommerce products. Head to the tab “Members Only” for this. Please check this in the settings of Product data.

Products Data

F. Hide individual products in WooCommerce by User ID

On occasion, you may have to hide particular products of WooCommerce. This is in the case wherein you want a few members to access the WooCommerce product.

Users

To initiate this, you have to navigate for the product you plan to hide. You need to scroll to the section of Product data. Hit “Members Only”.

Set “By User” to set the Restriction Method. Make sure to place the User ID. This is for the users to which you plan to give access.

User Existing add

Browse to the “Users” to get the USER IDs. On the WordPress admin dashboard, press “All Users”. Check for the desired users. You can see the USER ID next to the username.

Make sure to check the box “Next”. This is next to the option “Archives”. You can choose to hide the items of WooCommerce in archives. This can be your tag archives, category pages, and the main store page.

How do you redirect users from hidden products?

You can redirect your users if they try to access your hidden products. This is a great approach for membership websites.

My Account

Stop over to the WordPress admin panel, and hit “WooCommerce”. Then click “Settings” and “Members Only”.

Pick “Restriction Method” from the dropdown.

Redirect to the page that you want your unauthorized user should go to. You can redirect them to a personalized landing page or any of your one WooCommerce default pages.

For this, you need to choose the action settings “Redirect To section” or “If Restricted”.

Facing challenges to hide products in WooCommerce? Hire WP Customify!!

Our team can accelerate your business efficiency with a design thinking approach, smart planning, and the latest technologies.

Build a successful business with Printful WooCommerce integration

Customized mugs, t-shirts, shirts, etc., with fun logos and cartoons, are in rage today. Individuals love expressing their individuality through sassy puns, quotes, superheroes, and statements.

Nowadays, small businesses and solo entrepreneurs are launching their eCommerce websites online.

Printful WooCommerce integration is the best solution for fewer investment businesses. You do not want to invest capital in warehouses and machines.

INTRODUCTION

a. Printful

Printful is an effective online app that delivers printed products to clients. It is a dropshipping and service provider of print-on-demand. This superlative app assists online merchants to sell custom designs to their clients.

You can integrate this app with an eCommerce store or online store. Using this, one can deliver printed items like on-demand printed phone cases, posters, etc., to their clients.

You do not require to give any upfront or setup cost for machines or accessories.

Printful is a commercial company that has warehouses worldwide. Hence, the products can get quickly shipped to the customers. It can bypass the duty and shipping fees on items available locally.

This brand provides the best-quality photography, design, and branding service. It will make your product appealing. Printful has set no limits for the minimum orders.

b. WooCommerce

WooCommerce is a customizable platform. You can easily build your eCommerce store on WordPress using WooCommerce.

You have to download this plugin in order to use its functionalities and features. You get the basic functionalities of eCommerce like order management, payment, categories, taxes, etc.

“Do you know that more than 90% of businesses with eCommerce websites use WooCommerce?”

You do not have to be a pro in technical or coding to set up a WooCommerce store in WordPress. It is leveraged with tools like drag-and-drop. This will help you to customize and move your store.

You can implement numerous functionalities by using built-in extensions of WooCommerce. You can even get your store’s performance. For this, WooCommerce offers Reporting and Analytic tools.

KEY FEATURES

a. Printful

This magnificent tool provides on-demand services. You as a store owner can save plenty of money. Some features of Printful are shared below:-

1. Complete automation

You can do Printful WooCommerce integration and automatically import products from your store. The process fulfillment is quite easy and quick.

2. Design Tools

This platform has Design Makes. It allows you to build unique designs from shapes and clipart. Through Getty images, you can access 80+ million images.

3. Integration

Printful lends great support for Integration. You can integrate it with most online marketplace and e-commerce platforms. Most businesses go for Printful WooCommerce integration because of this. Printful offers accessible and flexible services to most owners of an e-commerce website.

b. WooCommerce

WooCommerce makes the best platform for online merchants. The store owners can set up e-Commerce websites and sell services and products. Some features of WooCommerce are shared below:-

1. Reporting
The users can keep a track of winning products, sales stats, etc. WooCommerce offers a Reporting tool for this.

2. Secure Payments
This platform provides methods of multiple payments. This includes COD, bank transfers, credit cards, etc. The store owners get the privilege to integrate numerous platforms like Apple Pay, Google Pay, etc.

3. Dynamic Pricing
WooCommerce can calculate the delivery charges and tax rates automatically.

HOW WILL PRINTFUL WORK?

Printful WooCommerce integration allows the clients to make their orders. Further, make them delivered to Printful.

Once you do Printful WooCommerce integration, you can use the online mock-up generator of Printful. Finally, you can develop your products.

You can work on different types of products with Printful WooCommerce integration. It gives you the privilege to be creative with the clothing of children, women, and men. You can even display your creative side on home goods, accessories, and hats with Printful.

This denotes that you do not have to secure any expensive inventory that takes up your working area. You can promote your store by selling the products through Printful WooCommerce integration.

Advantages of Printful WooCommerce integration

  • Printful WooCommerce integration allows the users to get live shipping rates and settings of automated tax. This is available on all the products through Printful.
  • Printful WooCommerce integration is the best solution to the Printful fulfillment system, importing the orders from the WooCommerce store of WooCommerce automatically.
  • Printful WooCommerce integration is great for order initialization.
  • Printful WooCommerce integration allows the user to avoid unsold product storage, inventory hassle, upfront cost, etc.

Steps for Printful WooCommerce integration

For Printful WooCommerce integration, you need to employ the official plugin. This will help to connect your WooCommerce with a Printful account. With customizable features, you can add multiple products.

Here, you also get the option to track and manage your orders from the dashboard of the plugin.

Click “WooCommerce” and then tap “Plugins”. Next, go for the option “Add New”.

Search “Printful” on the search bar. Once done, do the installation and activation of the plugin.

You need to navigate to “Printful” from the dashboard of WordPress. Finally, press the button “Connect”.

Do you know you can restrict shipping to logged-in users? Check this blog.

Click “Approve” for Printful WooCommerce integration.

Make sure to sign up for Printful. You get the privilege to access all that is available on the dashboard of Printful.

Check the left sidebar. From here you can get the details of your profile, statistics, and view orders.

If you are having trouble viewing product pages of WooCommerce, please check here.

Common issues while doing Printful WooCommerce integration

1. Invalid consumer key

It denotes that you have entered your Consumer Keys incorrectly. For this, you must check your Consumer Secret and Consumer Key.
Visit the admin panel of “WooCommerce”. Navigate “Settings” and click “API”.

Then go to “Keys/ Apps”. Match the Token and Identity in the store settings of Printful.

2. WooCommerce synching causes a 404 error

For fixing this issue, visit the “Settings” of WordPress. Click “Permalinks” and choose “Under Common Settings”. Apart from “Plain” select any link structure. Tap “Save Changes” and reconnect the store of WooCommerce.

3. Too long URL- HTTP Error 414 Request

The configuration of the server does not give support for long URLs. The APIs of WooCommerce use long URLs exceptionally. You need to have a word with the system administrator and raise a request for maximum URL length.

Now, this issue may even arise because of WordPress plugins. For instance, the plugin “iThemes Security” can cause this issue if you have enabled “Filter Long URL Strings”.

4. Invalid signature

This error denotes that the signature you provided is not a great match. Hence, make sure to check the Consumer Secret. If it is the same, please reach out to support@printful.com for troubleshooting.

5. Not enabled REST API and Invalid WooCommerce URL

It causes your page to be returned due to an invalid API. Check the URL to fix the issue. Make sure that URL must not end with /shop/ or /wc-api/v1/.

Final Note

Printful WooCommerce integration is beneficial and simple. Printful provides solutions to shipping and inventory problems. Contrary, WooCommerce offers a robust e-Commerce platform.

WP Customify is an established WordPress development company with immense years of experience. We are known in the market for distinguished WordPress support. If you are having any troubleshooting or have doubts regarding Printful WooCommerce integration, please reach us.


How to test WooCommerce checkout and payments?

Payment facilitation is a critical component for any online business. Nowadays, there is no niche that does not pay close attention to it. There is simply no purchase or customer without it.

But, how can you test WooCommerce checkout and payments? What do your potential leads experience while making their purchase?

Read ahead to find out:-

Why should you test WooCommerce checkout and payments?

Nowadays, most online shoppers love to do their shopping in their own comfort. Be it groceries or buying household essentials, the users turn to online shops.

Check how you can restrict shipping to logged-in WooCommerce users.

If your eCommerce store does not give the users comfort, then you are out of the loop. Your customers may go to your competitors. There are even chances that they may file legal actions against you.

You must have a reliable payment system to run a trusted, credible, and good-ranking store. A broken or slow checkout process can impact the experience of your users. This will create great chaos in your sales.

Ensure that you maintain the security and check the bugs every now and then.

1. How can you test WooCommerce checkout and payments via cheque?

You can test the cheque payments in the simplest way. For this, you need to visit the “WooCommerce Payment Section”. Click on the option “Cheque Payment” and then enable it.

Navigate to your store and place the orders. It will steer to the page of Checkout. Complete all the details such as delivery details, etc. Ensure that you choose the method of payment as ‘Cheque payment’.

Place your order.

Visit the “Order page” and see the orders that are successfully placed. Click on the section “Recent Orders” and check the details of the payment on your admin dashboard. You can see the order was placed with cheque payment methods.
You can even test like this to check the Bank transfers.

2. How can you test checkout and payments using COD?

Visit WooCommerce “Settings” and tap“Payments”. Enable COD, “Cash on Delivery”.

Go back to your online store and order any items from the inventory. Click the option “Proceed to Checkout”.

Your users can complete all the essential details and purchase their desired products. To test the WooCommerce checkouts and payments, you need to fill in the delivery and contact details. You will see that the checkout page by default is showing Cash-on-Delivery. It is because you have enabled this on the WooCommerce payment dashboard.

When done, tap “Place Orders”. It will show the order’s particular like the order number, email, date, costs, etc.

You can figure out if your order page and checkout page are smoothly working. Your clients will get an automatic confirmation message that contains details of the order.

It is very easy to access the details of the order using the dashboard of WordPress. For this, browse “WooCommerce” and click the option “Orders”.

At this time, you can click and check the essential order number. You can see detailed information on your screen regarding the placed order.

For instance, you can check the shipping methods, contact details of clients, and payment method.

You even get the privilege to modify the details (if required).

3. How to use the WooCommerce payment plugin to test WooCommerce checkout and payments?

It is quite easy to set up the WooCommerce payments plugin to integrate debit card and credit card payments. You can even use it easily. This even gives support to Google Pay and Apple Pay apps.

You can use this plugin to view and manage the reports of transactions. For this, you need to use the dashboard of the plugin.

Here, we are using the WooComemrce payment plugin. You can develop a Dev Mode, a test account to test the website’s development.

Firstly, you need to install this plugin- the WooCommerce Payments plugin. Complete all the essential details.

When done, you need to switch yourself to the Test Mode. Visit the option “Payments” and click “Settings”. In the next step, you need to tap “(Enable) Test Mode”. Proceed further when you save these changes.

For testing the card payments using the WooCommerce payment gateway

Once done with the order complete the particulars of your card. Make sure to fill in the expiry date and CVC code (3-digit). Then put your order and get a confirmation for the same.

Browse for “Payments” and then go to “Transactions” from your WordPress dashboard. You will see your orders getting processed forward.

4. How to use a free plugin to test WooCommerce checkout and payments?

Check back to your WordPress dashboard. From there browse for “Plugins” and tap “Add New”.

You need to type WC Order Test on the search bar. WC Order test is a free testing plugin that allows testing the process of checkout. You need to click the button “Activate” once you install the “WC Order test”.

You can use this plugin completely for testing purposes. Browse “WooCommerce” and go to “Settings”. Lastly, you need to click “Payments”.

Order test

You will see the option “Order Test”. Make sure that you enable it and click the button “Manage”.

Check in the setting panel of the WC test. Click “Enable order test gateway” and then tap the “Save changes”.

Order test gateway

Go back to your store and place the product orders. Proceed further and your screen will display the “Order Test Gateway” option.

Tap the button “Place Order”.

Your order

Make sure you jot down the order number and go to the page “WooCommerce Order”.

5. How to use the Stripe payment gateway to test WooCommerce checkout and payments

Stripe payment gateway is a widely used payment tool. This tool is largely loved by businesses because it allows local payments, digital wallets, and card payments using its gateway.

To begin, you must go to the WordPress dashboard. Install the Stripe payment gateway plugin and click “Activate”.

For doing the integration of this plugin for test mode, you must set up the Stripe account. This is for the API kets.

Visit the website of Stripe and create a Stripe account. Browse for “Developers” and click “API Keys”. In this step, you can get access to Secret Key and Publishable Key.

API Keys

Check back to the settings of WooCommerce and navigate for payment tabs. Under this option, make sure you “Enable” the Stripe payment method. Next, tap the button “Set up”.

Stripe

Here, you need to tap “Enable Test Mode”. Make sure you insert the “Secret Keys” and “Publishable keys”.

Test Key

When you are done pasting it, click the button “Save Changes

Make sure you add and complete all the customers and billing details.

For testing the credit card payment on Stripe, you can formulate the steps stated in the last section. Make sure you add a valid expiry date and CVC code. When you are done, tap “Place Order”.

Your order stripe

Visit the dashboard of Stipe and click the tab “Payments” and check for payments.

Payments

If the screen displays your order, this means your payment was executed successfully.

To make this active for your clients, visit “WooCommerce” and click “Settings”. Next, tap the option “Payments” and browse for the Stripe Payment button “Manage”, Click it.

Make sure you “Disable the test mode”. Complete all the details that are asked. Once done, tap “Save Changes”.

6. How can you test checkout and payments using PayPal?

PayPal is a widely popular payment gateway with plenty of followers all across the globe. By default, it is included in WooCommerce with PayPal standard. To do the order testing, you will require a PayPal Sandbox account. Visit the PayPal Developer website and create an account.

For this, go to “Sandbox” and click “Accounts”. Hit “Create account”,

Sandbox Accounts

A pop-up will ask you whether you want to create a personal (buyer account) or business (merchant account). It will also ask about your country and region.

To do the testing, we require both buyer’s and merchant’s emails.

To create a personal account, select the region and country and click “Create”. Repeat the same process for business accounts.

Create sandbox Account

Ensure that the region/ country matches your store’s default currency. Why? Well, you can avoid the orders stating as pending payments.

Next, you need to tap the button “Option” under the section “Manage Accounts”. Select the option “View/ Edit” account for the newly created account of Sandbox.

Sandbox accounts details

This will display all the sandbox account’s account details. Under the tab “Profile”, you can see the password and email address of Merchant & Buyer accounts. Copy them and save them securely. You will need them for testing the orders of WooCommerce in the later stage.

Account Details

How to enable this gateway?

You need to visit “WooCommerce” and click “Settings”. Next, you need to open the section “Payments”.

Looking for ways to configure PayPal for Digital Goods with WooCommerce? Check this link.

PayPal Standard

Make sure to enable the gateway, PayPal Standard. Tap on the Set-Up if you did not set up this payment gateway for your site.

Click “Manage” and hit “Enable PayPal Standard”. You have to add the merchant (business) email of PayPal on the Receiver email and PayPay email. At last, you need to check the option “Enable PayPal sandbox” and “Save the changes”.

PayPal Standard settings

How to test?

Open the public online store. You can even open it from an incognito tab or any web browser.

To continue the payment, tap “Proceed to PayPal”.

Your order paypal

You need to type the buyer’s email address of the PayPal Sandbox account and log in.

Select “Pay with a PayPal balance” and tap “Pay Now” for the payment.

Test Score

You will receive a payment success message.

PayPal Sucess Message

Log in to the merchant account of PayPal. Browse for “Recent History” and check for new transactions. If the recent transaction shows, this means everything is working just fine.

To initiate live transactions, visit “WooCommerce” and click “Settings”. Click “Payments” and the “Manage”.

Untick the option “Enable PayPal Sandbox”, complete all the details and save the changes.

In a conclusion!!

It is recommended to test the WooCommerce checkout and payments every now and then. In fact, you can take WooCommerce support services from a good team.

How can you do WooCommerce Point Of Sale (POS) integration?

Nowadays, most businesses have a physical store with a WooCommerce store. Businesses do this generally to tap different kinds of customers.

However, things become quite messy when it comes to inventory management. You need to synchronize all the time. WooCommerce Point Of Sale (POS) integration is one apparent solution to this problem.

For instance, if you run out of stock in your physical store. It will be modified on your online store as well. You will be sorted for the back-orders.

How can you do WooCommerce Point Of Sale (POS) integration?

There are different types of tools that can assist you in WooCommerce Point Of Sale (POS) integration.

Most of the WooCommerce Point Of Sale (POS) integration plugins use the REST API of WooCommerce.

For your physical store, you can develop a front-end interface with it. It will be connected to your store’s other data, orders, and inventory. The cashier at your physical store can check out a client using this interface.

This will reflect in the store data as well. They can apply discounts, scan the barcodes of products, and print invoices.

Steps for WooCommerce Point Of Sale (POS) integration

Fundamentally, all the processes are similar. But some steps may be different as per the plugin you choose.

  • Step 1: Installation and activation of the prominent WooCommerce POS integration plugin.
  • Step 2: You have to develop the frontend interface and add the items. You can choose the item from a definite class.
  • Step 3: Use API credentials to connect the POS system to the online store data.

Now, the steps of testing may slightly vary. However, you can assign the store’s capabilities to your store cashier. They can do the checkout using card payment or cash.

They can even offer discounts and add special fees before checkout.

There is many WooCommerce Point of Sale integration that allows card processors. They can even support external devices like barcode scanners or printers.

Some WooCommerce Point Of Sale integration plugins

  • WooPOS
  • POSPro
  • WePOS
  • Hike POS
  • Square

Final Note

In a competitive scenario of eCommerce, it is essential to integrate many sales channels. Hence, it is a valuable prospect to connect your WooCommerce store with 1/ more physical stores.

You get many options to achieve this. One option is to do WooCommerce POS integration. There are many prominent systems such as Square or Lightspeed for this.

There is even an alternate option. You can develop an interface on your WooCommerce store. Both options are great but they have their own sets of challenges. Live Chat Support

How can you restrict shipping to logged-in WooCommerce users?

Do you run an eCommerce store? For newbies, it may be an overwhelming and complicated task. You must ensure that your clients are loyal to you and are satisfied with your products. You need to try risks rather than just relying on true client retention strategies.

The best support system

WooCommerce is the best and most famous e-Commerce solution. One of the best options for e-Commerce owners is that you can restrict shipping to logged-in WooCommerce users.

Let us first understand the difference between non-logged-in users and logged-in users.

Non-logged-in users cannot have access to your products whereas a logged-in user has. You get full knowledge about what logged-in users/ customers are keen on. Accordingly, got can provide. The satisfied users will purchase and come to you again.

How can you restrict shipping to logged-in WooCommerce users?

It gives lots of advantages to restrict shipping to logged-in users. You get the upper hand on what your users are interested in. Moreover, you will get an idea about their purchase patterns and what pages they have viewed or visited.

This accumulated data can help you to increase your online business’s sales. You can present them with similar products related to what they have purchased or viewed. It will keep your users engaged.

You can get the client’s location. This includes local geolocation and shipment location. You can identify the coupon numbers used for the given product category.
You will need the WooCommerce Table Rate Shipping Pro plugin to restrict shipping to logged-in WooCommerce users.

restrict shipping to logged-in WooCommerce users

Steps to restrict shipping to logged-in WooCommerce users

Firstly, go to the admin panel of the WordPress website and click on the tab “WooCommerce”. You will see a panel opening at the right end.

You can see plenty of options like shipping, general settings, etc. Click on “Shipping”. You will see options like remove/ change/ add shipping zones.

The process to add a new shipping zone is quite simple. Tap “Add shipping zone”. You can then complete the form by adding “Zone regions” and “Zone name”. The settings can be applied.

Shipping

You can see a list of “Shipping methods” that can be reordered by dropping and dragging.

In the next step, you have to disable or enable the button. This you will find next to the shipping method. Click on the button disable.

Enable Shipping

To check the list of shipping methods, you need to tap the plugin’s name. You get two methods of shipping available:-

  • “Not logged in”
  • “Logged in only”

Note:- You can add/ implement more methods.

Open any of the methods of shipping. You can edit these by hiding other methods, changing the title, handling fees, etc.

You can display different rates for the users who are not logged in to your business website. It is better that you specify that these are particular rates that are specified for a product/ group of products.

For instance, by setting “Total price” as a condition for a table rate, you can specify what the shipping price will be for all products with a price in the range that you set. Choose any base price and label it according to you.

You can provide a cheaper price for shipping to your membership users. For this, you need to do small customization in the settings and go back to shipping panel options.

Click on the shipping method option “Logged in only”. Ensure to tick the option “Only for Logged in users”.

Check only logged in

Now the shipping method option is only available to those who have a membership with you.

The users who are logged on can see the following shipping methods:-

  • Premium
  • Standard

The users can choose as per their interests. The moment you log out you can only get the “Standard shipping” option. The users who do not hold membership will be displayed this option.

But you need to do smart work to fix this.

Tick on the option, “Hide other methods”.

Make sure you visit the cart manually through your site and check both cases.

Cart totals

In a conclusion!!

The users can log in to your business by simply sharing their email addresses. You can check their behavior on your website and shoot emails for newly arrived/ similar items.

Use this plugin and get more traffic to make a successful business. Else, you can hire a good team who can give you support for WooCommerce.

Try and give a test today!!

Best ways to do Google calendar Woocommerce integration

Nowadays, business landscapes are continually evolving. To maximize profit and achieve extra growth, you must inherit new techniques for sales management. One such technique is Google Calendar Woocommerce integration.

A detailed introduction to:-

1. Google Calendars

Google Calendars are the best tool that can change the most unorganized person into an efficient one. It is especially helpful for those who are facing a hard time streamlining their bookings with their daily work.

Google Calendars are a great support for large hotel chains and such domains. One can easily manage to mark the dates for booking, manage the staff, or next booking.

Similarly, it will update the appointment schedules to connect people all across the globe. You can manage/ schedule the remote meetings via video links. One can even coordinate multiple calendars at once to figure out the best time.

But have you ever analyzed what happens if you have to manage more than 100 bookings/ month?

2. WooCommerce Appointments and Bookings

WooCommerce has a bunch of amazing features. This plugin is the most powerful tool to manage reservations, bookings, events, etc. You can provide or initiate the booking based on months, days, hours, and even days. One can even restrict the booking to a certain locking period.

From a musical concert organizer to a hotel business owner, one can efficiently use and manage this plugin.

How can you set up Google Calendar WooCommerce integration?

1. WooCommerce

  • Visit “WooCommerce” and tap the option “Bookings”. Next, click “Settings”.
  • Choose the tab “Calendar Connection”.

Booking

  • Click on the option “Connect” using Google. This you can find under the section of Calendar Connection. Next, choose a Google account.

Signin from Google

  • You must choose an account here.
  • Make sure to confirm to the Google account or Gmail. Review your Permission to Allow.

Confirm your choice

  • Choose “Allow” to gain access to the calendar.

Woocommerce Permission

  • Do the verification of the URL and tap “Continue”.

Woocommerce

You will see a message that displays for successful connection.

Authorization

  • You will see a new section along with the settings of the calendar because of successful connection is set up.
  • From the dropdown choose the calendar and sync the Bookings.
  • Next, you must set the preference of the sync. Check below to learn about the sync preferences. Lastly, click the option “Save Changes”.

Calender Connection

The Set up is complete!!

2. Google Developers Console

Visit “WooCommerce” and click “Settings”. Next, tap the option “Integration”.

Google Calender

You can take the help of Google Developers Console to develop the project. For this, click Google Developers Console you will see your screen:-

Library

You can choose any option “New Project” or “Use existing project”.

Select

Browse for “G Suite APIs” and click the option “Calendar API”.

Calendar API

Next, hit the “Enable”.

Enable google calendar API

a. You need to create the credentials. For this, choose the option “Go to credentials”.

Check Details

You can even try an alternate method. Directly go to the API Manager. Next, click the option “Project” and “Credentials” page.

Choose the option “Create Credentials” and click “OAuth Client ID”.

API manager

b. Next, you need to do the setup of the OAuth Consent Screen. For this, you need to complete the details for the consent screen.

Please Note:-

You can only see the consent screen when you tap the option “Connect from your site”. This you can find on the WP-Admin.

On the WP-Admin, click the option “Bookings”. Then tap “Settings” and tap “Calendar Integration”.

It will by default select the email address. You need to type your application name. If you are planning to add any application logo then you need to do the verification from Google. This may take four to six weeks.

This application is internally used to connect the website to the calendar. Hence, we will recommend you to not add any Logo.

“SAVE AND CONTINUE”, Click this!!

You can skip the step “Scopes” as it is optional.

To set the OAuth Client ID screen, visit API Manager. Click Project and tap the option Credentials page.

You have to choose “Create credentials” and tap OAuth Client ID. Next, Redo the Step (a).

Add the credentials to your site. Please make sure to add the credential to your website.

You can check this by visiting the API and tapping on the Credential page after you have created them.

  • To open the credential, you need to click on the name.
  • Next, copy the Client Secret as well as the Client ID.

At your store, you must visit Bookings and click Settings. Finally, tap the option Calendar Connection. Under ‘Connect with your own Google App’ enter the Client ID and Secret ID. Once done, click ‘Save the settings’.

c. For the authorization of the calendar and account with Google, you need to enter your credentials.                                    Then save the settings. Lastly, tap on the button “Connect with Google”.

Google calendar WooCommerce integration

Google calendar WooCommerce integration

Next, select your Google account on your screen.

Google calendar WooCommerce integration

You will be notified regarding the warning of your app not getting verified. Tap ‘Advanced’.

Google calendar WooCommerce integration

Once you tap, please ensure to click on the link you see on your screen.

You will see a notification that will ask you to grant access. Click Allow.

Google calendar WooCommerce integration

To confirm the Access, tap” Allow”.

2 Way Google Calendar Sync

This sync is best if you have to manage bookings or reservations for your business. To do this, enable the Google Calendar Sync.

  • Install and download the WooCommerce plugin.
  • Next, for the activation of the plugin, tap “Settings”.
  • Under the tab “Google Calendar” tap the option “Start Two-Way Sync”.

Once you tap on this button, it will sync all the events that you have developed on Google Calendar.

Google calendar WooCommerce integration

To sync an event as Booking on the site, you must:-

  1. Give the name of the Bookable product or “Bookable Product ID” as the “Calendar Event Title”.
  2. You need to set the booking time and date as per the availability of the product.
  3. If you have any guests, list them in the event description with the following command “<guest name as mentioned in the product>:<number of guests>”.

For instance,

If you have the option for guests (Adults +Children) in the bookable product, you can list them as:-

  • Children: 3
  • Adults: 4

Google calendar WooCommerce integration

  • You can make sure that all the bookings are automatically synced. The plugins will sync the events by default every 60 seconds to your site. You can even customize the timings but we will recommend and tap “Save Interval”.
  • You can even set your site up to date for booking availability for emergency situations. Now if you cannot wait that long to sync the calendar events, you can sync the calendar events manually. For this, click on the “Manual Sync”.

Google calendar WooCommerce integration

Once the sync (related to the event) is complete, you can see this on your site as “New Booking”. This you will see under the tab “Booking” and the Order Page. On the order page, you will see this as “New Order”.

It is quite a struggle to streamline the bookings with the daily work. For instance, managing the staff, marking the dates next booking, etc. It is strenuous to manage.

You need an automated calendar system in this case so that you are updated with the booking. Using the features of Google sync, you can navigate the bookings from your smartphones from any location.

The plugin -WooCommerce Bookings and Appointments have got you covered.

Want to know more regarding Google calendar WooCommerce integration? Contact WP Support!! We are the pioneer WordPress development company that provides maintenance support.

Our experts are well-versed to bring solutions to the most complex errors.

Hire us and experience the new digital experience today!!

Top 10 WooCommerce Coupon Plugins to boost sales in 2022

Nowadays, people are always on the lookout for exclusive deals, vouchers, and discounts. So, you can say that coupons are the driving force to earn exclusive deals and customer loyalty. As per the sources, 90% of shoppers utilized coupons in 2020.

Note:- You are missing great opportunities if you fail to include them on your e-Commerce website.

Key takeaways:

  • Coupons are the best way to drive clients and expand the customer base.
  • Coupons can assist you to introduce new products
  • Encourage new customers.
  • It attracts existing clients to purchase from your store.

WooCommerce is an incredible eCommerce solution. It can be utilized for any online platform. Business owners initiate this solution because of its open-source nature.

The eCommerce plugins work flawlessly with WordPress. It has raised its fame because of its adaptability and adjustability. The statistics of WooCommerce make it a superior comprehension in the digital world.

According to SoftwareFindr, six percent of online sites and twenty-six percent of online use WooCommerce to develop a strong eCommerce business.

Using WooCommerce and WordPress coupon plugins is the game changer if you are running an online business. It is a powerful yet simple way to boost engagement and solidify loyal clients.

What must you contemplate for WooCommerce coupon plugins?

There is a huge range of WooCommerce and WordPress coupon plugins. You can use a handful of factors like discounts types, budget, and WooCommerce-specific features. Perhaps you must look for a straightforward and basic solution for displaying and developing coupons on your website.

Tips to provide coupons to attain maximum potential clients for your WooCommerce website

Now, you have learned about the solid foundation regarding WordPress coupons plugins. Let us check some prominent ways that guarantee a great discount option that works with the customers:-

  • Easy to find products:

Have an awesome coupon for the product? Do your clients face difficulty tracking down your product? If yes, then you are nothing but a failure. You need to develop an easy deal so that your clients can directly get to you and finalize their purchases

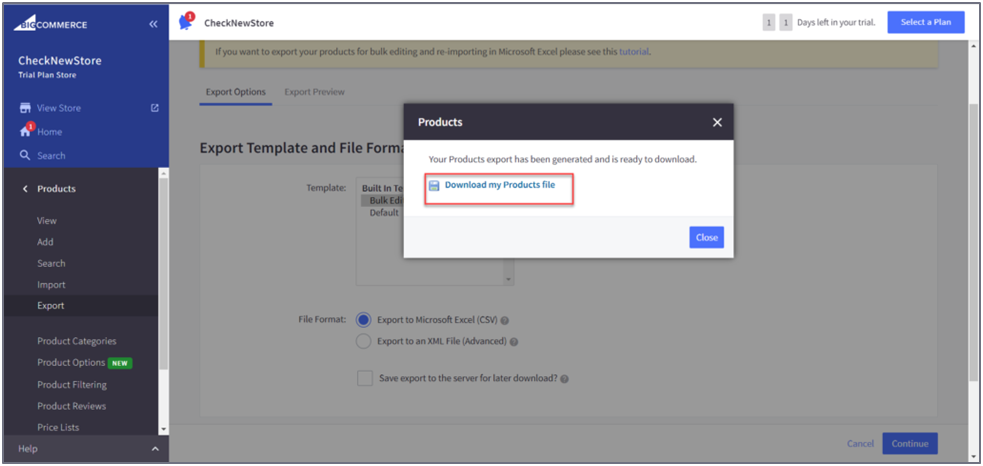
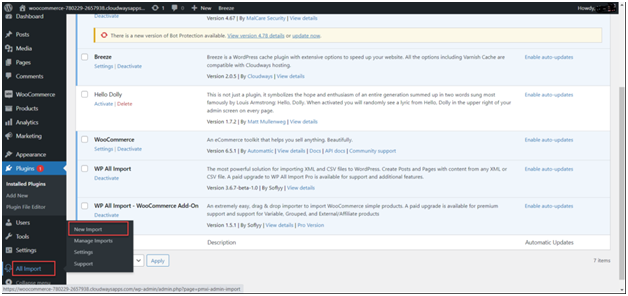
  • Import coupons for your clients

It is not good if your visitors hunt on your website for codes. You need to place the coupons, discounts, or sales at the center of the website. This will capture the interest of the client.

  • Keep relevancy

You must present the coupons that are relevant to the products that your clients have purchased. This is applicable for those products that are available in the shopping carts currently.

  • Customization of the coupons

The coupons that you provide your user are the development of your brand. If you use strong copy, it can make your potential users endure like they are getting rare deals.

  • Do not overdo it

If you overload your website with vouchers and deals, it will make things less exclusive. Try to experiment with attractive and varied messages & coupons. It will make things fresh.

  • Make a deal

Nowadays, many visitors do not have any trouble sharing their email addresses. It is not simple to provide your clients with special discounts to secure sales. You need to have a proper strategy and finesse to retain, engage, and acquire potential clients.

Top 10 WooCommerce Coupon Plugins

1. WooCommerce Discount Rules by Flycart

flycart

This WooCommerce Coupon Plugin goes past the basic coupon-based discounts. It provides you with huge loads of features.

It assists you to build dynamic discounts and pricing in the WooCommerce store.

Now, these conditions are based on the following:-

  • Roles of the users
  • Categories
  • Quantity
  • The email id of the customers
  • History of the purchases
  • Shipping address
  • User roles
  • Products
  • Variants
  • Attributes
  • Order total

So you can build for mass tiered pricing deals, cart discounts, or total-based discounts.

You can set discount rules to automatically apply or after utilizing a coupon code. A similar coupon code can likewise be utilized to activate different discount rules.

The fundamental benefit of this coupon plugin is that it permits you to make discount rules in three basic steps.

The odds of clients forsaking your store cart will be negligible. It is in light of the fact that the plugin assists in displaying the discounts right on the cart or product page.

You can purchase this WordPress coupon plugin for $49 per year.

2. YITH WooCommerce Gift Cards

This is one of the best WooCommerce Coupon Plugins. It empowers you to provide your site visitors with the opportunity to buy gift cards to your WooCommerce store.

Yith woocommerce

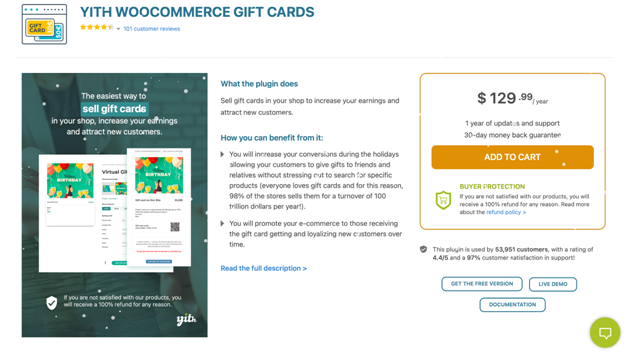
Ideally, you can send these gift vouchers to new potential clients who will make purchases. They will become loyal adherents of your brands. This is a gainful methodology for lead generation.

For instance, you can make digital and physical gift vouchers. It will permit your clients to set their own gift voucher sums. There are numerous other features also that you can enjoy.

3. SUMO Coupons – WooCommerce Coupon System

Sumo Coupons

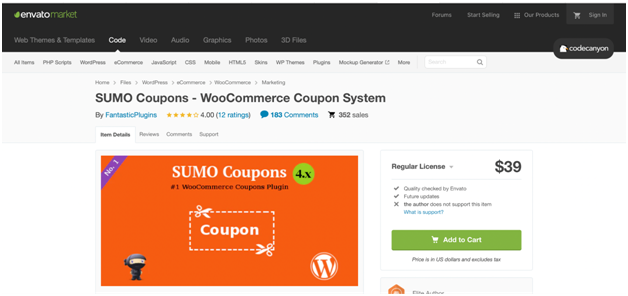
SUMO Coupons is the best WooCommerce coupon framework. This WooCommerce Coupon Plugins is best for your online store. Using SUMO Coupons, you can give your clients great coupons for Sign up, social media promotions, Product Purchases, and writing Reviews.

It contains three coupon modes, they are:-

  • Email Coupon Mode
  • Credit Coupon Mode
  • Auto Apply Coupon Mode

You can provide fixed discounts and percentage discounts through coupons using this system of WooCommerce coupons.

4. Ninja Popups

This is a one-of-a-kind WooCommerce Coupon Plugins. It allows you to add vouchers to pop-ups that it showcases to your WordPress site guests. You can make your popup utilizing the visual editor. You can take advantage of new themes for added creativity and inspiration.

Ninja Coupons

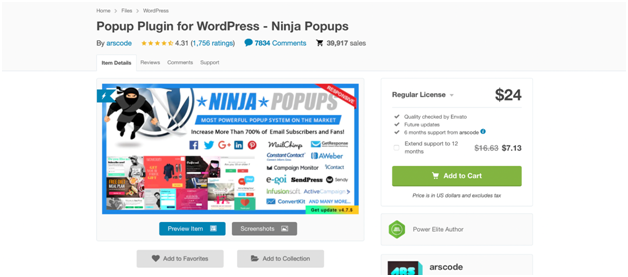
Also, there are eight opt-in panels to choose from seventy-four animation effects.

This dynamic WooCommerce coupon plugin is mobile-friendly and responsive. It can be deciphered utilizing the WPML plugin. It even coordinates with well-known email service providers.

Additionally, you can coordinate your cherished social media networks. It includes Facebook, Twitter, LinkedIn, Google+, and Pinterest

Ninja Popups isn’t an explicitly designed WordPress coupon plugin. But you will love its adaptability.

5. WooCommerce Ultimate Points and Rewards

This WooCommerce Coupon Plugin is a complete answer for compensating clients to your online store.

ultimate points

With this WordPress coupon plugin, you can relegate points to product categories and individual items. You can design the settings to permit your clients to impart points to different clients. You can deduct the points and manually add them to the accounts of the customers.

The fundamental benefit of utilizing this WooCommerce coupon plugin is that it makes it simple for you to secure new clients. It can likewise assist you to build product reviews and boosting referral marketing.

6. WP Coupons and Deals

Your search is over if you are seeking a powerful yet simple WordPress coupon plugin. You can add discounts and vouchers to your site’s pages and posts.

coupons deals

Unlike other WooCommerce coupon plugins, this one is designated explicitly for affiliate marketers.

It is intended to assist to promote deals and affiliate vouchers. WP Coupons and Deals secures your deals by guaranteeing guests to click on your affiliate links.

7. Coupon Creator

This WordPress plugin is a simple-to-utilize custom post type with a couple of settings to design. You should simply generate a shortcode. You can place your coupon on any page or post you need.

Coupons Creators

With this WordPress plugin, you can display your coupons. You can display and create WooCommerce-explicit coupons. You can exploit the speedy and mass functionality of the expiration date.

8. Social Offers

Social Offers

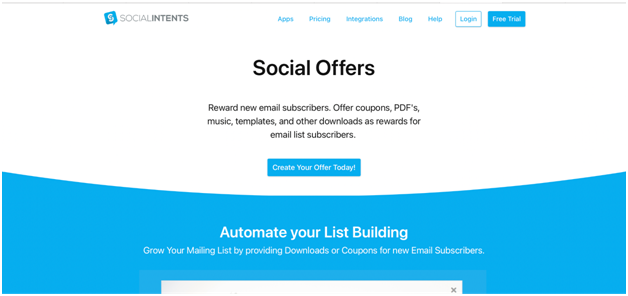
It is a strong WordPress coupon plugins. This plugin likewise upholds additional premium applications. For example, an email list builder for expanding supporters or a Live Chat function.

9. Code Shop for WordPress

It is a strong WordPress coupon plugin that allows you to offer the following categories.

  • Licenses
  • Coupons
  • vouchers

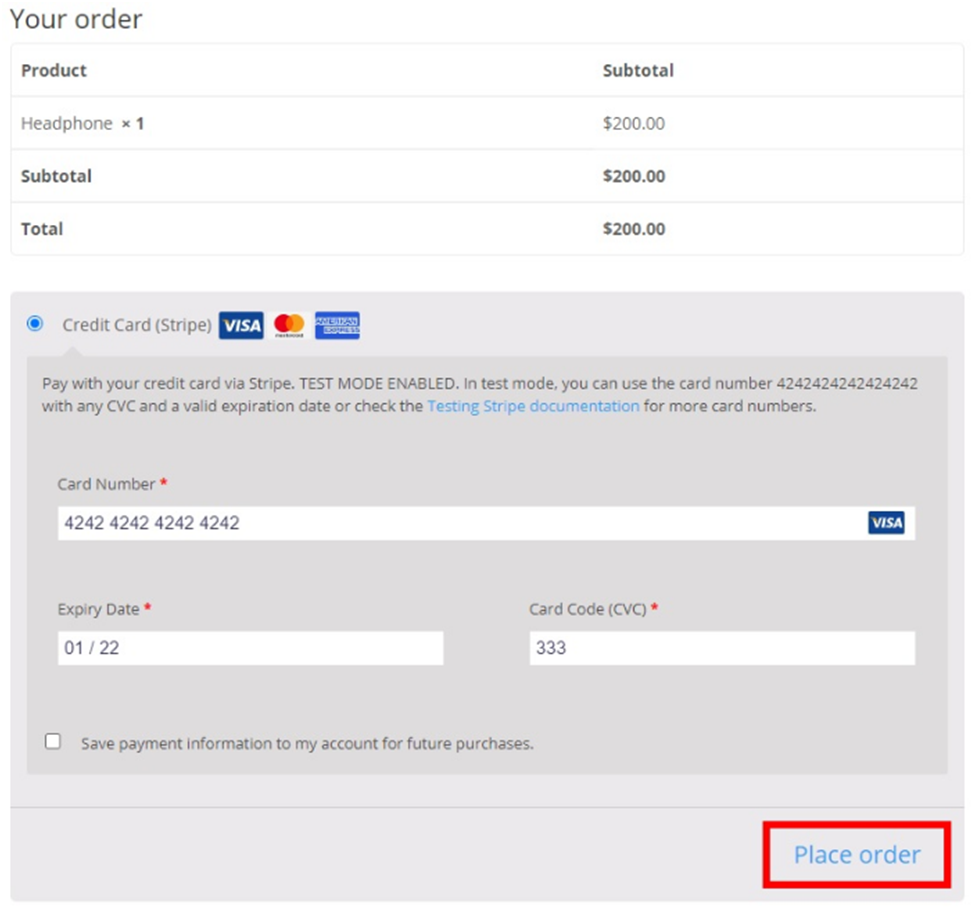
You can provide these directly from your websites. It interfaces flawlessly with payment gateways like PayPal, Authorize.Net, and Stripe.

Code shop

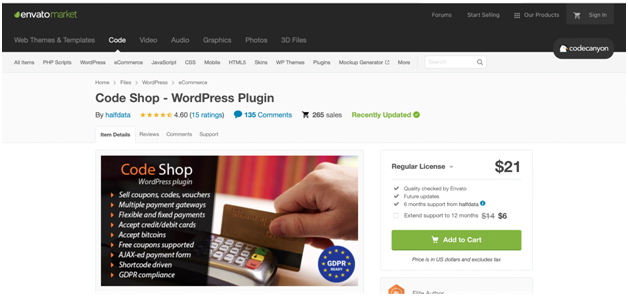
It allows unlimited campaigns. You can convey coupons, vouchers, or permit codes by means of email. You can even convert it into numerous languages for reaching a worldwide audience. Hence, you can create more revenue.

10. Coupon Wheel For WooCommerce and WP

Coupon Wheel For WooCommerce and WP will take you back to your childhood. Do you remember spinning a fortune wheel to get your favorite toys and candies? With this WordPress coupon plugin, your clients will enjoy fortune with different limits.

The most outstanding aspect of this WooCommerce coupon plugin is the discount wheel. Hence, your clients can display the exit intent. This WordPress plugin is viable with iOS and Android devices.

You can try these and make your online business phoenix amazon your competitors.

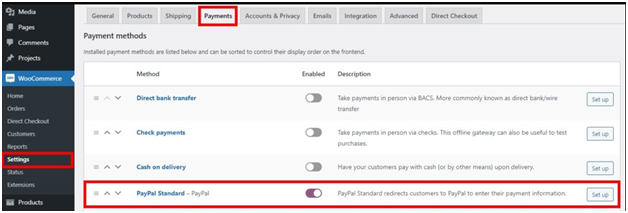
How to integrate WooCommerce with Coupon Plugins?

First, you need to “Enable coupons

For this visit “WooCommerce” and choose “Settings”.

Click “General” and tap “Enable coupons”. To do this, you need to choose the box “Enable the use of coupon codes” in your store.

Enable Settings

Next, we need to manage the General Settings

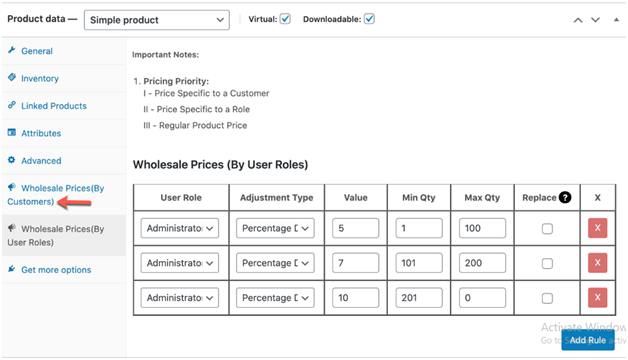
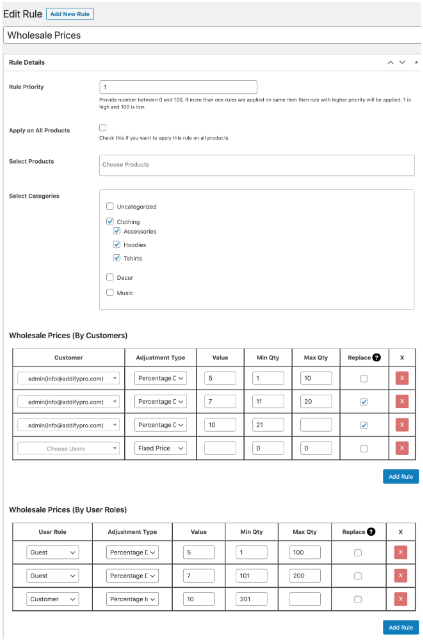
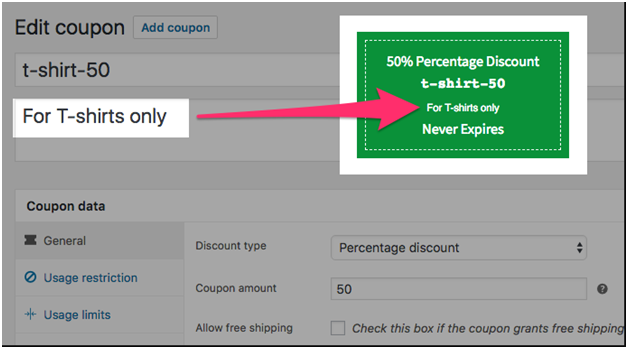
To do this go to “WooCommerce”. Then tap the button “Settings”. Click the tab “Smart Coupons”. You will see the settings of Smart Coupons as shown in the image below:-

Smart coupon seattings

Shop

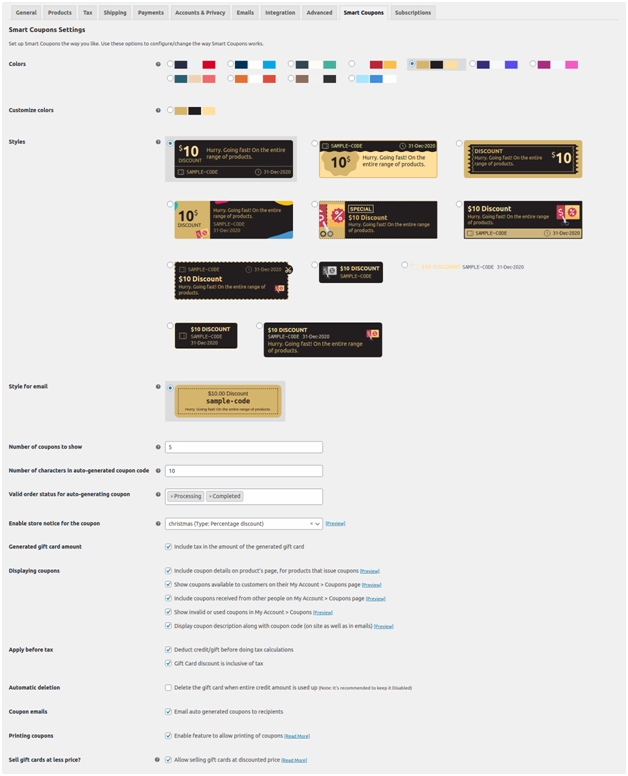
  • The generated amount for store credit: Enable/ check “Include tax in the amount of the generated store credit”. If it is unchecked/ disabled then the credited amount will be less than the amount paid by the client.

● Display Coupons: This is a section where you can do the settings related to displaying coupons.
● You can include the details related to the coupons on your product page.

Woo logo

You can display the coupons available to your shoppers on their accounts. For this click “My Account” and tap “Coupons page”.

Coupons

You can even list the coupons listed by other people. To do this, click “ My Account”. Next, you need to tap “Coupons page”.

Coupons Received

You can display the used or invalid coupons. Tap “My Account” and click “Coupons”.

invalid coupons

You can also display the description of coupons along with the coupon code.

Edit coupon

In conclusion!!

It is just a common misconception that coupons are used by shoppers who look for bargains. But in a real-time scenario, it is highly appreciated by all types of customers.

Consider checking the following stats if you have doubts regarding this:-

  1. 96% of shoppers will love to use coupons if they already have one.
  2. 49% of users look to shop at discounted rates.
  3. 79% of millennials and Gen Zers check for discounted programs or loyalty from their favorite brands.

With pandemics on the rise, shoppers look for ways to purchase online. Shoppers are struggling hard with the economy. Hence, as the business owner, it is vital for you to consider the strategies. Employing coupons for your eCommerce store is one of the best strategies that you must take for your business. This will assist you to earn long-term acquisition of customers, loyalty, and satisfaction.

Planning to implement WooCommerce Coupon Plugins for your WordPress site, hire WP Customify. With us, you can get support services, configuration support, etc. We can help you streamline and design your WordPress upkeep and site maintenance. Hence you can pay special attention to boosting the conversion and driving traffic. Contact us today!!